Using Google Docs gives you full confidence that you always have the current version. I use Google Docs on my phone, my laptop, my desktop, and sometimes even someone else’s computer. I never ever have to say “oh, that is on my other device.” or “I forgot to save that.” THERE IS NO SAVE BUTTON! Google Docs saves automatically. I can get up from my laptop and walk out the door and continue to work on my document from my phone. Better yet, Google Docs is collaborative!! You can edit and work on a document at the same time. This is a game changer for teaching because you do not have to wait until the student submits their work to provide feedback.
1. Google Drive
Start with Google Drive. All of your Google Docs save to Google Drive. Even if you do not name the doc, it still saves to Google Drive. Start with Google Docs by going to Google Drive and clicking on the NEW button and selecting Google Docs.
2. Name the Doc
The default for a new Google Doc is “Untitled Document.” You can see this in the upper left corner of the Google Doc. Click on where it says “Untitled Document” to rename it.
Want More Help with This? Become a Premium Member
3. Voice Typing
Obviously you can type words on your Google Doc. However, the voice typing in Google Docs is AMAZING!! Locate the Tools menu at the top and select “Voice typing.”
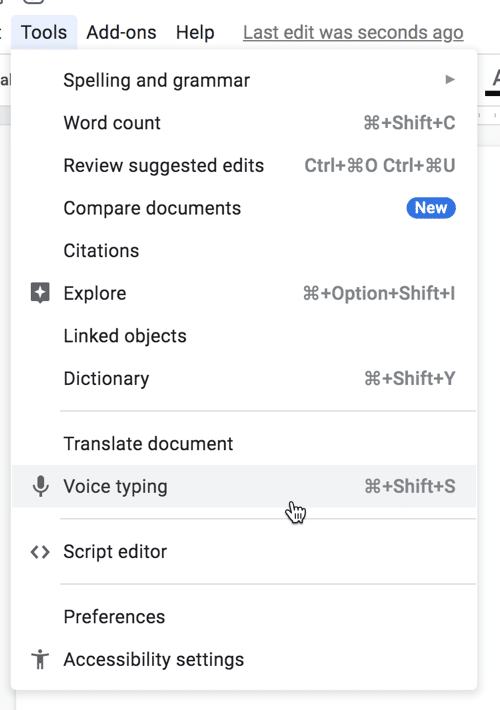
You can also say your punctuation such as “period” and “exclamation mark” and “new line.”
4. Share the Document
No need to save, your document is automatically saving to Google Drive. Invite someone else to view or edit your document. I oftentimes will share the document BEFORE I have finished to allow others to help me with input on the document. Look in the upper right corner for the blue Share button. Notice the padlock on the button. This tells you that the document is private to only you. Even if someone has the link to your document they will not be able to see it.

A pop up box will allow you to share the document with someone. Enter their email.
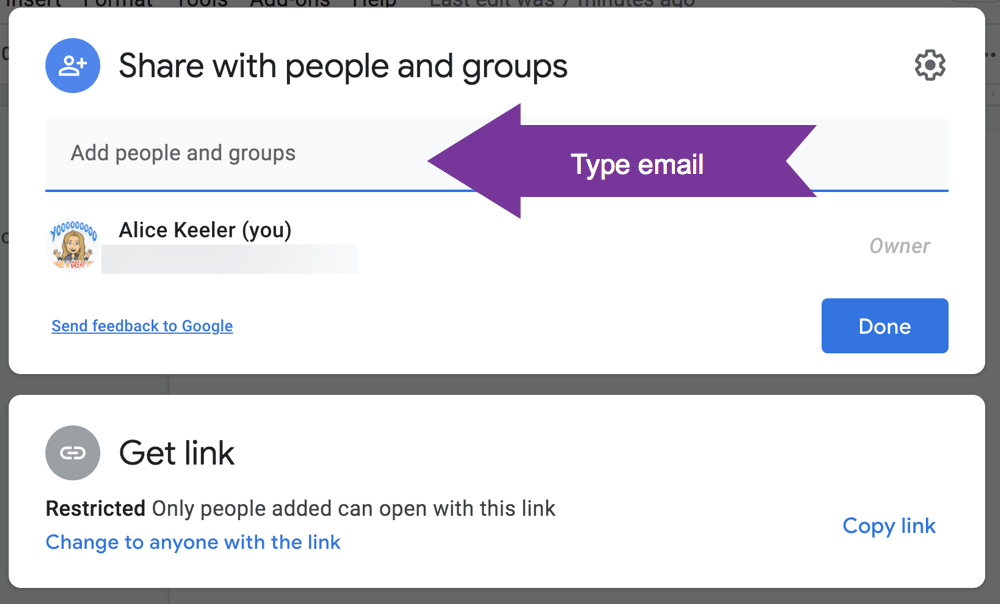
The default when you type the email address is to allow this person to be an EDITOR. This means they can make changes to the document. Google Docs allows you to give collaborators view only access or comment only access if you prefer. Use the tiny arrow next to the “Editor” access to change the access.

After sharing a document with someone they can find it in their Google Drive under the “Shared with me” filter.
5. Leave Comments
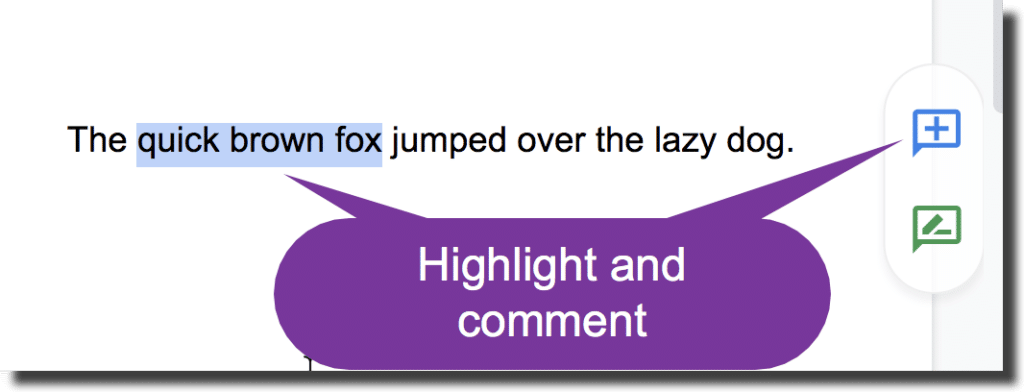
Provide feedback or leave notes to yourself to come back to a part of the document. Highlight the portion of the text that you want to make a comment on. Notice on the right edge of the document an icon shows a blue icon with a plus sign to add a comment.
6. Find Comments
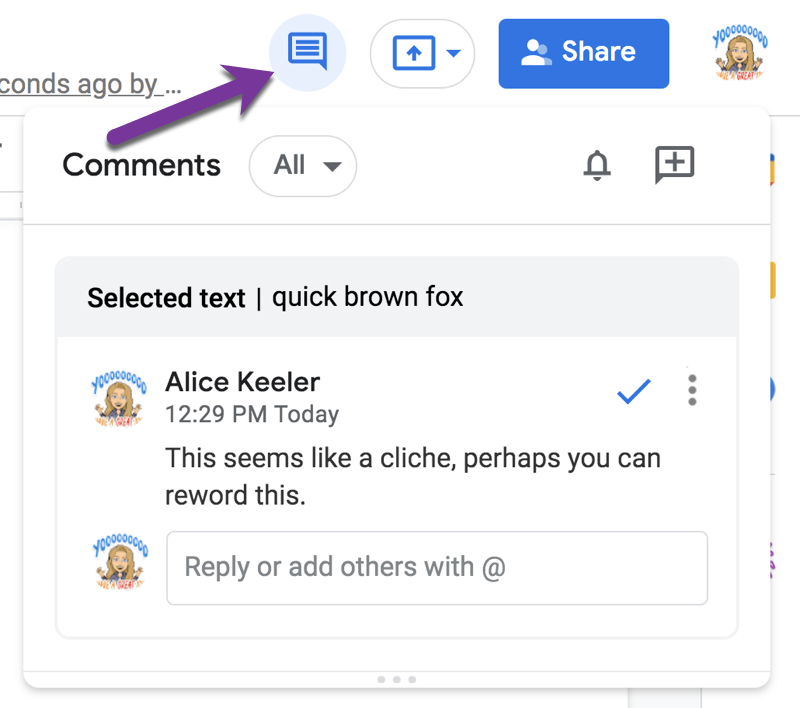
A comment appears as a bubble beside the document. Particularly on long documents it can be challenging to know what comments were left by others since the last time you looked at the document. In the upper right of the document are several icons. One appears to be a speech bubble. Click on this to expand out the comment history.
7. Suggestion Mode
A paradigm shift to using Google Docs is the sharing of documents to allow for co-editing. If you are not the owner of the document you may want to consider suggesting edits rather than editing directly. This allows the document owner to clearly know what additions you made to the document. The owner can also choose to accept or reject the edits. In the edge of the toolbar shows a pencil icon to indicate “Editing mode.” Use the tiny triangle next to the pencil to switch to “Suggesting mode.”
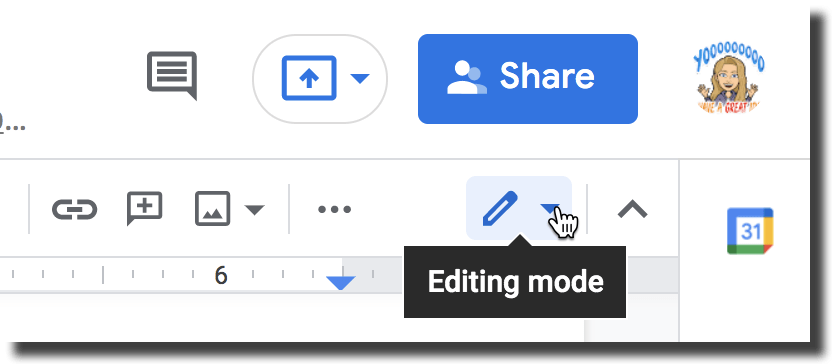
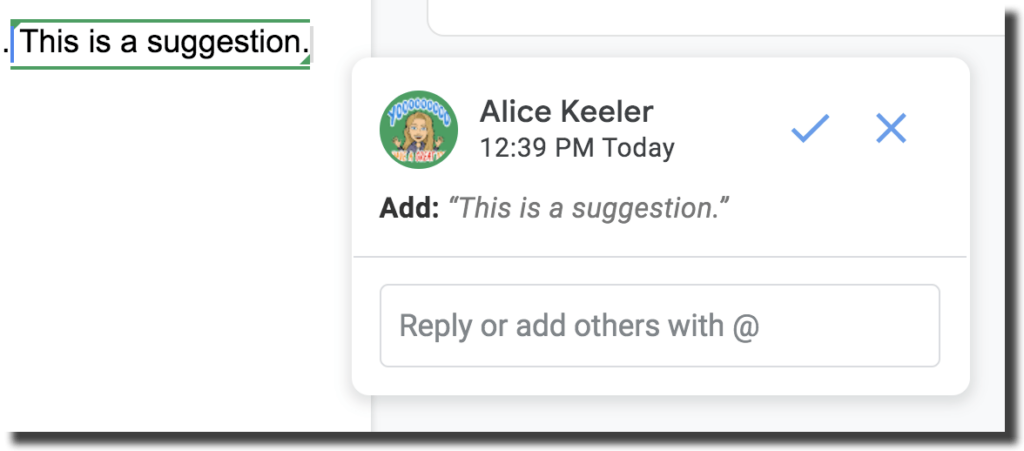
This will put all of your text you type, while in suggesting mode, in a different color and create a comment bubble to allow collaborators to accept or reject the suggestion.
8. Use Headings
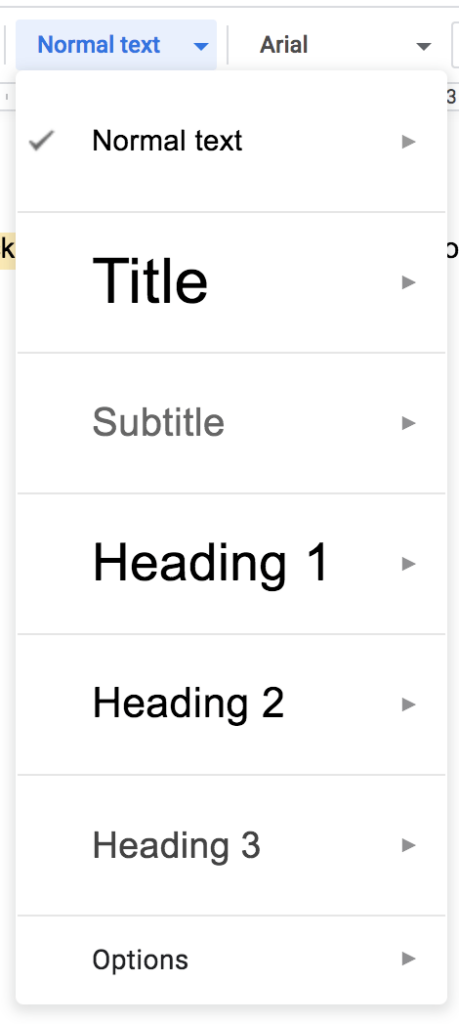
Google will automatically create an outline (table of contents so to speak) of your document. However, you will want to use the Headings feature in Docs. Additionally, headings make a document more accessible and for this reason alone should be used. Notice in the toolbar that it says “Normal text.” Click on the tiny arrow to show the drop down menu of “Title”, “Subtitle”, “Heading 1”, “Heading 2”, etc… Use these often!
9. Document Outline
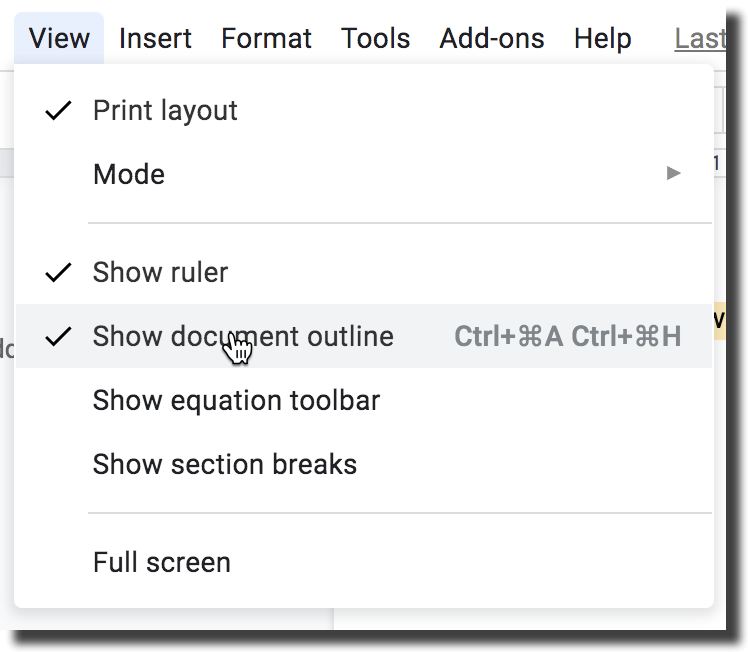
You can find the document outline to the left side of the Google Doc. If it is not showing, go to the View menu and select “Show document outline.” This is very helpful for navigating longer documents.
10. Version History
Version history might be the best part of Google Docs. At least in the top 10 🙂 Gone are the days of saving a version just in case something happens. As you make edits to a Google Doc it automatically is saving versions. Use the File menu and choose “Version history” to show the list of edits made to the document.

The right sidebar of Version history shows edits by timestamp. Click on the tiny triangle next to a timestamp to reveal additional versions and edits.
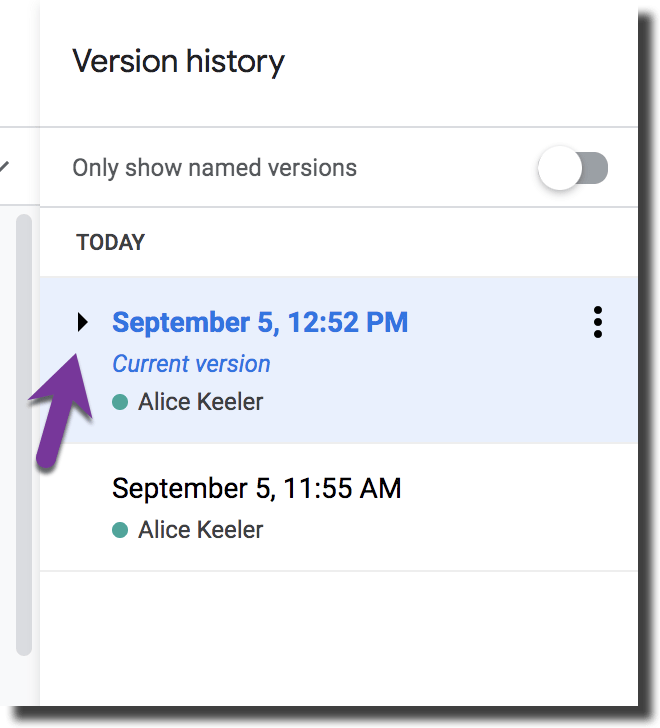
Click on the timestamp to name a version to make it easier to look back at a document for a certain point in time. Click on a version and click “Restore this version” from the upper left corner. This helps make collaboration risk free. If someone deletes or edits the document in a way that you did not like, simply use the Version history to restore it back the way you wanted it.


