


My standard rule in my class is to “take a screenshot and submit to Google Classroom.” This lets me know what the student was working on and if I need to provide any support I have screenshots I can use to give advice or go over it with a student. Students can add up to 20 attachments to a Google Classroom assignment. If they need more than that they can add the screenshots to a Google Slides. Here is how to take a partial screenshot on a Chromebook.
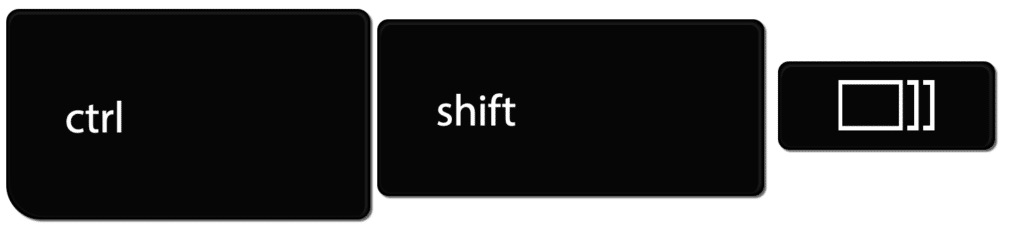
Control Shift Windows Switcher Key
Download this image to add to your Google Classroom Assignment
Control Windows Switcher key takes a full screenshot. The addition of holding down shift on the Chromebook takes a partial screenshot.
Want More Help with This? Become a Premium Member
Saves to Chromebook
The screenshots save to the Chromebook Downloads folder. Students can locate them by going to the circle in the bottom left corner and searching for “Files.” A folder icon for the Files will result. I recommend pinning the Files to the Chrome shelf.
It is possible to change the Chromebook to automatically save the screenshots to Google Drive. I recommend this since education accounts have unlimited storage in Google Drive.
How to screenshot on a Chromebook
Control Windows Switcher Key takes the screenshot. The shift key allows to select a partial screenshot. Either way, be fast! When the pop up comes in the bottom right corner select to “Copy” the screenshot to the clipboard to make it easy to drop into Google Slides.


