Bullet points, numbering, and checkboxes in Google Docs might appear straightforward, but there’s a world of tricks and techniques to master them effectively. Often overlooked, these simple tools are crucial for organizing and presenting information clearly. As we dive deeper, we’ll uncover how to elevate the use of bullets and numbering in Google Docs, transforming basic lists into powerful components of your document. Whether you’re drafting lesson plans or compiling notes, these tips will enhance your ability to communicate and engage with your audience.
Table of Contents
Bullet Points and Numbering in Google Docs
Use the toolbar in Google Docs to enable bullet points in Google Docs. Tap the icon to start a bulleted list.
This creates as simple bullet list. However, you can take this further with different bullet styles, indentations, and more.

Indenting Bullet Points
Creating multilevel bullets and numbering in Google Docs is an important skill. Indent to create sub points.

Use the Tab Key
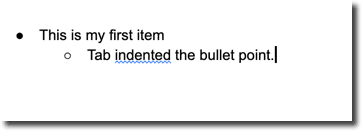
Indent a list item by using the Tab key on your keyboard. Pressing enter will create a new list item that is also indented.
Notice after pressing Enter I used the Tab key to indent and then after pressing Enter again further indented and kept the layering going by using the Tab key.


Use Shift Tab
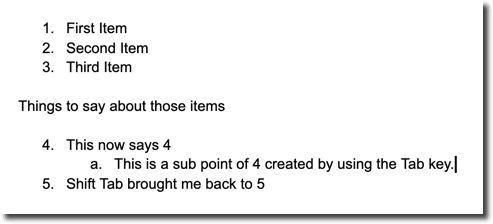
To move the bullets and numbering in Google Docs to the left a level use the Shift key. Holding down the Shift key and pressing Tab moves the indentation to the left.
Changing the Bullet Style
Mix up the style of the bullets by locating the tiny triangle next to the bulleting icon in the toolbar.
Right Click for More Options
This is a bit tricky. Right click on the bullets in the document. Right clicking on the text will provide text options. To gain options for the bullet points be sure to have your cursor on the bullet itself.


Try one of the pre-set options for bullets or customize your own.
How to Use Emoji's for Bullet Points
Customize your bullet points with emoji’s. Select “More bullets” in the right click menu.
An “Insert special characters” pop up will appear. Choose from a variety of options for bullet points.
Change the category to “Emoji” to find emoji options.

The Magic of Checklists
A new feature to the options of bullets and numbering in Google Docs is checklists. Understanding that you might not be printing the Google Doc, an image of a box is insufficient. You want to be able to actually check off list items. Use the checklist icon in the toolbar for this magical option.


There are 2 types of checklists. Both let you check off dynamically in the Google Doc. The first option crosses out the list item when checked.
Use the tab key to indent the checkboxes.
Numbering in Google Docs
Similar to Bullet Points, number your list items in a Google Doc by selecting the icon in the toolbar. Pressing enter will automatically generate a list item with the next sequential number. Use Shift Tab to indent the numbered list.
Continue Numbering
When using numbering Tab and Shift Tab also work. However, when I am numbering items I sometimes want to break up the list to say things between the numbering. For example in my book Stepping Up to Google Classroom I have listed 50 ways to start using Google Classroom. I need each of the 50 things numbered but I want to write a paragraph, include a picture, and give a tip for each one.

Pressing Enter twice exits the numbering and allows me to return to regular paragraph writing. However, when I click the numbering icon again it starts over again at one.
Right Click
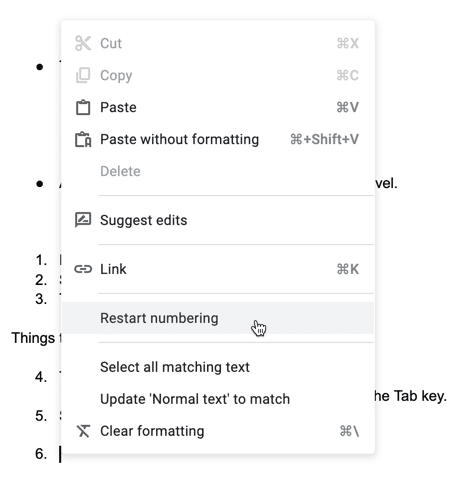
Right click in the new numbering list. This will provide several options for your text, including “Continue previous numbering.”

Restart Numbering
What if you want to set the number to be something specific? On right click choose “Restart numbering.”

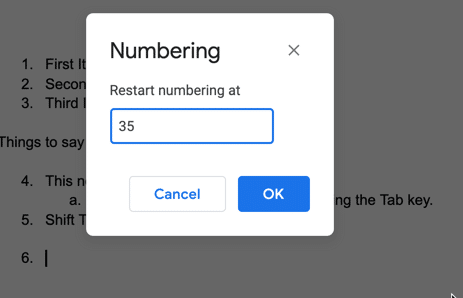
Choose the Number
Choosing “Restart numbering” allows you to choose what number you want to restart at. It does not have to restart at 1!


