5 Things About Google Slides You Did Not Know
This is a little cheating as some of these features are new so you could not have known!! Google Slides is one of my favorites. I use it to have students GIVE ME information rather than get information. Truly transformative for teaching.
1. Insert Video from Google Drive
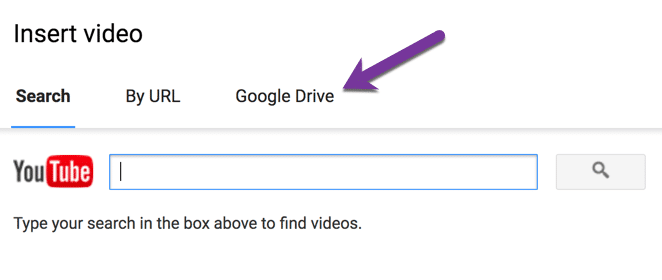
When inserting video you are no longer restricted to YouTube videos. This is great news since YouTube is blocked in so many schools. Choose the 3rd option of “Google Drive” when using the Insert menu to insert video.
Sharing Settings
You want to make sure your videos are not private. It is not an issue if the videos are for you and you are the one presenting the slides. However, if you share the slides, the viewer will not be able to see the video if the video in Drive is private. Suggestion to create a video folder in Google Drive and change the sharing permissions to “Anyone with the link can view.”
Snagit
One of my favorite favorite things is Snagit. It allows me to take screenshots, make video and magically create GIF’s. One option is to save directly to Google Drive. You can now take your screen recordings and drop them into Google Drive.
Screencastify
Use the Chrome extension Screencastify (pay for the upgrade, you want all the features) to make screen recording videos (that include your face and allow you to annotate while you record). You can choose to default your videos to save to Google Drive. Easy Peasy! You can drop these screen recordings into Google Slides!
2. Slash Create
You can create Google Slides many ways. Traditionally you go to drive.google.com and use the NEW button to create new Slides. You can also create them from the App on your phone. Going to slides.google.com was one of my favorite tricks because it was so attractively designed and gives me access to templates.
If you throw /create to the end of slides.google.com it will automatically just create a blank Google Slides on the spot. Hands down the fastest way to create Google Slides!
3. Voice Type Speaker Notes
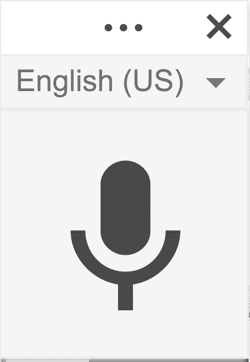
Hat tip to Christine Pinto for discovering this one! You can now do voice typing in the speaker notes of Google Slides. Super helpful as you should not have your presentation in text on your slides. I try to have zero words on a slide and let images tell my story. I put what I want to say into the speaker notes. Find “Voice type speaker notes…” under the Tools menu.
One of the 4 C’s is for students to “Clearly Communicate Their Ideas.” [tweet]How can students clearly communicate their ideas with only images?[/tweet] This increases the creativity and critical thinking too! Students can speak their ideas into the speaker notes, but really have to know their stuff when they present the slides with no words (or maybe up to 5) on the slide.
4. Q&A History
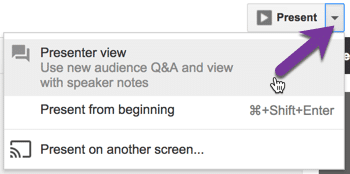
Google was built on collaboration. A culture shift to “we do things together.” Using the Q&A feature in Google Slides, audience members can actively participate by asking questions via a link that is automagically created. As the presenter, you can push out the questions to the presentation to allow audience members to guide the presentation or to just answer questions at the end (guess which one I prefer).
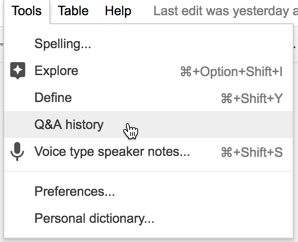
When I present I can not always get to all the questions. Even if I can I would sometimes like to revisit the questions. Under the Tools menu is “Q&A history.”
5. Autoplay Video
YOU CAN NOW USE VIDEO IN GOOGLE SLIDES WITH A CLICKER! (I am a tiny bit excited!) It used to be you had to click on the video to play it and then click off the video to continue the Slides presentation. A major hindrance when you were giving a presentation with a clicker and extended desktop. NO MORE!
When inserting a video into Google Slides you can now choose “Video options.” You can find this under the Format menu, in the toolbar or by right clicking on the video. This opens a side panel with the option to “Autoplay when presenting.” You can also choose a start and end time for the video which is so necessary. I usually only want to share a couple of SECONDS of a video in a presentation.








4 thoughts on “5 Things About Google Slides You Did Not Know”
Great stuff! Did not know about slash-create.
I think the best way to create a new Slide (or Doc, Spreadsheet, etc) is to use the Google Docs Quick Create Chrome extension. It’s the best.
Alice, I love these very useful ideas. Thanks for sharing. I love the one price for Snagit. I’ve been using screen-cast-o-matic and this looks better.
i needed this