Since writing my book on Stepping Up to Google Classroom a lot has changed! What has not changed is that the first step in setting up Google Classroom is to think about student engagement and how students will positively interact with their learning. Google Gemini (AI) is now built into Google Classroom, and that can help a lot of differentiating and just being more efficient. However, Gemini doesn’t teach but it can make a great teaching assistant. Here are some steps for setting up your Google Classroom.
Step 1: Setting Up Google Classroom
Your first move is to log into Google Classroom. Be sure to indicate that you are a TEACHER when you get started.
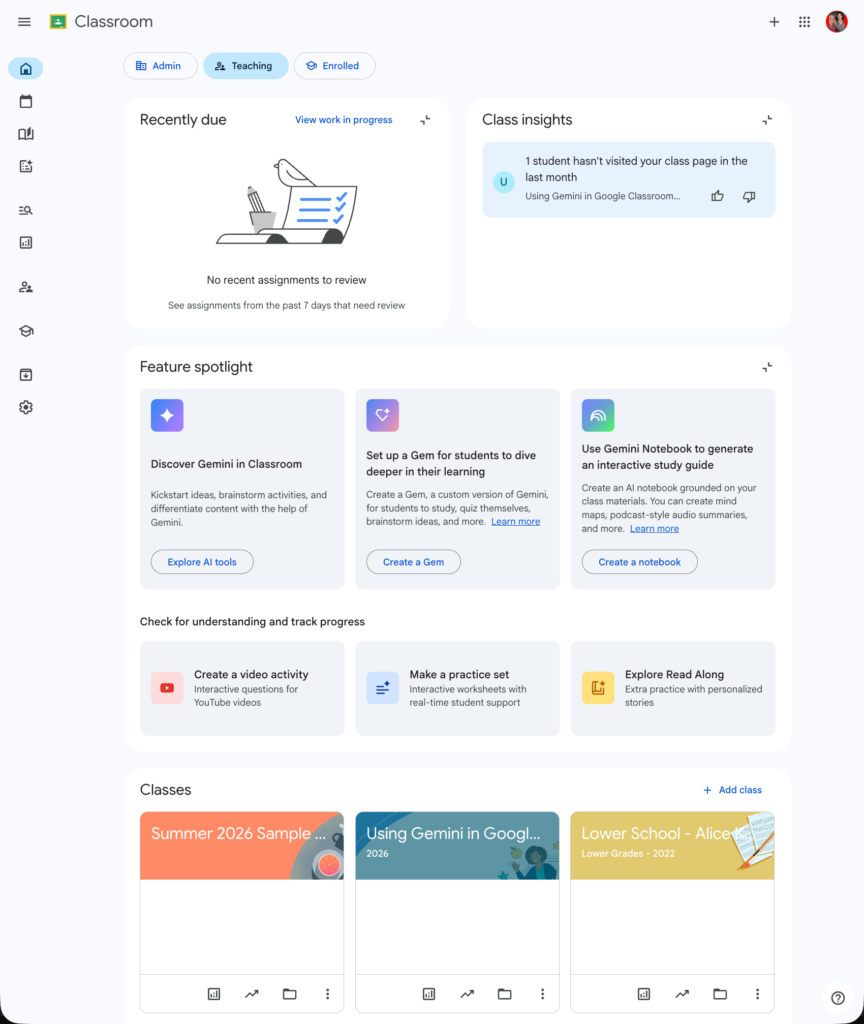
If you’ve used Google Classroom before you will notice there is a new homepage. At the top you can toggle Admin, Teaching, or Enrolled. The Teaching option shows the classes you are teaching. Scroll below the dashboard to find your classes, or expand the sidebar on the left to see a list of your classes.
Create a New Class
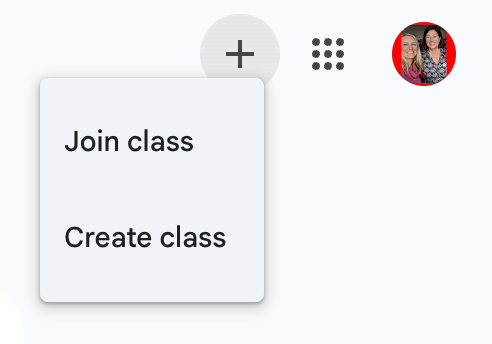
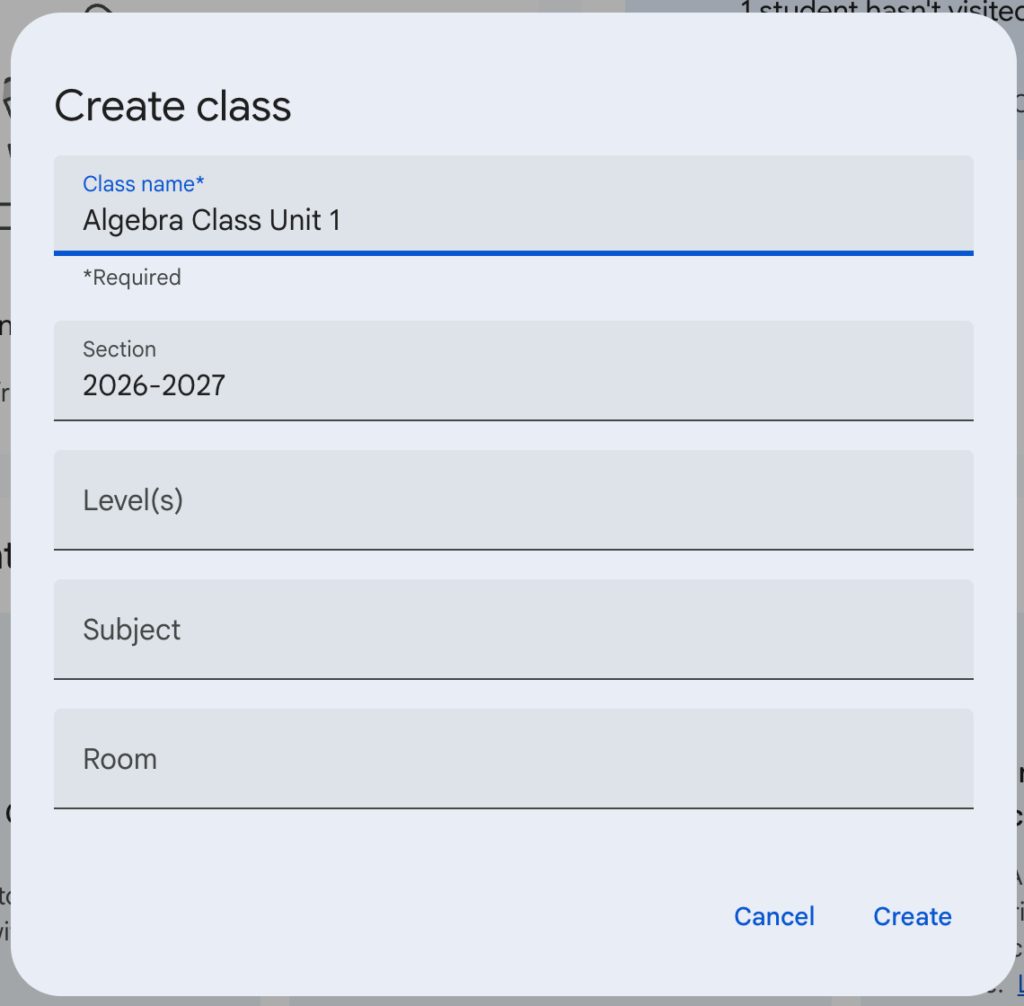
In the upper right of the Google Classroom home page is a small plus icon to choose “Create class.”
Personally, I choose to create a new class per unit or grading period, this makes it a lot easier to reuse assignments and also gives you more options to organize your class.
I also personally choose to put all my students (secondary math) into ONE Google Classroom. All my Algebra students in one class, all my Geometry students in another class
Whether you make a classroom per class period or one for everyone, there are plusses and minuses for both systems.
Name your class something meaningful such as “Algebra Unit 1”
Tip: Put the school year in the Section box.
The other sections are optional and I almost always leave them blank.
Tweak Your Settings Cog Immediately
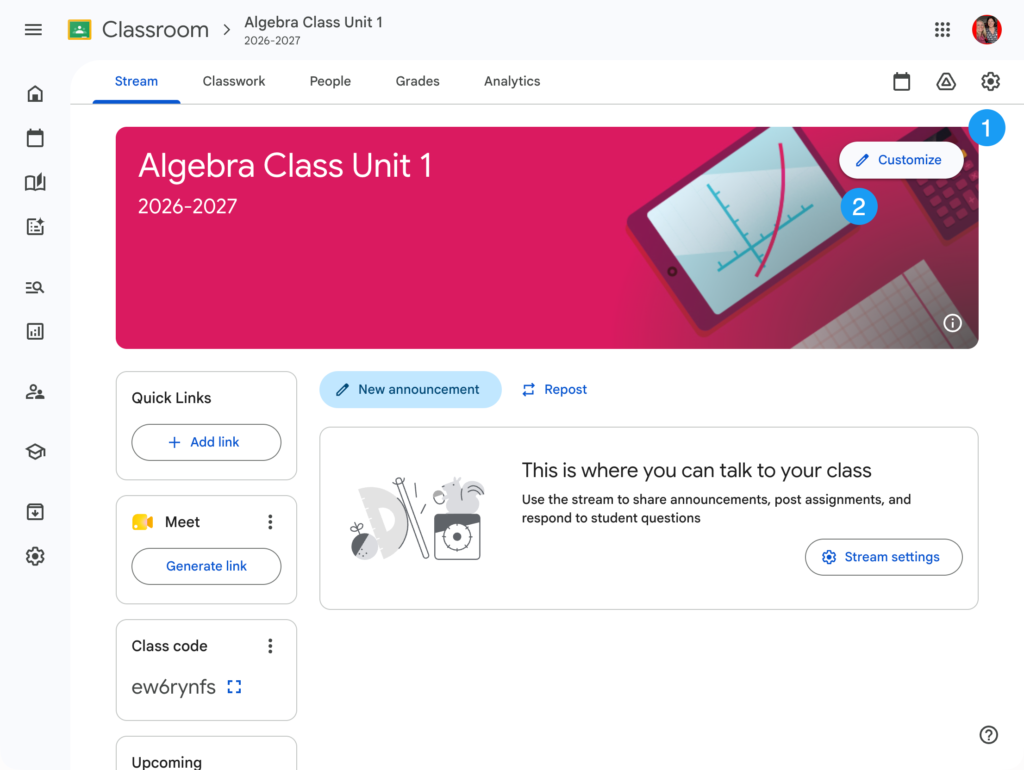
When you open your Google Classroom class you are immediately taken to the Stream. This is your class announcements page. The Stream is NOT where you post assignments.
Your first move is to head to the Settings cog and set up your Classroom settings.
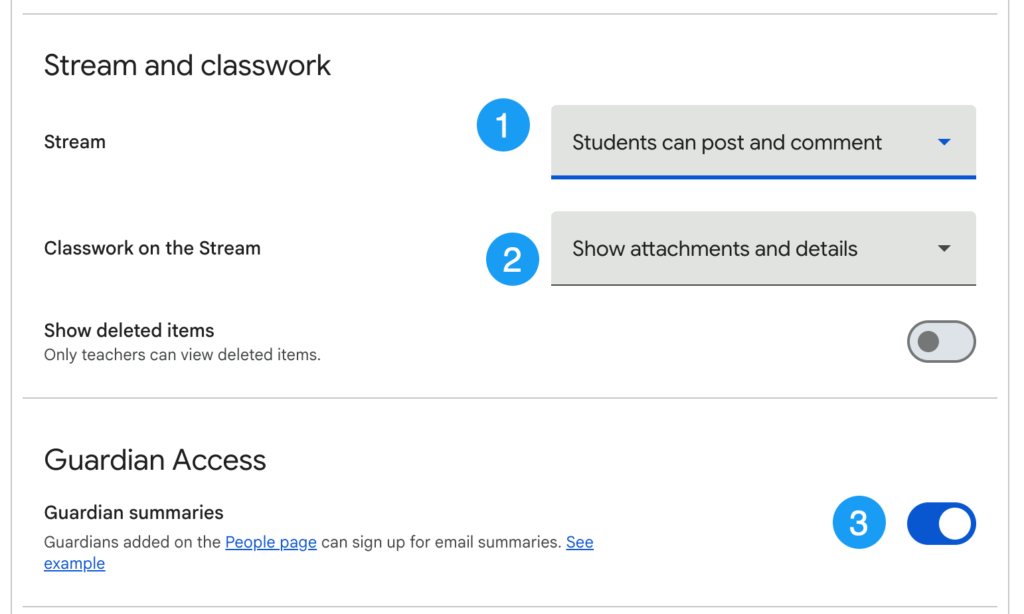
This is controversial, but I allow my students to post and comment on the Stream to allow them to ask questions to the class. Just like we have to teach students to act respectfully in the library, we also have to TEACH them how to act respectfully in digital spaces. Turning off the ability to comment to me is like saying “they don’t know how to act in the library so we don’t go to the library.” WHEN students put silly things like “What up bro” in the Stream, we have a conversation about shared spaces and what is and isn’t appropriate. And it’s not a one time conversation.
Stream Settings
I set the Stream to be “Students can post and comment.”
I set Classwork on the Stream to “Show attachments and details.”
I’m not a personal fan of how the Guardian Summaries display to parents so I personally choose to turn OFF and to create a newsletter for parents.
Set Up Grading
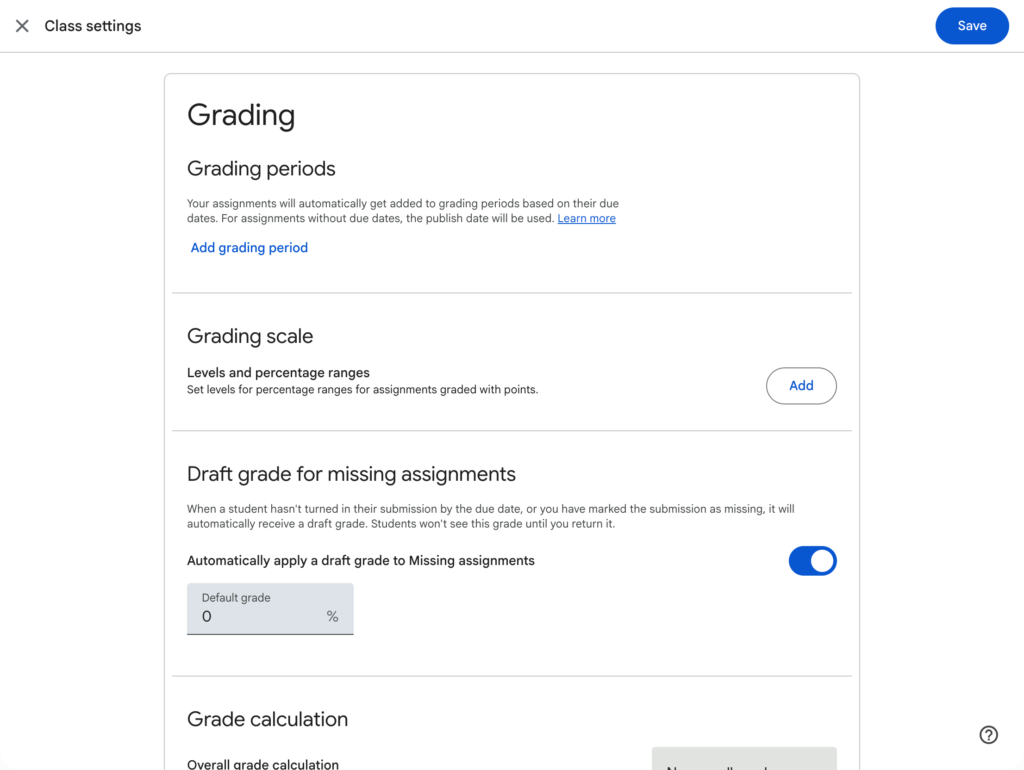
I personally do not display calculated grades in Google Classroom, that is for my PowerSchool or whatever gradebook the district requires me to use.
You can apply a draft grade if you want for missing assignments. So if an assignment is unsubmitted past the due date, would they automatically get a 0 or a 50%?
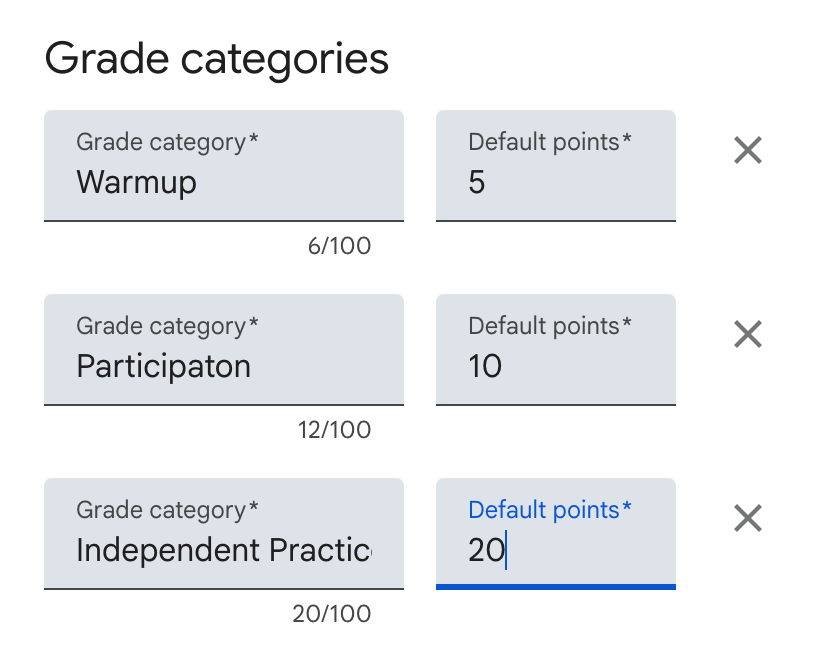
Grade Categories
Your district gradebook has your traditional grade categories such as Quiz, Classwork, Test… you can mirror these or be more creative. I have used ⭐️’s to indicate level of difficulty or I put DOK levels or some other system to label the assignments.
The Action is on the Classwork Tab
Assignments are listed and organized on the Classwork page.
Tip: Bookmark the Classwork tab to make it fast to get back.
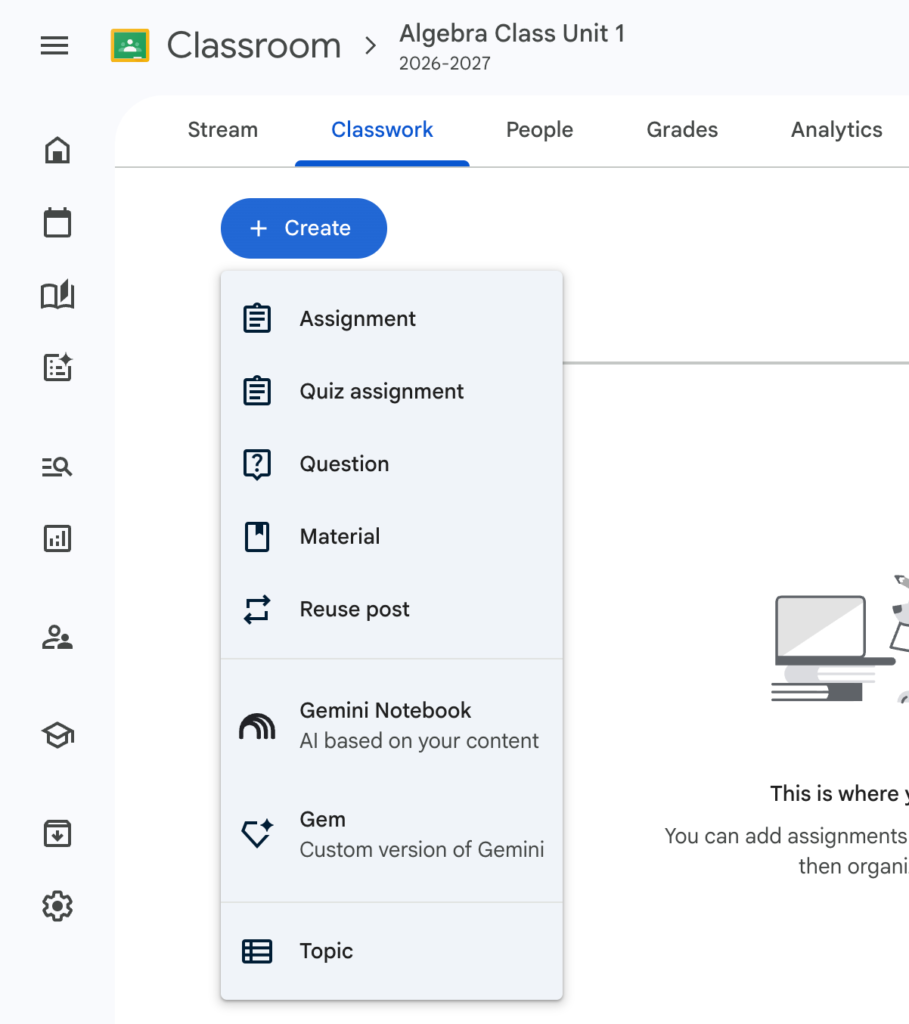
Create Topics
On the Classwork tab is the “Create” button. The last option on the dropdown is “Topic.”
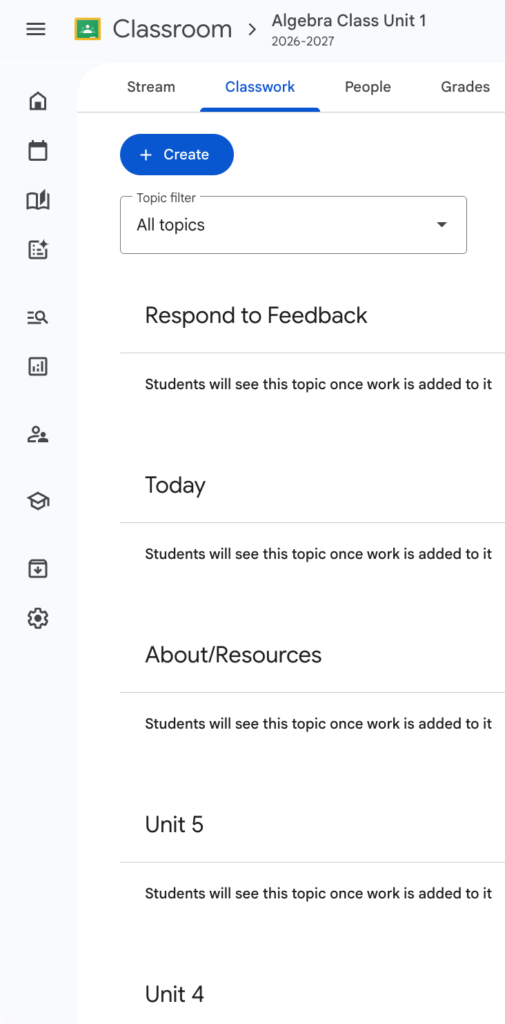
Empty topics are INVISIBLE to students. This allows you to set up your structure without overwhelming students.
Respond to Feedback Topic
For feedback to be effective, it needs to be actionable (Hattie). When I leave students comments in Google Classroom I want to make sure they see it. I have a topic at the top that says “Respond to feedback” where I drag assignments after I give feedback.
Create a Today Topic
“What are we doing today?” … It’s organized under “Today” which is at the top.
You can easily drag assignments around to organize them into other topics when it is not what you’re working on “Today.”
About/Resources
I create a topic that has the standards, websites we use, and other things that contain class materials, but not assignments.
Units in Reverse Order
Personally, I make a new Google Classroom per unit. If you choose to use one Classroom all semester, create your topics in REVERSE ORDER. You want the most recent unit at the top. Unit 1 should be at the bottom.
Remember, topics with unpublished assignments are invisible. So students will not see Unit 8 when you’re teaching Unit 1.
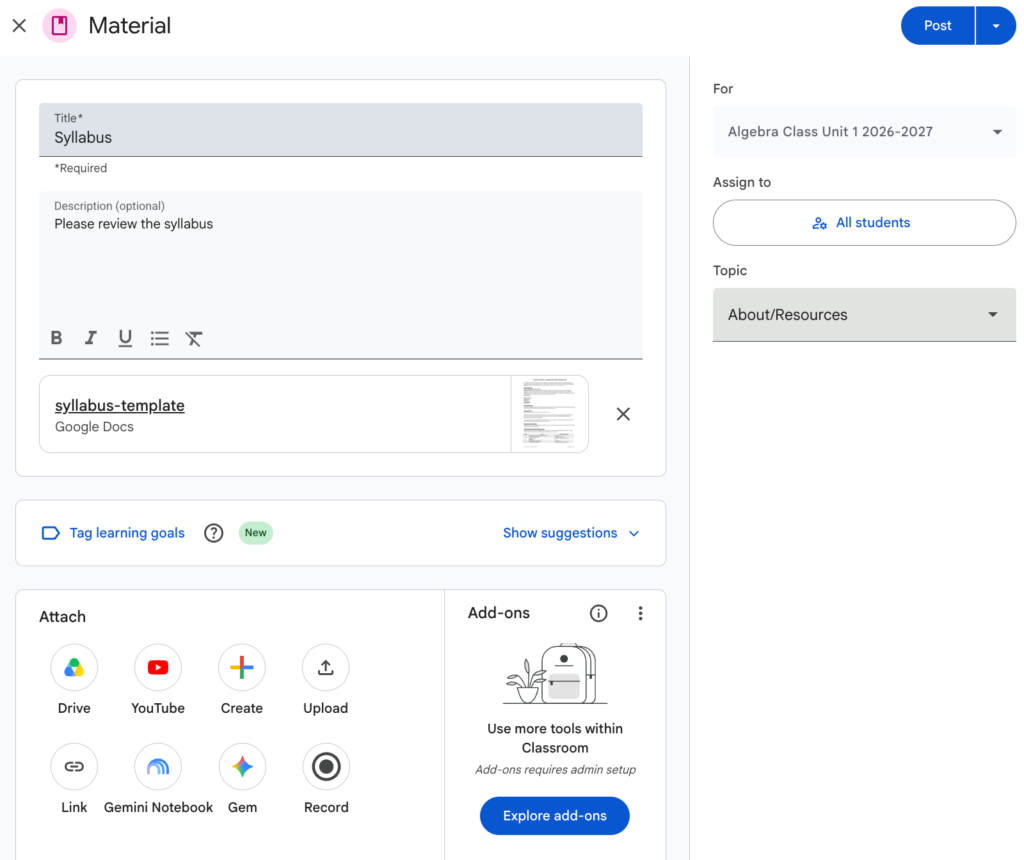
Create Materials
Before creating assignments with the Create button, add some materials. Materials are not graded.
Title the resource
Select the topic
Attach from Google Drive (or upload)
Post
Save as Draft
Note that you can add materials, or assignments, as a draft. Use the arrow on the Post button to select “Draft.”
Number Your Assignments
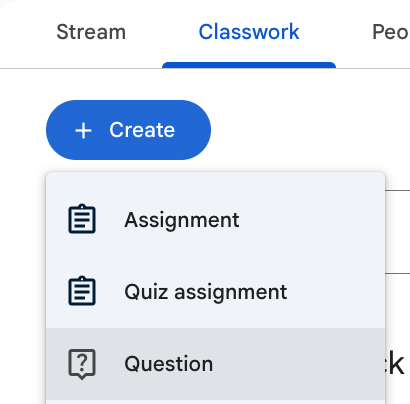
Use the Create button to make your first assignment.
My best tip is to number your assignments with a hashtag and a 3 digit number. #001, #002, etc…
Try starting with a Question assignment to engage students in your digital classroom.
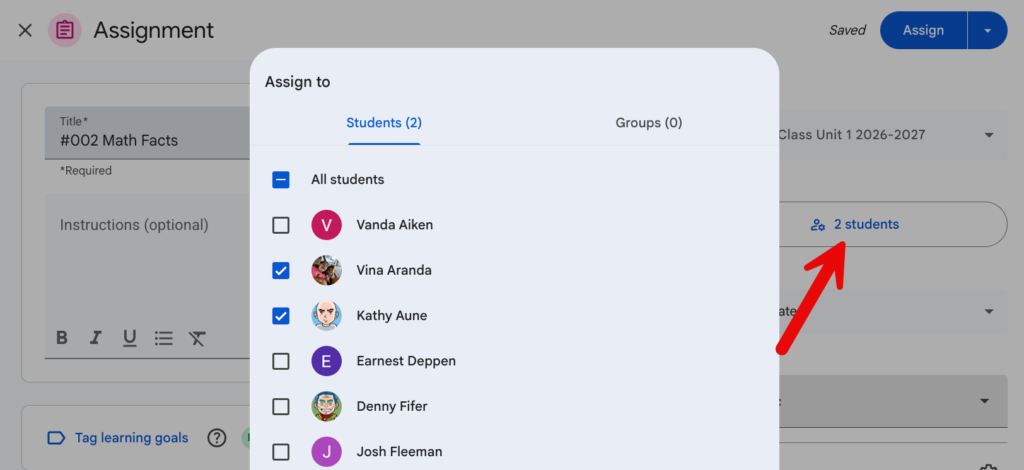
Assign to Some
One way that using Google Classroom improves learning is the ability to differentiate. You do not have to assign all students the same assignment.
Click on the “All students” button to select a subset of students.
Tip: A topic that has assignments for some students will be INVISIBLE to students who do not have assignments assigned in that topic.
Practical Checklist for Launch Day
Create your class with the school year in the title.
Adjust class settings: Reset the class code, leave student posting ON, and set Classwork on the Stream to Show attachments and details.
Create topics on the Classwork page (Respond to Feedback, Today, About/Resources, and Units).
Post a welcome announcement on the Stream directing students to click the Classwork tab.
Use the Gemini tab to draft an opening hook, build a custom rubric, or generate a visual aid for your first unit!
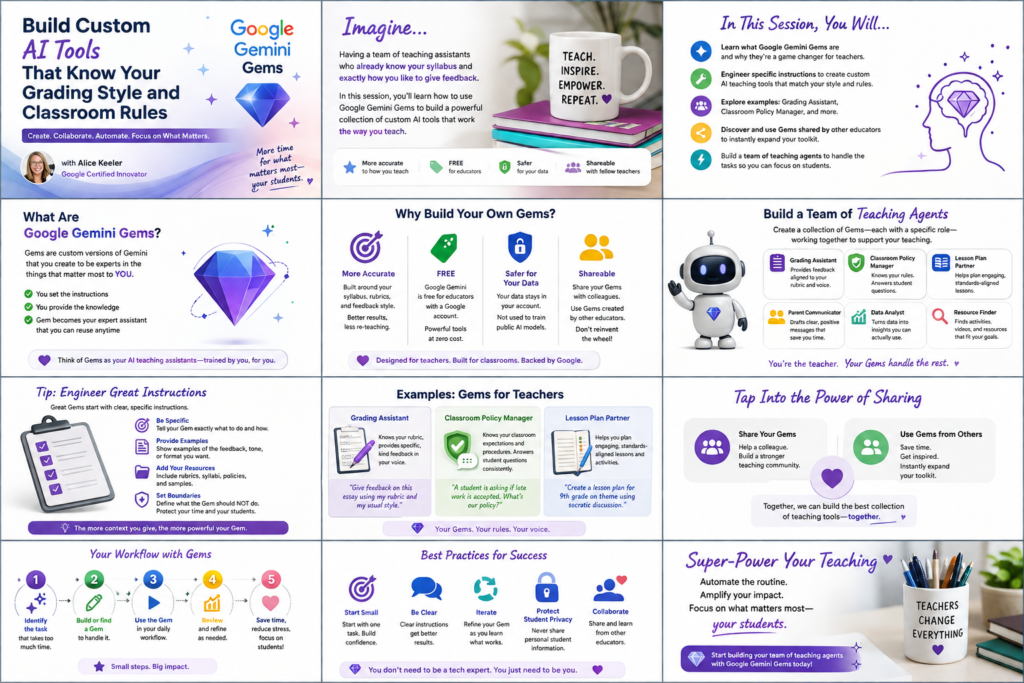
Join Alice Keeler for this session for teaching with AI
Imagine having a team of teaching assistants who already know your syllabus and exactly how you like to give feedback. Join Google Certified Innovator Alice Keeler to learn how to use Google Gems to build a powerful collection of custom AI tools. We will explore how to engineer specific instructions so you can create a Grading Assistant or a Classroom Policy Manager that works for you. You will also learn how to leverage Gems shared by other educators to instantly expand your toolkit. This session is about super-powering your teaching by automating the routine tasks so you can focus on the students.
Exit this pop up by pressing escape or clicking anywhere off the pop up.