


When students fill out a Google Form the responses go to the bottom. If you are using the same Google Form repeatedly this can make for a lot of scrolling.
Hide Rows
One trick I use for this is to hide the rows that I have looked at previously. For example: let’s say you want to hide rows 45 to 223. Click on the row indicator for row 45. Hold down the shift key and click on the row indicator for row 223. This will select all of the rows in between, inclusive. Right click on the row indicators to be able to choose “Hide rows 45 – 223.”
Sort Z to A
Hiding rows takes effort. If instead you would like to view the most recent form submission at the top try using the sort formula.
Create a New Sheet
While you can technically use this formula in the columns to the right of the Form responses, I would recommend you click on the plus icon in the bottom left and create a new sheet.
=Sort()
In cell A1 type the formula
=sort(‘Form Responses 1’!A1:C,1,false)
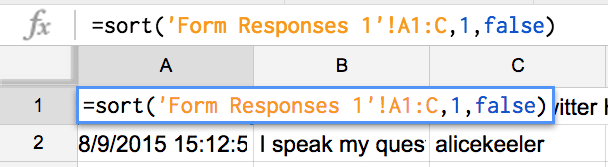
This will sort the form responses. My example uses a range of A1 to column C. If your form has more than 2 questions (plus the timestamp) you will need to edit the formula to include a wider range. For example =sort(‘Form Responses 1’!A1:H,1,false)
After the range, the 1 in the formula indicates to sort the first column. In this case, that is the timestamp.
The false tells the sort formula to sort in descending order instead of ascending order.
Freeze Bar
Google Forms automatically freeze the top row. You will need to manually set the freeze bars.


6 thoughts on “Google Forms: Sort Responses Backwards”
HI! Is this formula for the old google form or the new google form? I’m using the old one and when I type that formula into box A1 it comes up ERROR. I sure would love to be able to view my most recent responses at the top! 🙂
Formulas are for spreadsheets. Did you insert a NEW sheet?
Yes I clicked the “+” at the bottom of my response form to add a sheet. I then entered the formula into A1 and it said ERROR
Are you using quotations?
I wasn’t – but I just did……..and now nothing happens? Sorry! I guess you can tell I am technically challenged! This is what I am typing in box A1 now on a new sheet: “=sort(‘Form Responses 1’!A1:K,1,false)”
You should not have quotations around the formula.
You should try “Form Responses 1!A1:K” in quotations.