


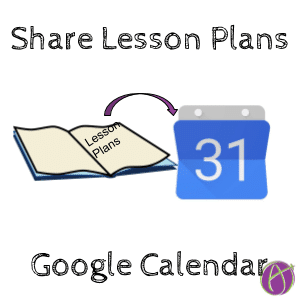
Share Your Lesson Plans Through Google Calendar
There are 3.6 million teachers in the US and we do not have a collective way to share our lesson plans. There is some awesome teacher in “Vermont” doing some cool things and we all have no idea about it. How do you follow day to day what a particular teacher is doing so you can “steal” those ideas for your class?
New Google Calendar is rolling out and making it easier than ever to share our lesson plans. Create a lesson plan calendar and share the link to the calendar to allow other teachers to follow you and what you do. Go digital with your lesson plan book and create your lesson plans in Google Calendar.
Google Calendar Lesson Plan Book
There are many advantages to using Google Calendar for your lesson planning book. It’s digital and accessible from pretty much every device. Review your lesson plans on your phone! You can COLLABORATE on a Google Calendar. If your department does the same lesson plans you can all use the same one. Adding documents and links to the calendar event allows all collaborators to access the files, easy to find the activities for the day!
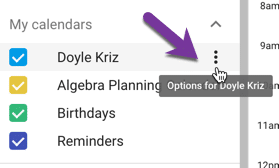
Share with Team Members
To collaborate on a Google Calendar, hover over the calendar name on the left hand side and click on the 3 dots.
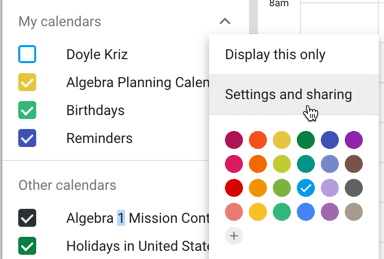
This will give you the option for Settings and sharing.
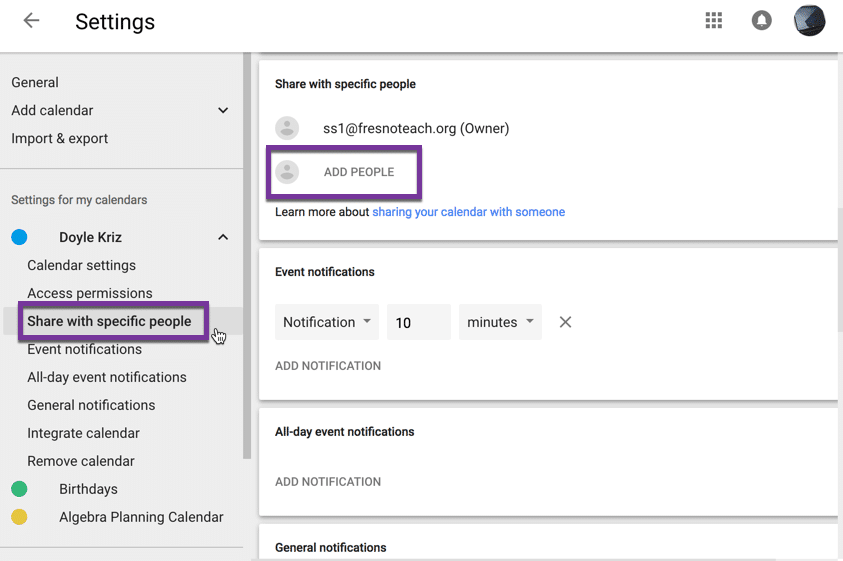
Locate “Share with specific people” and click to “Add people.” Type in their email address.
Share with Strangers
Sharing with grade level teams or subject area teams is great, but what if you want to share with strangers? Teaching is hard and if we can pull together to share our lesson plans we can all benefit. Create a publicly shareable link to give others view access to your lesson plan calendar.
Go to Settings
First, make sure you’re using new Google Calendar. The interface shows really big numbers for the dates. Find the settings cog in the upper right. Choose “Settings.”

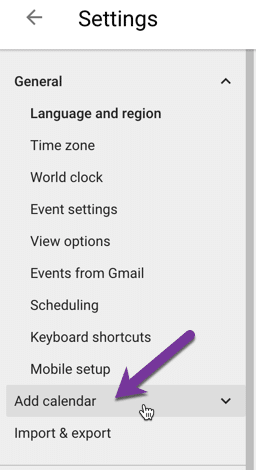
Add a Calendar
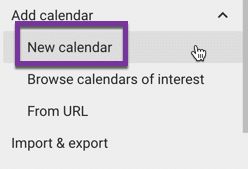
You are going to create a new calendar just for lesson plans. This is not the calendar automatically created by Google Classroom or your default calendar. Click on “Add calendar” in the menu on the left hand side.
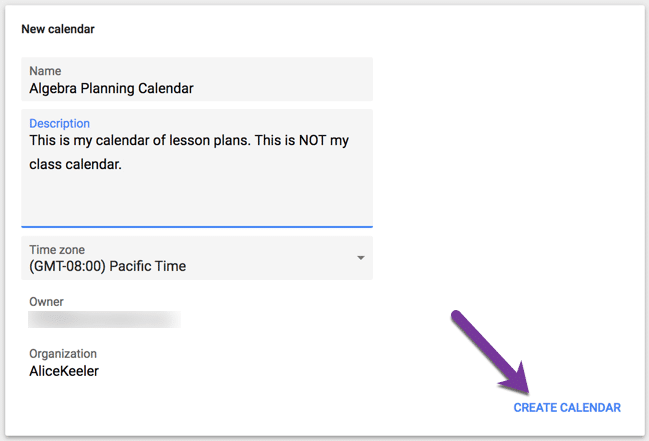
Create a Planning Calendar
Title your calendar to indicate it is a planning calendar, NOT your class calendar. The idea of this calendar is this is where you house your lesson plans. This makes it easier to share your lesson plans with anyone, including outside of your district.
Configure
This might be a little confusing, after selecting “Create calendar” what you just filled out goes blank. This is to allow you to make another calendar if you want. If you’re teaching multiple classes this could be helpful. But look at the bottom and notice a blag flag to indicate that your calendar was successfully created. Click on “Configure.”

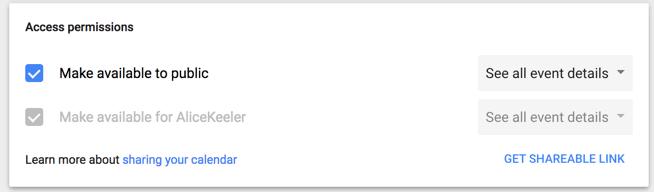
Access Permissions
Scroll down to the section on “Access permissions.” Check the checkbox to “Make available to public.”
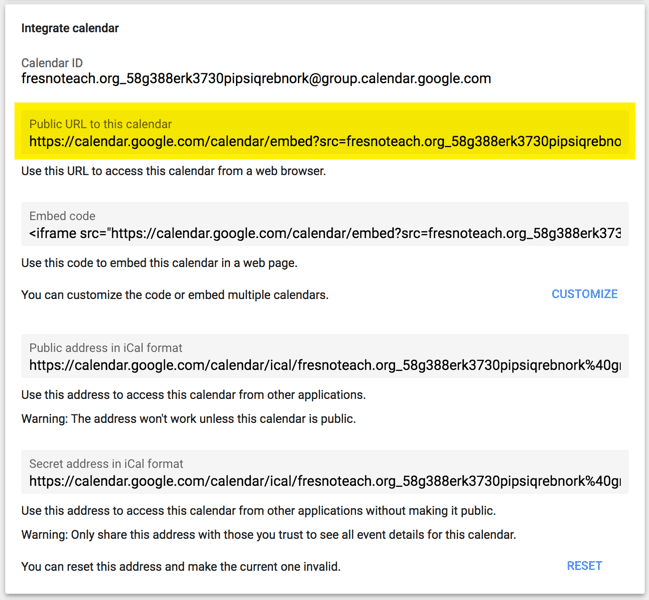
Integrate Calendar
Scroll down further to the section on “Integrate calendar.” Find the “Public URL to this calendar.” Copy this URL.
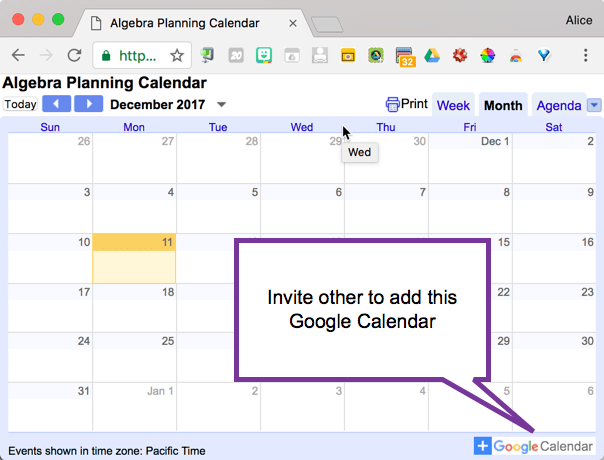
Share with Others
If you share that URL with others they are able to view your planning calendar. When they open the link, they should look for the +Google Calendar icon in the bottom right. Clicking on that will add your planning calendar (view only) to their Google Calendar.
Tip: Create a short URL out of the long calendar URL to make it easier to share the calendar link. You can use goo.gl, bit.ly, tinyurl.com or others. For example, https://tinyurl.com/samplealgebraplanningcal will take you to the sample planning calendar I created. Suggestion, add the link to your publicly viewable calendar to your signature line on your email.
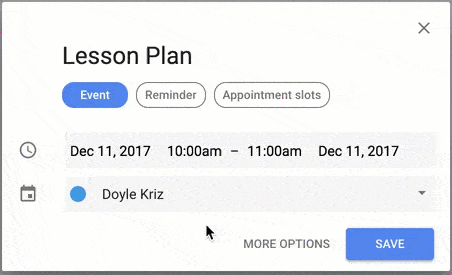
Add Events for Lesson Planning
On your calendar click to add an event. By default, the event will add to your default calendar NOT your planning calendar. Make sure your calendars are different colors to make it easier to see you have created the event on the wrong calendar. When creating the event change from the default calendar to your planning calendar.
If you made a mistake (ha, if… I mean when) it’s easy to fix. Double click on the event in the calendar and select the planning calendar.
Add Attachments
Create a Google Doc for the lesson plan. Also, create any additional assets such as Google Slides that the lesson may use. While editing the calendar event for your lesson plan, click on the paperclip icon to add your Google Doc lesson plan and any other resources. This will allow viewers of your lesson plan calendar to access your resources.
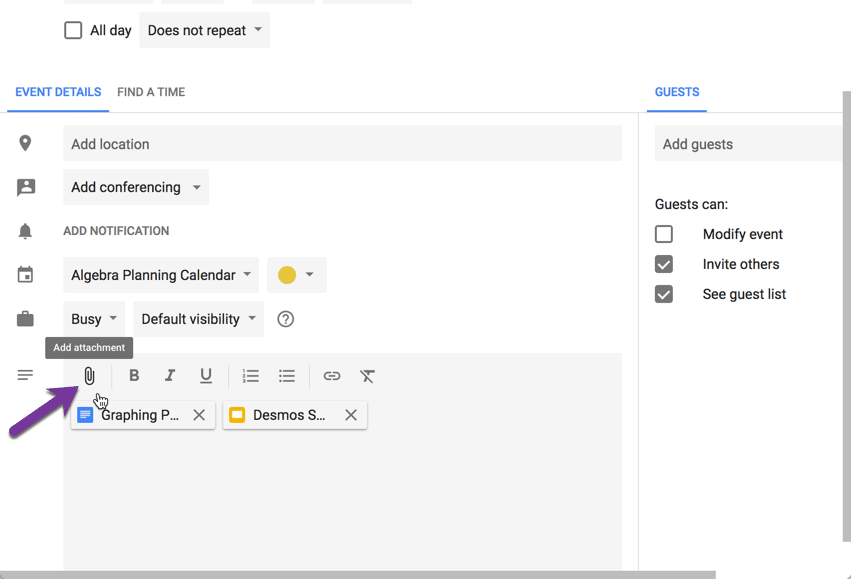
Remember to change the document sharing permissions.
Google Calendar will not change your sharing permissions on your documents. If you attach Google Docs or other files to the calendar event it is important that you make the documents viewable. You may want to try my AnyoneCanView Chrome extension that with one click makes your Google Doc “Anyone with the link can view.” Another trick is to create a folder in Google Drive for lesson planning documents and change the sharing permissions on the folder. This ensures that any documents in the folder are visible when you add them to the planning calendar.
If you have a common benchmark or material that is under copyright you can still attach it to the calendar event for your own use, just make it private in Google Drive so others are not able to access the file.
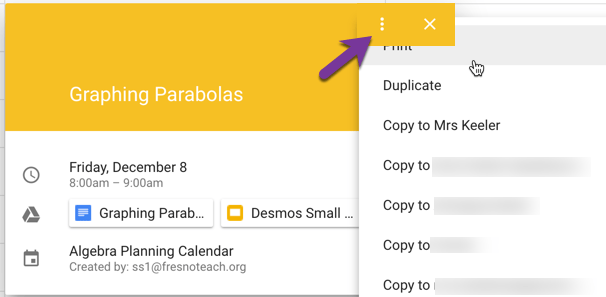
Copy To
If you are subscribed to another teachers calendar and you like a lesson plan, copy that lesson plan event to your calendar. Click on the 3 dots in the event and choose to “Copy to” your lesson plan calendar. The links to the attachments will also copy over.
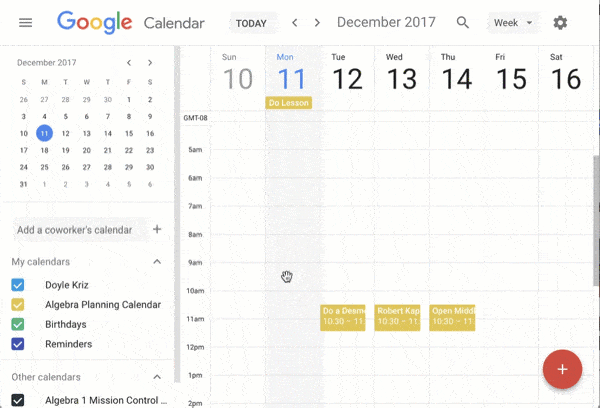
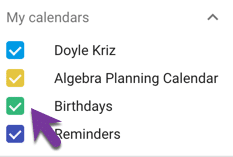
Toggle Calendars
Your Google Calendar can get a little cluttered when you have so many calendars. You can toggle the calendars on and off. Click on the colored square next to the calendar title on the left to view and unview the calendar.
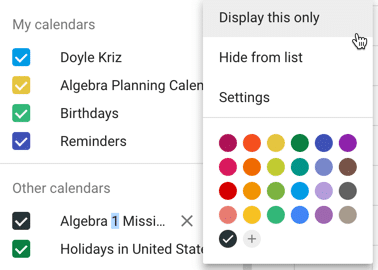
Display This Only
For any calendar, hover over the calendar title on the left hand side and click on the 3 dots. This will reveal a menu to allow you to “Display this only.” Isolate just your planning calendar or the calendar of an awesome teacher whose planning calendar you follow.
Too Many Calendars
You may already have too many calendars. Google Classroom automatically creates a calendar for me each time I create a class. I wrote a script to allow you to easily purge those extra calendars in mass.
Visit my previous blog post for directions on how to use the Add-on script.
Share Your Lesson Plan Calendar
Are you willing to share your lesson plan calendar? Add your link to this spreadsheet.


6 thoughts on “Google Calendar: Create a Curriculum Planning Calendar”
I’ve set up a lesson planning calendar. I used the description box to type our district’s learning target for the lesson. Is there a way to print the calendar so that it shows the learning target? My district requires we print and display our lesson plans for the week by the door of our classroom.
Post by the door the QR code to the Google Calendar. You can print, but I don’t think one ounce of extra student learning would occur from the time you spent printing.
Love GOOGLE CALENDAR!!! I use the Google Calendar and have it set up w/ my Google Classroom. Then I post the calendar on my school website for students to refer to for what assignments are due, what field trips are coming up,etc. This has been such a game changer for me and my students!
Great Post Alice… This gave me some pretty awesome ideas of how to use this feature both in and out of the classroom!
Happy Holidays!
is it possible to copy a years lessons to all start the following year to reuse and revise or are you retyping every lesson every year?
You can change the dates on the events or duplicate the events. Or code to change the dates.