Google Slides Automatic Advance
For Back to School night you may want to share student work and on a rotating slideshow that automatically advances.
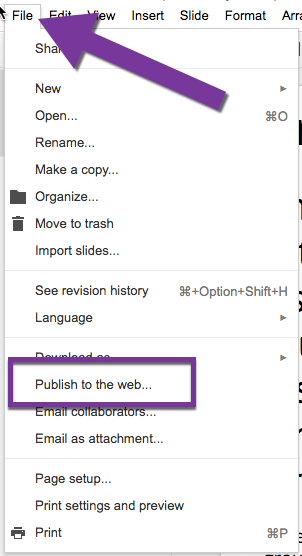
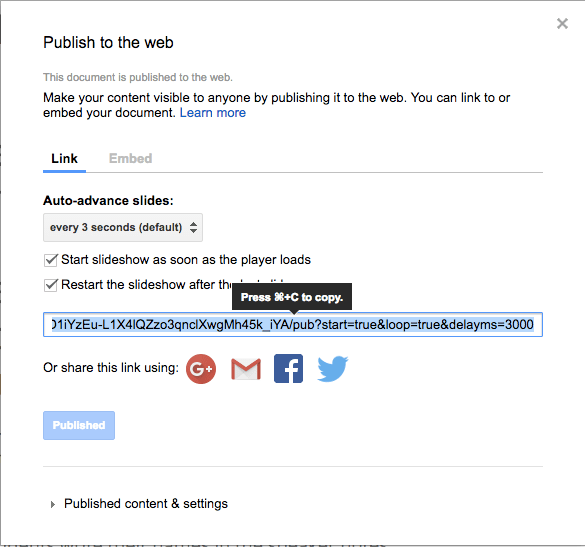
Publish to the Web
After creating a Google Slides you will want to use the File menu to publish it to the web. Note: You do NOT have to be finished or even started with the Google Slides to obtain the published link.
Check Both Checkboxes
You have the option to have Slides start automatically and advance automatically. Check both checkboxes. Note that the advancement of each slide is the same for each slide. A good reminder is you should never have a lot of information on one slide.
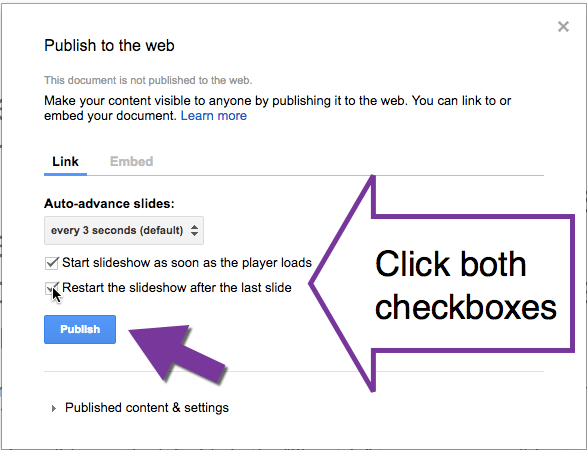
Click Publish
The blue “Publish” button will provide you a published link.
Copy Link
Use Control C to copy the link.
Control T to open a new tab.
Control V to paste the link. Press Enter.
This will display and run the slideshow.
Updates
The slideshow will NOT reflect edits unless you refresh. NO need to republish to the web. Refreshing the rotating slideshow will show the new edits. If you have the slideshow embeded into a webpage (see below), any edits will be visible when the webpage is refreshed.
Sample
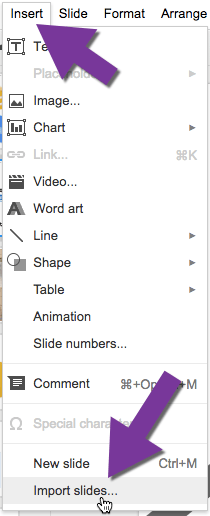
Import Slides
An easy way to share student work is to import slides from student slides. When students submit work to Google Classroom you have the work nicely organized in your Google Drive. Create a blank Google Slides presentation and use the Insert menu to “Import slides.” Select from slides from student work to easily create a presentation with student samples.