New to G Suite, What is Essential
G Suite is a productivity collaboration suite. It consists of Google Apps such as Gmail (your school may disable this), Google Drive, Docs, Sheets, Slides, Forms, Google Classroom, and more! Here are 10 things you want to be able to do if you are using G Suite.
1. Login to Google Drive
2. Create a Google App
From Google Drive you click on the NEW button and choose a Google Doc (like Word), Google Sheets (like Excel), or Google Slides (like PowerPoint.) Click on the “More” option to create a Google Form or Drawing.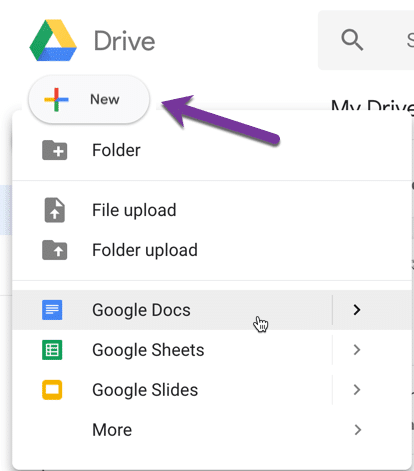
3. Name a File
For any of the Google Apps, click in the upper left hand corner where it says “Untitled” to title it. Honestly, even if you do not title your documents you will still be able to find them in Google Drive.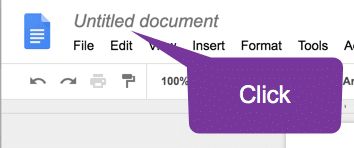
4. No Save Button
Take a deep breath, there is no save button. Google Apps documents are saved automatically to Google Drive.
5. Locate Your Files in Google Drive
As soon as you create a Google Document, Google Sheets spreadsheet, Google Slides presentation, etc… the file is stored in Google Drive. No thumb drives needed. There are multiple ways to find your document in Google Drive. By default the file is stored in My Drive. As soon as you go to drive.google.com you should be able to scroll through any documents you have created and locate them.
Recent
On the left hand side of Google Drive is an option for “Recent.” This is a filter that shows any files that have recently been edited. This can be a quick way to locate your document.
Search
What Google does really well is SEARCH. This is no different with G Suite documents in Google Drive. Notice the search box at the top of Google Drive. What is awesome about Google Drive is that it searches the entire document, not just the document title. If you can not remember what you named a file, search for any word you used in the document.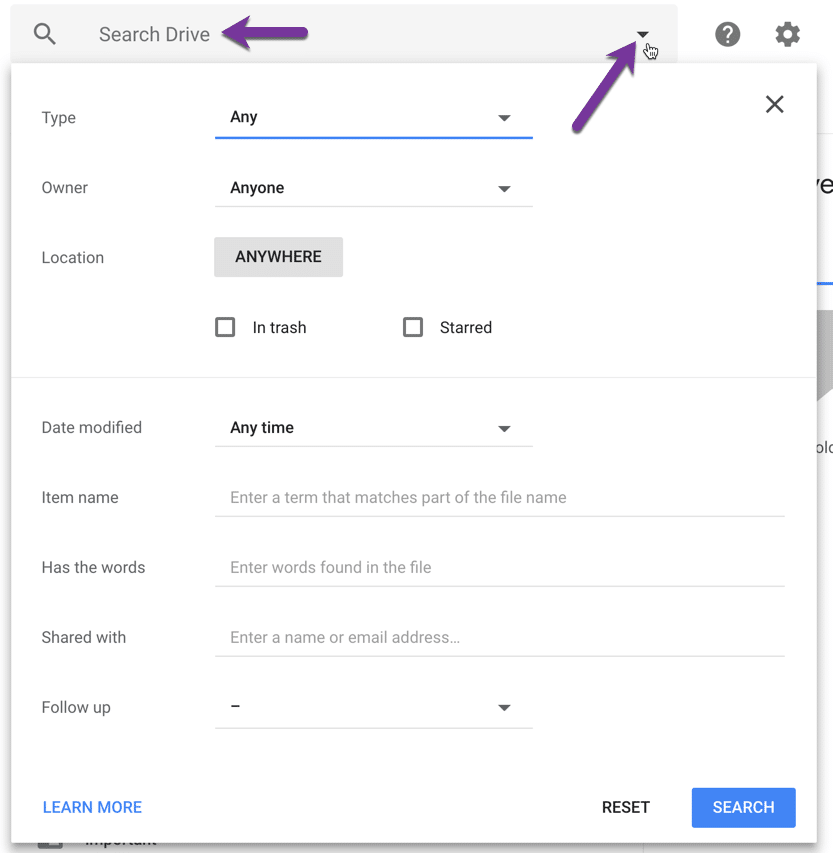
Tiny Triangle
Notice the tiny triangle in the search box at the top of Google Drive. This should make you very excited! As a G Suite user, anytime you see a 3 dots menu or a tiny triangle, CLICK ON THEM! They give you more options. Clicking on the tiny triangle in the search box allows you to filter your Google Drive search more specifically to make it easier to find the document you are looking for.
6. Single Click
In Google Drive, if you single click on a file you can select options about the file. If you double click, you will open the file.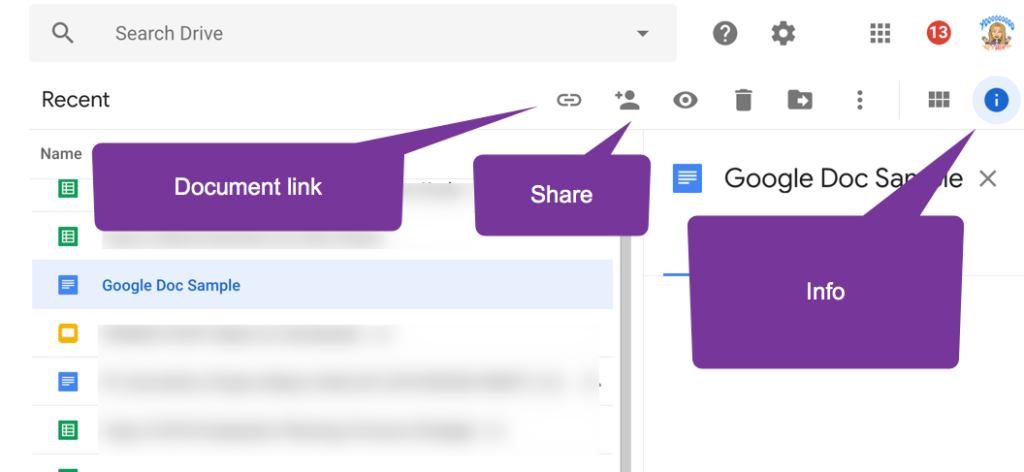
Single click on a file listed in Google Drive and notice all of the icons that appear in the toolbar. Hover over each one for a tooltip as to what they do. Do not forget to click on the 3 dots menu for additional options.
7. Store Anything
Google Drive does not just store Google Apps. It will store any of your digital files. You can click on the “New” button to upload files into Google Drive or you can simply DRAG files from your computer into Google Drive. You can add PDF’s, Images, videos, Office documents, and much more. If you can save it to a thumb drive (flash drive), you can save it to Google Drive.
8. Sharing Settings
Do not work alone! G Suite is designed to collaborate. It is important to know how to share files with others.
Blue Share Button
When using Google Docs, Sheets, Slides, or Drawings you will notice a blue share button in the upper right hand corner. By default your documents are private. Notice the padlock.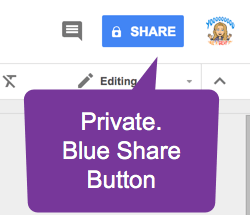
Click on the blue share button to change the sharing permissions.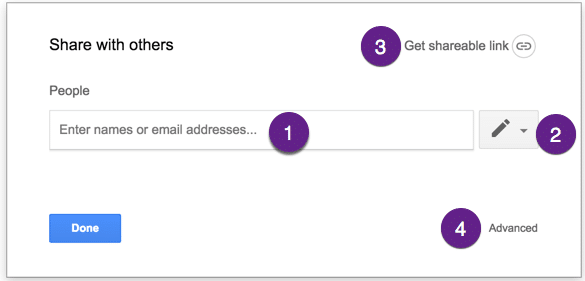
- The easiest way to share a document is to type the person’s email address into the box. They will receive an email notification and immediately the document will be available in that person’s Google Drive.
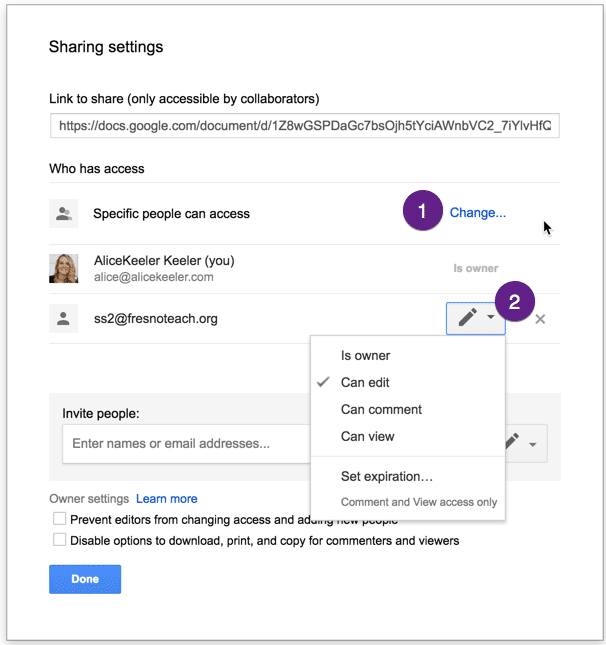
You can enter multiple email addresses at once, place a comma between addresses. - The default for sharing is edit access. You can instead provide comment or view access to the document. Click on the tiny triangle next to the pencil to change from edit access (for the person whose email you are entering.)
- Clicking on “Get shareable link” copies the link to your clipboard and changes the permissions to making the document viewable to anyone at your school who has the link. Note this means that if you share the link with a parent they will not be able to view the document since they do not have a school address.
- Click on “Advanced” to set sharing permissions more specifically. Click on the blue “Change” to set generic viewing permissions. I generally use “Anyone with the link can view.” This allows people outside of my school, when I share the link with them, to view the document. Notice for anyone who you’ve explicitly shared the document with there is a tiny triangle to change the types of permissions that person has. You also have the ability to temporarily provide access and then shut it down after a period of time.
9. Link Sharing Instead of File Sharing
Banish the word “Attachment.” With G Suite, files are not attached, they are linked. When sending an email from Gmail, notice the Google Drive icon in the toolbar at the bottom. You will be able to select files from Google Drive. However, the file is not attached to the email. Instead, the recipient will receive a link to the file. This is superior to an attachment because it eliminates version confusion. If between the time you sent the email and the person opening the file you have made edits, the other person will be looking at the current edits. You have zero effort to update the people you are sharing with. They are always viewing the current version.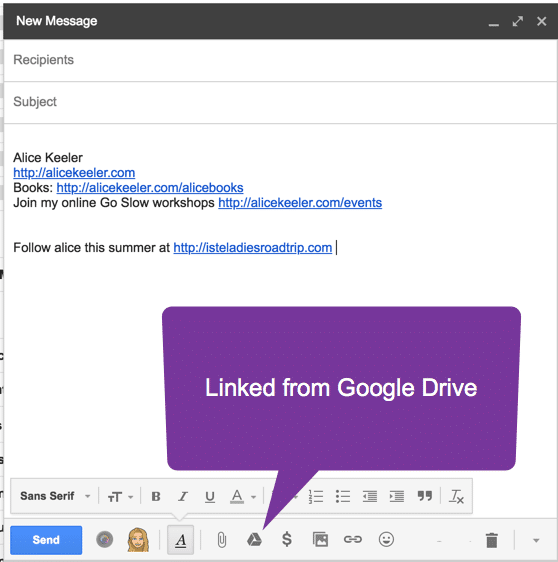
The same is true in Google Classroom. If you add a Google App file to an assignment it is not attached. It is linked. Any updates made to the file in Google Drive will automatically be reflected in Google Classroom.
Control L
While reviewing a Google Apps file I will use the keyboard shortcut Control L to highlight the URL. Then Control C to copy. This copies the link to the document to my clipboard. I can then paste it anywhere using Control V. If I am doing a chat conversation I can use Control V to paste the link to the Google Apps file into the chat, giving those in the chat access. (note, you need to make sure you have changed the sharing permissions first.) You can also click on the blue share button and copy the link from the sharing window. However, the link at the top of the document is the link to the document and can be shared.
10. Version History
An important feature of Google Apps is version history. Frequently, Google automatically captures a snapshot of the document. If you are collaborating with someone (they are editing the same document as you) you may have a need to rewind the document to a previous state. Use the File menu and choose “Version history.” from there you can name the current version (recommended if you’ve made major edits) or choose “See version history.”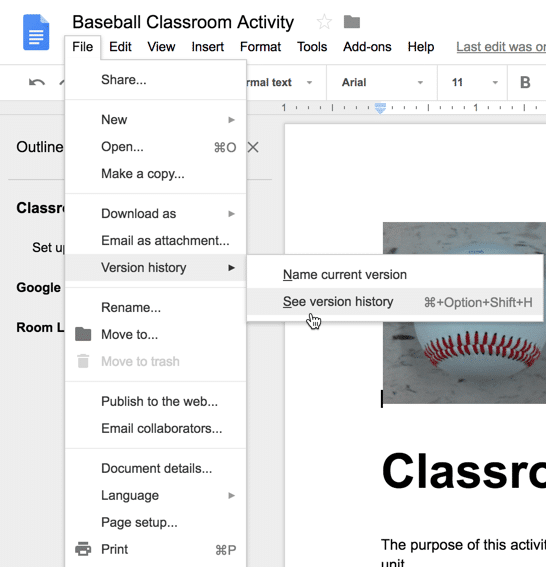
Version history will show you on the right hand side a list of dates that the document was edited. Next to each date there may be a tiny triangle. Click on this to expand out additional versions captured on that date. Clicking on one of the versions listed in the version history on the right hand side will show what the document looked like at that time. At the top left is a button to “Restore this version.” This will make the active version reflective of what the document looked like at the time the version was created.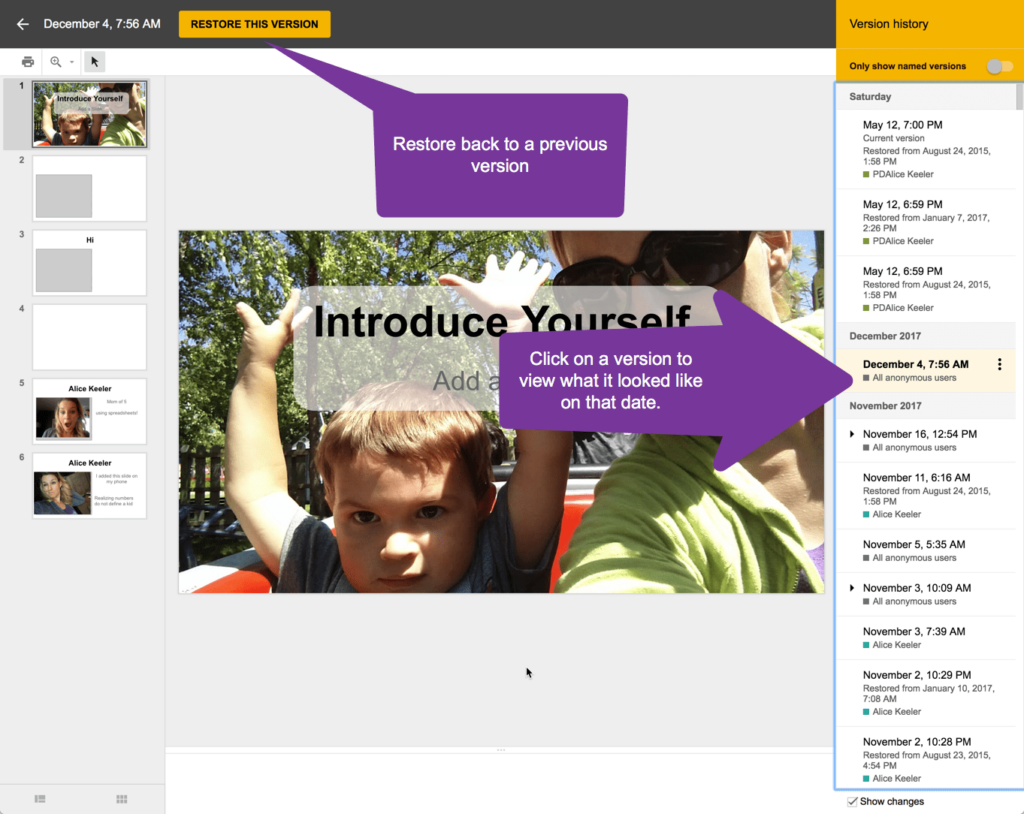
Free Drip Subscription
Sign up for my free drip subscription. You are sent an email every week with a G Suite essential tip. alicekeeler.com/goslow
Note: When new features in G Suite come out they roll out. It can take time for you to see any newly announced features. For a few weeks some users will have the new features and others need to wait.

