Push Feedback to Student Slides
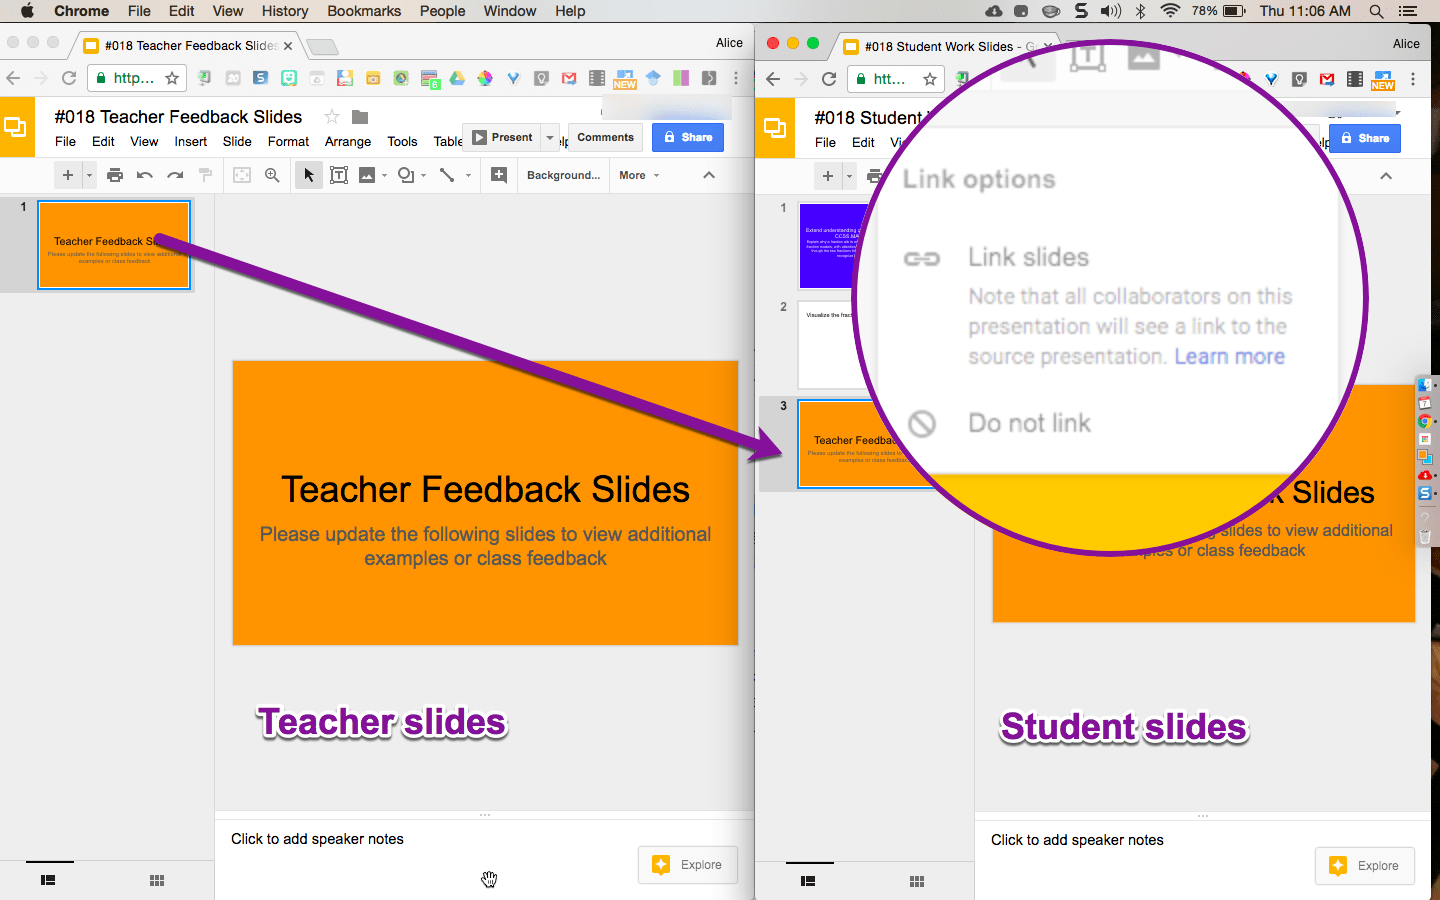
A relatively new feature in Google Slides is the ability to link slides. What this means is if you have 2 Google Slides presentations you can connect the two slides. Create a slide in presentation A, copy the slide and paste it into Presentation B. You will be prompted upon pasting as to if you want to link the slides. Linking the slides would allow for changes in presentation A to be reflected in presentation B.
Linked Feedback Slides
I am a fan of using Google Slides for students showing their work. Slides provide a blank canvas that allows for multi-media, peer and instructor feedback, and collaboration. When each student has their own Google Slides presentation to show their work, it can be time-consuming to add additional slides to each student’s slides. Linking slides can make this process significantly easier.
As it comes up that sharing examples or pushing additional information out to individual Google Slides, linked slides allow for easy sharing.
For example, in a class discussion or working with an individual student you may want to share to each student’s Google Slides the example or comments. Editing a single slide in presentation A to add a text box or picture would update in presentation B for each student.
Steps to Create Linked Feedback Slides
- Create a Google Slides for teacher feedback (Presentation A) and make the slides anyone with the link can view.
- Create a Google Slides for student work (Presentation B)
- Design the student slides (B) to allow for students to demonstrate their work.
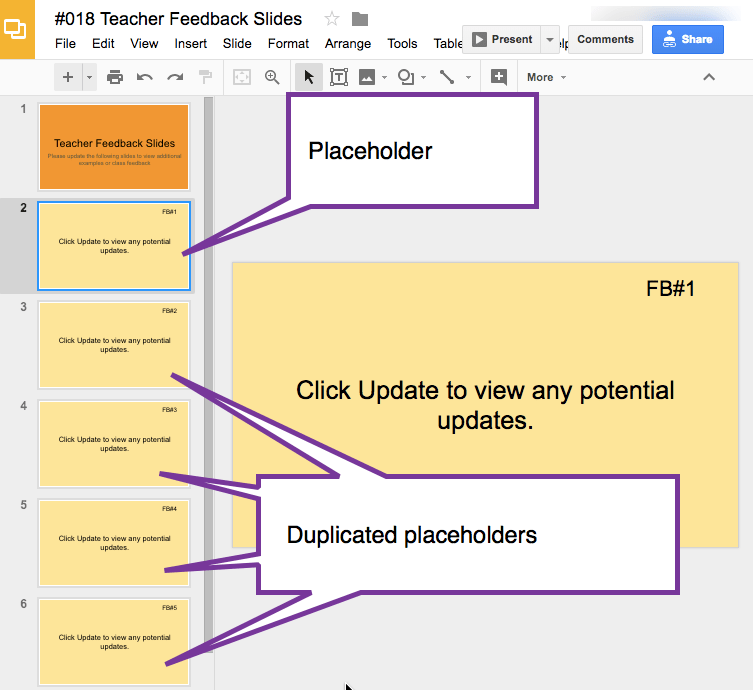
- Create several “blank” temporary slides in the teacher slides (A). Create one slide and then duplicate (Control D) multiple times.
Tip to put a placeholder on the blank slides that indicate “Click Update to view any potential updates.”
- Copy those feedback slides (A) into the student slides (B). Link the slides.
Tip: You can copy, paste and link all the slides at once.
Click on the first slide (A). Hold down the Shift key and click on the last slide to select all the slides. Use Control C to copy. In the student slides (B) paste (Control V). A single pop up asking to link slides will appear, indicate to link slides. This will apply to all slides pasted. - Duplicate the student slides for each student.
This is easy in Google Classroom by adding the student slides (B) to an assignment in Google Classroom and choosing “Make a copy for each student.” If you are not a Google Classroom user you can distribute the slides (B) to students by replacing the end of the URL from /copy to /edit. Share the link with students that ends in /copy and each student will be prompted to make a copy. - As needed, edit a slide in the teacher slides (A).
- Indicate to students to update the slide. This is done manually by the students. Students will see a symbol on the slides showing that the slides are linked. There is an arrow for students to click which will reveal a menu with the option to “Update.”
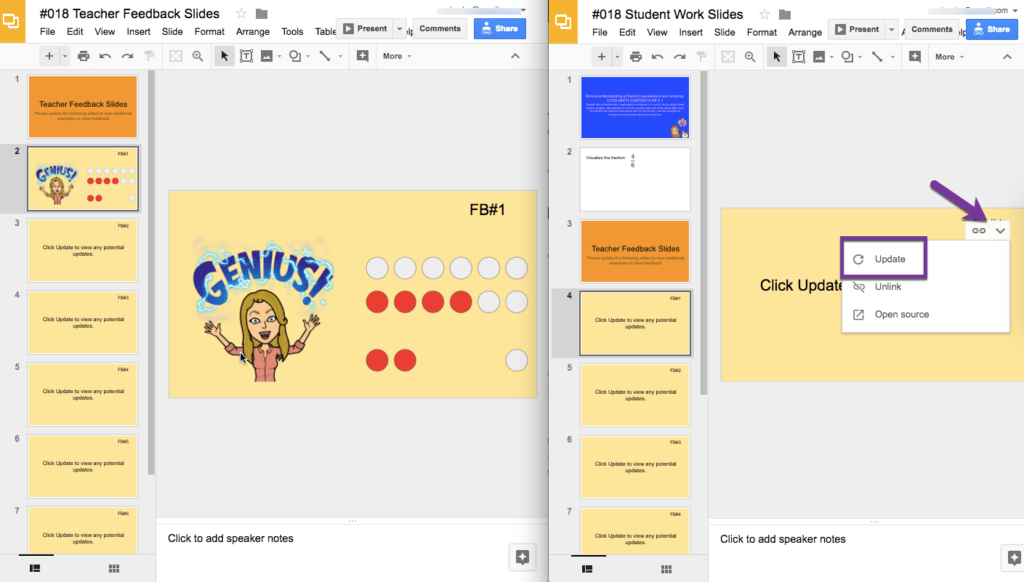
When students click to “Update” they will be able to see the examples and additional information shared by their teacher.


Pre-Plan
The trick to utilizing the linked slides feature in Google Slides is to pre-plan. To create enough “blank” slides in presentation A and link them into the student slides to accommodate any potential updates and feedback you may want to share.
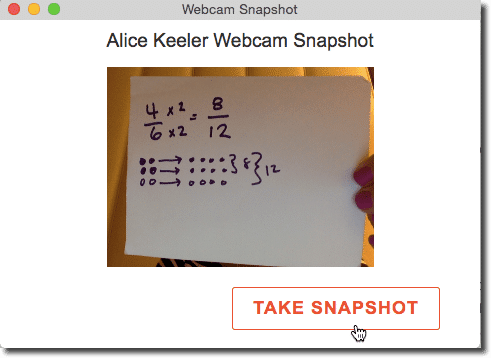
Snapshot
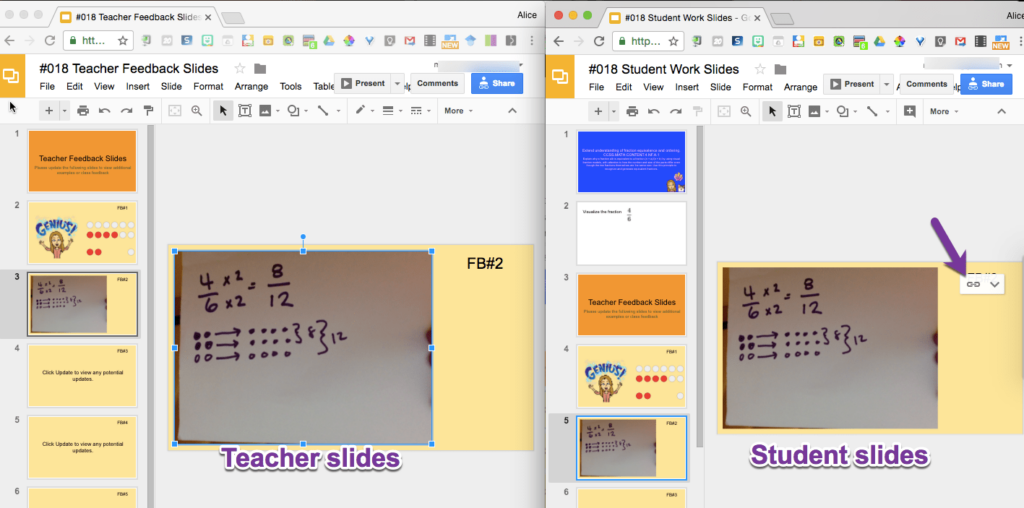
When working with students on paper, I recommend using quarter sheets of paper, you can easily add these examples to the teacher slides. Using the Google Slides app, open the teacher slides for the assignment and insert a photo right onto one of the blank slides. This makes it easy to share student examples with the class or to share examples you came up with an individual student or group of students.
Insert Image from Camera
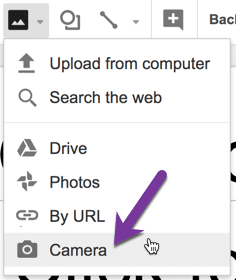
Google has put back the webcam option for inserting images! Next to the image icon in the toolbar, notice the tiny triangle. Click on this to choose “Camera” as the method of inserting an image.
Snapshot Chrome Extension
If you are using a Chromebook, PC or Mac you can use my Webcam Snapshot Chrome extension to add pictures of student work and examples to the teacher slides (A). The image is saved to Google Drive. Add the image to the slide from Drive.