In the landscape of educational technology, Google Sheets stands out as a versatile platform that not only organizes data but also encourages student creativity and interaction. One of the most underappreciated yet powerful features of Google Sheets is the ability to merge cells. This functionality, while simple in concept, opens up a multitude of opportunities for educators to create more engaging, student-centered learning experiences.
Why Merged Cells Matter
The default cell size in Google Sheets is often too restrictive for detailed student responses or for the organization of complex information. Merging cells is a straightforward solution to this problem, enabling educators to design larger, more flexible spaces for text entry, project planning, or even artistic expression within a spreadsheet. This adaptability is crucial for accommodating diverse student needs and learning styles.
Step-by-Step Guide to Enhancing Learning with Merged Cells
Rarely do I make a student activity using spreadsheets where I don’t merge cells.
Selecting a Range for Merging:
Begin by identifying the cells you want to combine. You can do this by clicking and dragging across the desired cells with your mouse or trackpad. For a more precise selection, click on the first cell, hold down the shift key, and use the arrow keys to extend your selection. This method allows for the exact customization of the merged area, catering to the specific requirements of your lesson or project.
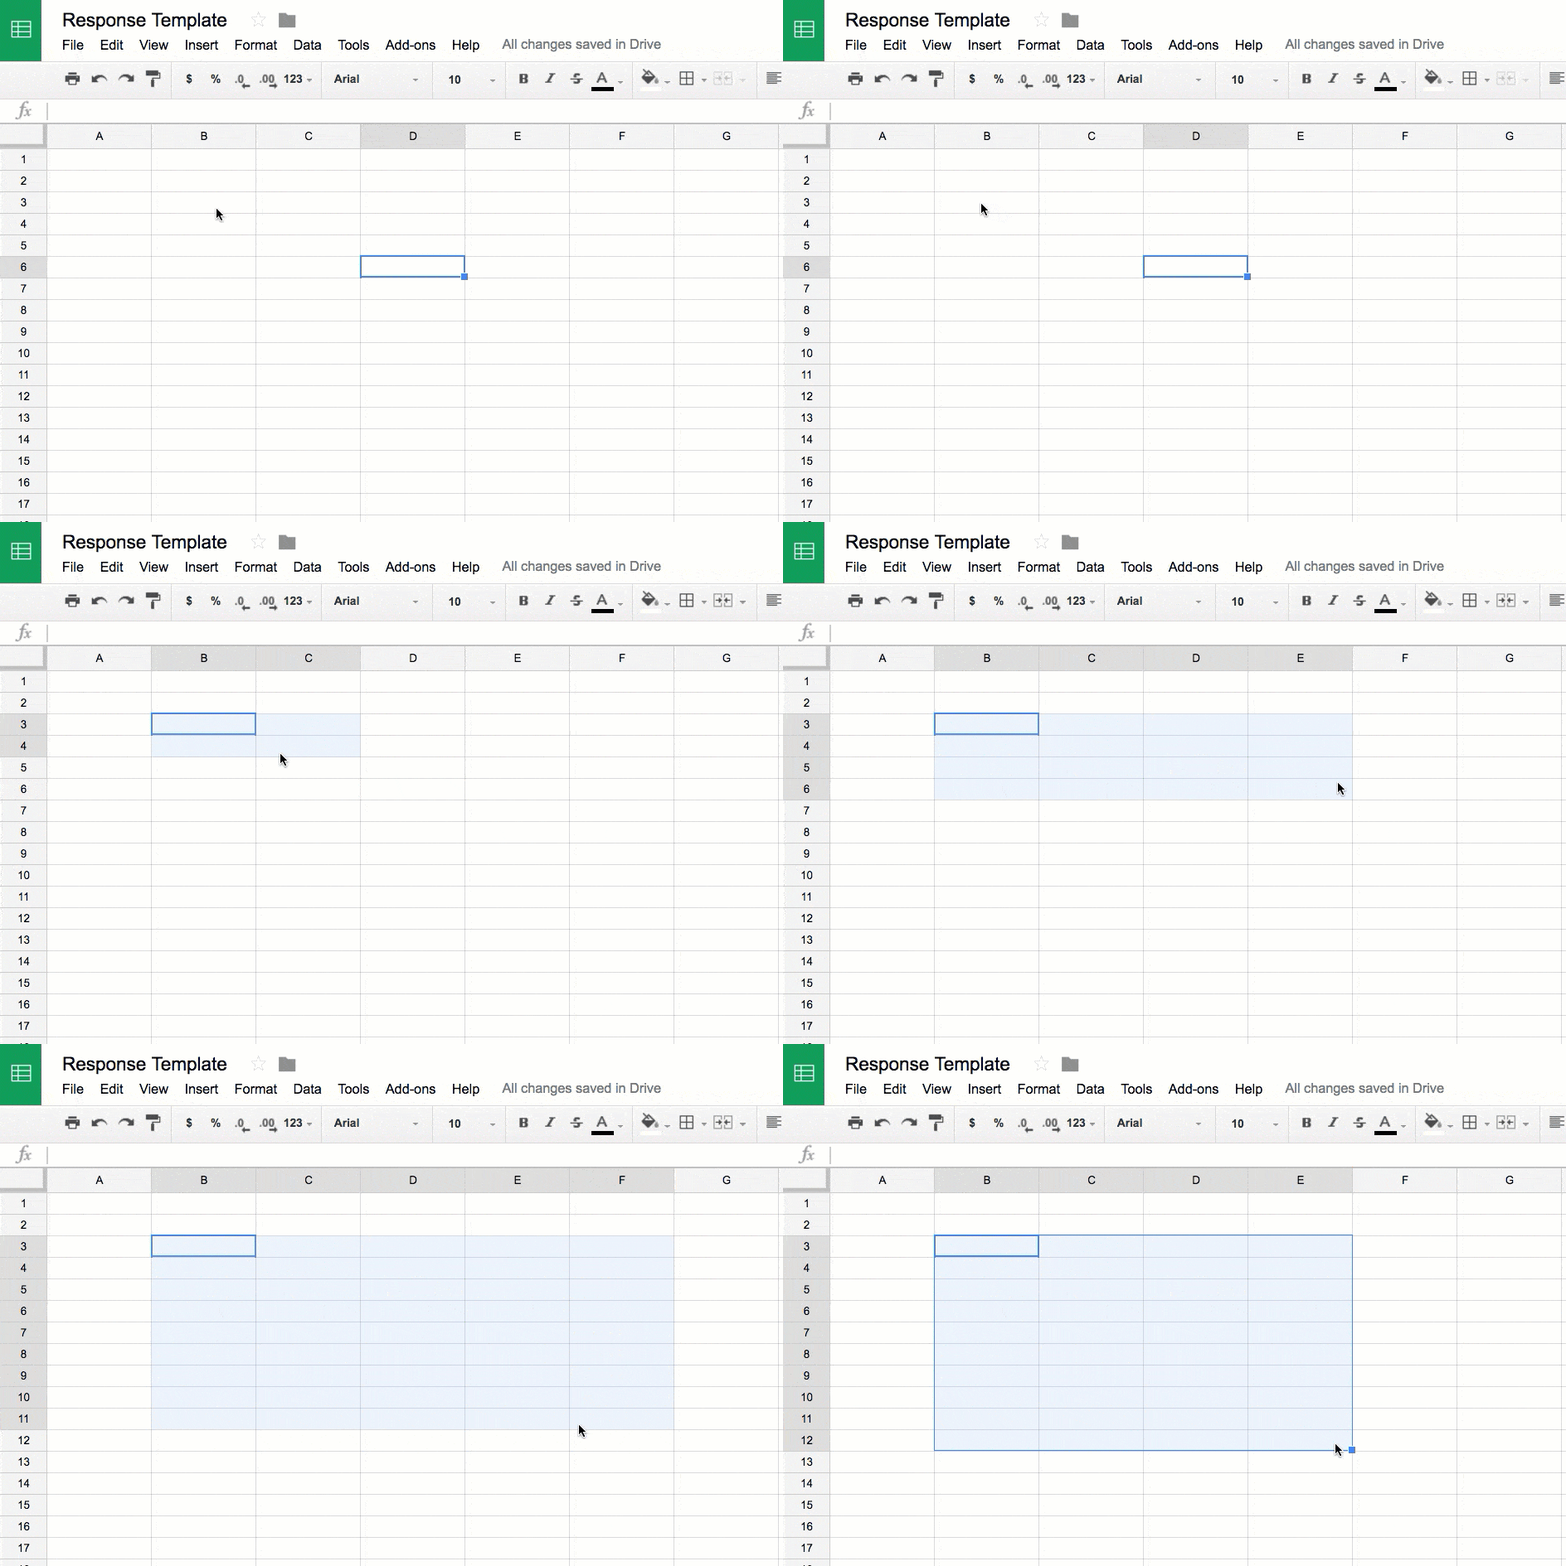
Merging with a Click:

Once you’ve selected your range, find the merge icon in the toolbar—a symbol depicting the union of two rectangles-ish. Clicking this icon merges your selected cells into one, creating a larger space for student input. This process not only simplifies the layout of your spreadsheet but also makes it more visually accessible for students.
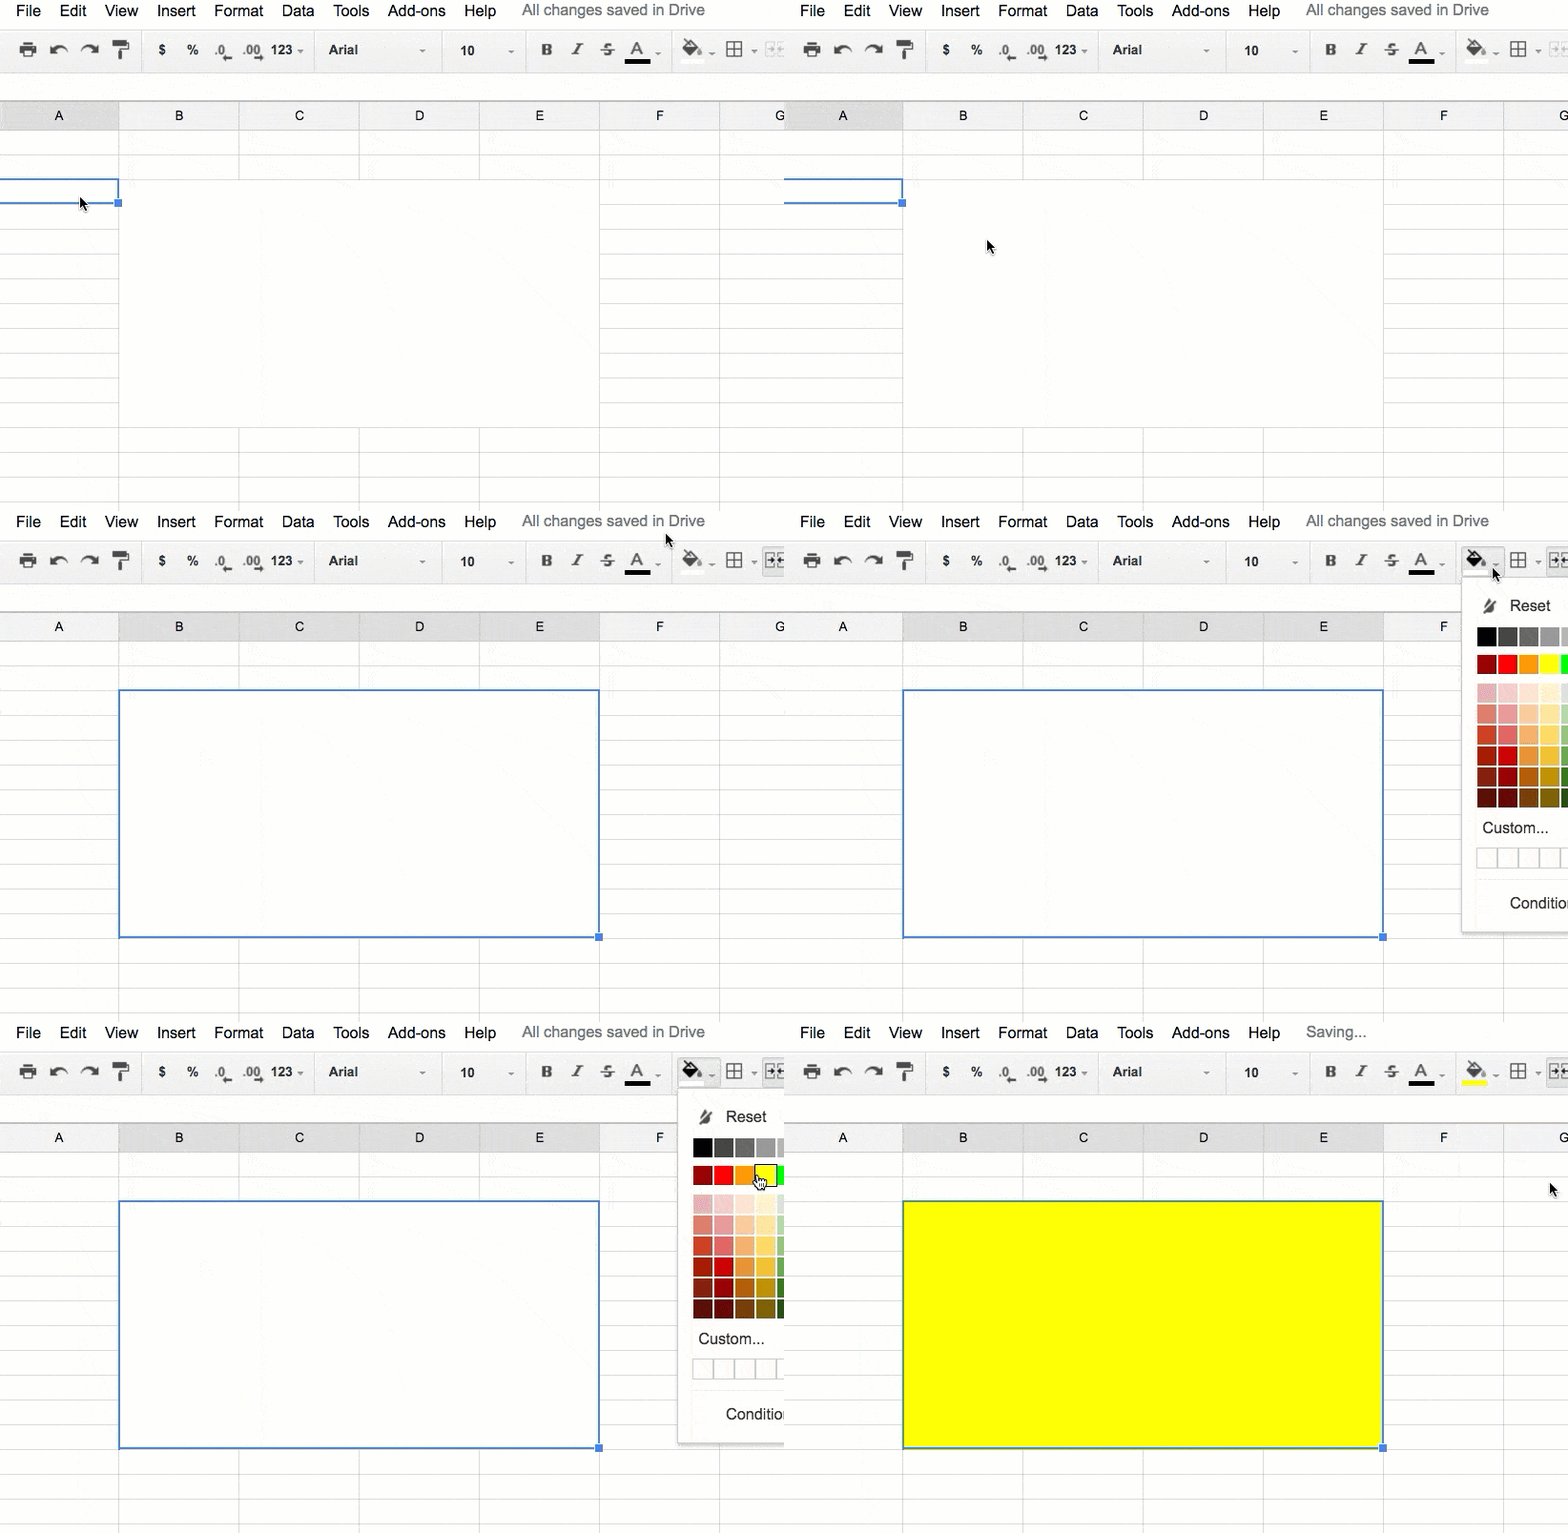
Customizing the Merged Cell:
To direct student attention to specific areas or tasks within the spreadsheet, utilize the paint can tool to color-code merged cells. Applying a distinct color to these cells can signify different activities, priorities, or response sections, aiding in navigation and organization.
Use the centering options in the toolbar to center both horizontally and vertically.

Activating Word Wrap:
For text-heavy entries, enabling the word wrap feature is essential. This ensures that students’ written responses are contained neatly within the merged cell, facilitating easier review and grading. The word wrap option, found next to the alignment tools, allows text to flow within the cell boundaries, improving both aesthetics and functionality.
The Impact on Student Learning
Incorporating merged cells into your Google Sheets activities transforms the spreadsheet from a mere data repository into a dynamic canvas for student learning. This approach supports differentiated instruction by providing spaces for extended writing, collaborative project planning, and even creative design tasks within a familiar platform. It encourages students to think critically about how they organize and present information, fostering both engagement and digital literacy.
By leveraging the simple yet versatile feature of merging cells, educators can craft more interactive and personalized learning experiences. This not only enhances student engagement but also empowers learners to take charge of their educational journey, creatively expressing their understanding and insights through the versatile medium of Google Sheets.
Speed it Up with Quick Crop
Obviously this is several steps to create a merged response box.
- Highlight a range of cells
- Use the merge icon
- Use the paint can
- Center horizontally and vertically
- Set word wrap
To speed this up, I added a feature to my Add-on “Quick Crop.”
Quick Crop Add-on
Crop Google Sheets™ quickly. Plus other quick spreadsheet needs such as hide other sheets.
Created by AliceKeeler – Collects NO user data. Completely free
Quick Crop Extension
Quick Crop is designed to help you quickly do a task in Google Sheets. It’s main function was to reduce the number of rows and columns that you are not using. The “Fun Extras” has a feature to “Insert Response Box.”

Click on one cell where you want to insert a response box. Selecting “Insert Response Box” will merge 3 columns and 5 rows. The merged cells will be filled in yellow. Centering and word wrap will be enabled. It’s intended to help you to quickly insert response boxes into student activity templates.


