


Here are 3 tips for Google Slides you may not know.
1. Delete Layouts
By default, there are 11 different layouts for students to choose from.

When doing a collaborative activity you probably only need one or two templates for students to use.
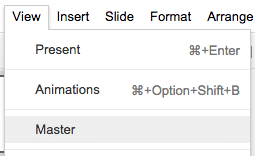
Use the “View” menu and choose “Master.”
Delete the 10 extra layouts by selecting them and pressing the delete key. You can then edit the remaining layout to represent the template you want students to utilize.
2. Insert Clipart
Using the “Insert” menu, choose “Image.”

The last image option is to “Search.” This will do a Google Image search for images to insert into the presentation. After searching for something, change the filter from “All types” to “Clipart.”

3. Change Background
Click on “Background” in the toolbar to upload a background image. This image is locked into the background, and thus can not be accidentally edited by students. Create a graphic organizer for the background to allow students to demonstrate their learning by inserting text boxes, shapes and pictures onto the slides in the correct spots.


19 thoughts on “3 Tricks in Google Slides to Try”
Alice, When you have students all collaborate on one slide show and each add a slide – Do you have the entire class do this all at once? Or is this used for online courses where students would be adding slides at different times?
Both ways
‘3 Tricks in Google Slides to Try’ – http://t.co/8CxFCOjebY http://t.co/tsv9d1zn5Y
RT @alicekeeler: ‘3 Tricks in Google Slides to Try’ – http://t.co/8CxFCOjebY http://t.co/tsv9d1zn5Y
RT @alicekeeler: ‘3 Tricks in Google Slides to Try’ – http://t.co/8CxFCOjebY http://t.co/tsv9d1zn5Y
RT @alicekeeler: ‘3 Tricks in Google Slides to Try’ – http://t.co/8CxFCOjebY http://t.co/tsv9d1zn5Y
RT @alicekeeler: ‘3 Tricks in Google Slides to Try’ – http://t.co/8CxFCOjebY http://t.co/tsv9d1zn5Y
RT @alicekeeler: ‘3 Tricks in Google Slides to Try’ – http://t.co/8CxFCOjebY http://t.co/tsv9d1zn5Y
RT @alicekeeler: ‘3 Tricks in Google Slides to Try’ – http://t.co/8CxFCOjebY http://t.co/tsv9d1zn5Y
RT @alicekeeler: ‘3 Tricks in Google Slides to Try’ – http://t.co/8CxFCOjebY http://t.co/tsv9d1zn5Y
RT @alicekeeler: ‘3 Tricks in Google Slides to Try’ – http://t.co/8CxFCOjebY http://t.co/tsv9d1zn5Y
RT @alicekeeler: ‘3 Tricks in Google Slides to Try’ – http://t.co/8CxFCOjebY http://t.co/tsv9d1zn5Y
RT @alicekeeler: ‘3 Tricks in Google Slides to Try’ – http://t.co/8CxFCOjebY http://t.co/tsv9d1zn5Y
RT @alicekeeler: ‘3 Tricks in Google Slides to Try’ – http://t.co/8CxFCOjebY http://t.co/tsv9d1zn5Y
RT @alicekeeler: ‘3 Tricks in Google Slides to Try’ – http://t.co/8CxFCOjebY http://t.co/tsv9d1zn5Y
RT @alicekeeler: ‘3 Tricks in Google Slides to Try’ – http://t.co/8CxFCOjebY http://t.co/tsv9d1zn5Y
RT @alicekeeler: ‘3 Tricks in Google Slides to Try’ – http://t.co/8CxFCOjebY http://t.co/tsv9d1zn5Y
RT @alicekeeler: ‘3 Tricks in Google Slides to Try’ – http://t.co/8CxFCOjebY http://t.co/tsv9d1zn5Y
RT @alicekeeler: ‘3 Tricks in Google Slides to Try’ – http://t.co/8CxFCOjebY http://t.co/tsv9d1zn5Y