 If you are not familiar with Microsoft 365, it is a version of Microsoft Office. The advantage to using this particular Office product is the cloud capabilities. You are able to edit your Word, PowerPoint, OneNote or Excel files on multiple devices. You are also able to collaborate in real time on the files.
Log In
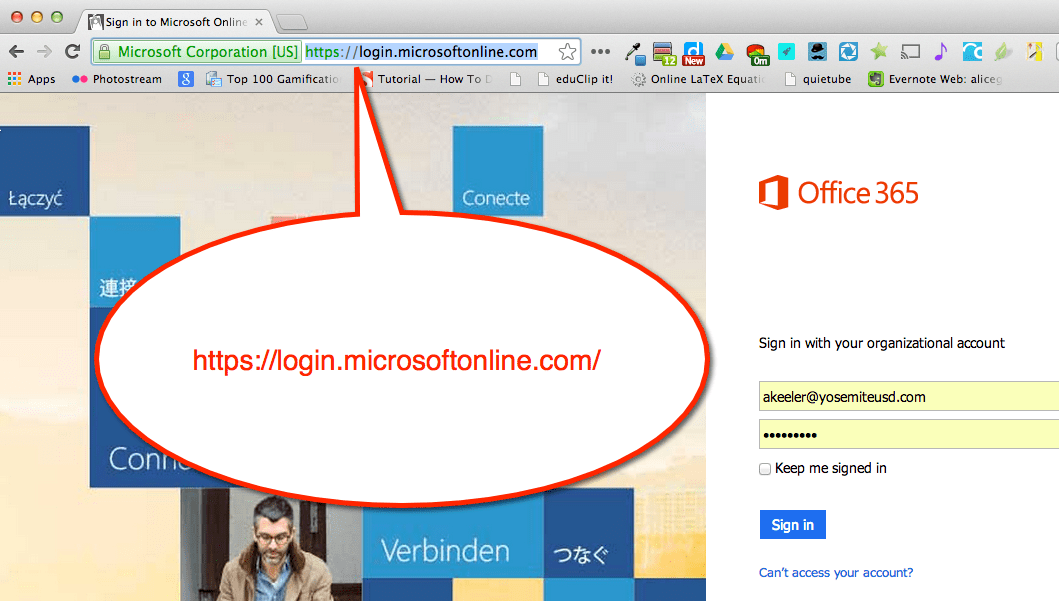
If your district has a Microsoft 365 account you will want to log in at https://login.microsoftonline.com/ . If your school district did not obtain a 365 account for you, you can purchase 365 online or you can sign up for a free OneDrive account: https://onedrive.live.com/about/en-us/
Outlook
Logging into Microsoft 365 online website will launch your outlook account. Locate the “OneDrive” link in the upper right hand corner. 
OneDrive
OneDrive is your files in the cloud. You are able to work on the full function Microsoft Office files on your computer and then sync them with the cloud so you can edit from anywhere. 
Sync
Make sure that you sync your files so that you are able to access them away from your main computer.
Download Full Version
The online version of Office does not have the full features of the desktop version. 365 offers the best of both worlds. By syncing your desktop files with your OneDrive account you are able to edit and view your files online as well as on your computer. If your school has obtained a 365 account for you, click on the settings wheel in the upper right hand corner to download the full desktop version. You will find the download options under the “Office 365 settings.” 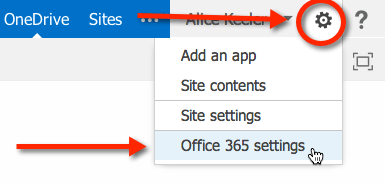

Back to OneDrive
Click back on the “OneDrive” words at the top right to return to the files in OneDrive.
New File
You are able to create new files in the cloud, from scratch. Click on the “new” button to choose which Office file you would like to create. Optionally you can also create a folder to organize the documents in. 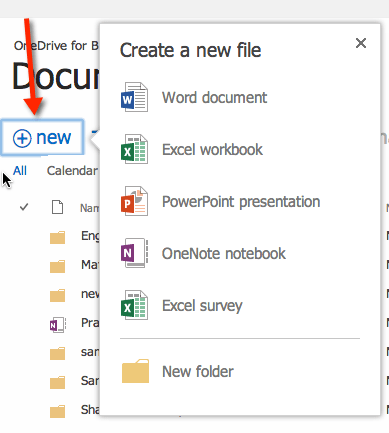 You will be prompted to name your file.
  This will take you OUT of OneDrive and into your document to edit.
Share
Notice in the upper right of the document you have the options to Share or “Open in Word.” If you want to collaborate with someone in real time you need to be in the online version. If you want more robust features, but not collaborate simultaneously, choose to use the desktop version. 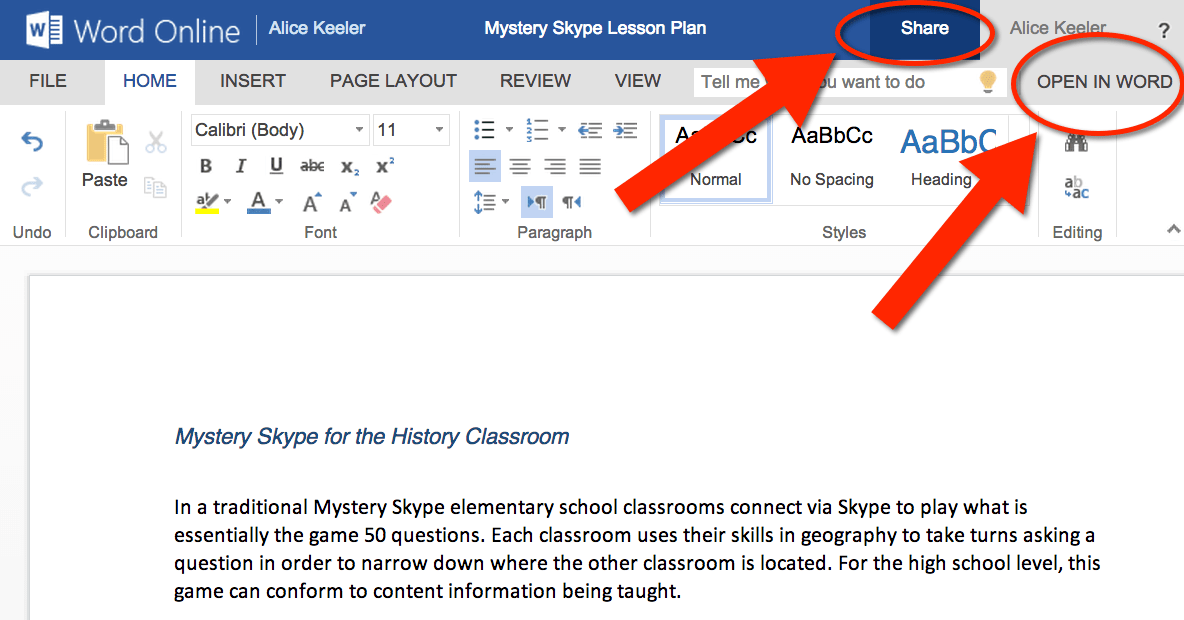 Clicking on the “Share” button opens up the sharing options.
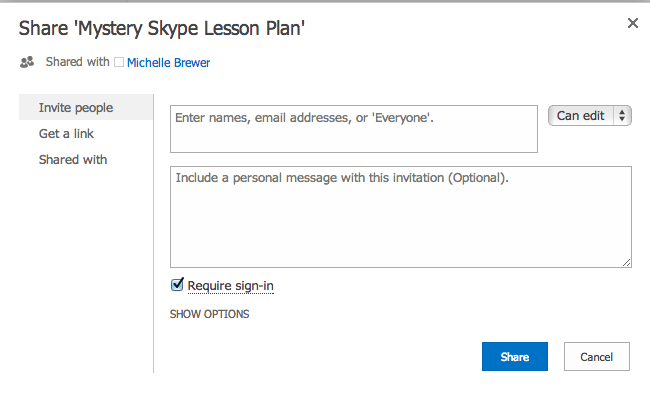
Share with Everyone
In the first box you can type in specific email addresses to share the document with or you can type the word “Everyone.” Once you hit the spacebar you will be able to choose if you really meant “Everyone” or if you wanted only people within the organization.  To the right of the box is a drop down menu that indicates that those who you are sharing the document with will be able to edit. You can choose “Can view” from the drop down menu instead if you want people to only view your documents, not make changes. If you are sharing your syllabus with students… you only want to allow them to view the document.
Get a Link
Choosing “Get a link” from the left hand side allows you to share with non specific people who do not need to log into OneDrive. If you are not sure if viewers or collaborators have a OneDrive account, or if they might forget their password, choose the “Get a link” option instead. 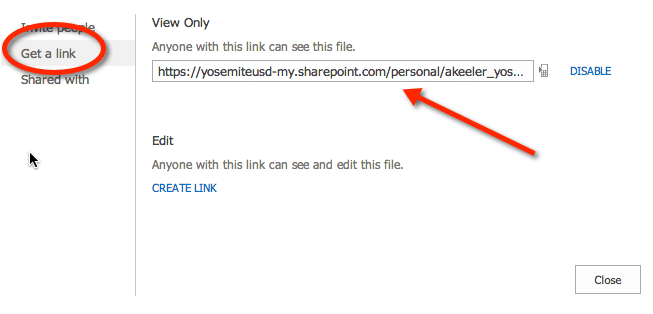 Click on “CREATE LINK” and a link will be generated. Notice you can create 2 different kinds of links. One to give viewing access, this is what you will want to use with parents for flyers you are emailing home or posting to your website. The other link allows the person who clicks on the link to edit the document. This is good when you are looking for contributors to help you craft the document.
Copy and paste these links into an email or post to your website to allow others to view or edit your document with you.
Close
Once you close the sharing settings you are taken back to OneDrive. You did not lose your document you were editing, it is open in another tab. Simply switch back to the document tab and continue editing.


