One thing I strongly advocate is a well organized website that contains a daily detailing of what goes on in the classroom that day along with any resources and directions the students will need. I find that I am frequently typing “CLICK HERE” to have the students link to a Google Form or something. The words “Click Here” can get lost in the text of directions. One way to make this more obvious for students is to create a “Click Here” button. Then it stands out.
Step 1
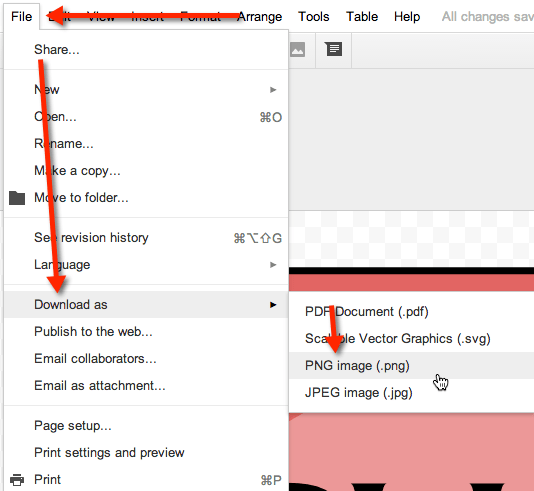
Create an image. I created mine in Google Draw and downloaded it as a PNG image. It is important that you choose PNG since this maintains the transparency where you do not intend for there to be the button. 
Alternatively you can download pre-made click here buttons. Try http://clker.com
Step 2
In Google Sites choose to insert an image. Browse for the PNG file you downloaded.
Step 3
Click on the inserted image, a properties bar will appear over the image.  You may want to resize the image by clicking on S, M or L if your button was too large.
Step 4
Notice the image link goes to the image itself. Click on “Change” next to the image link.
Step 5
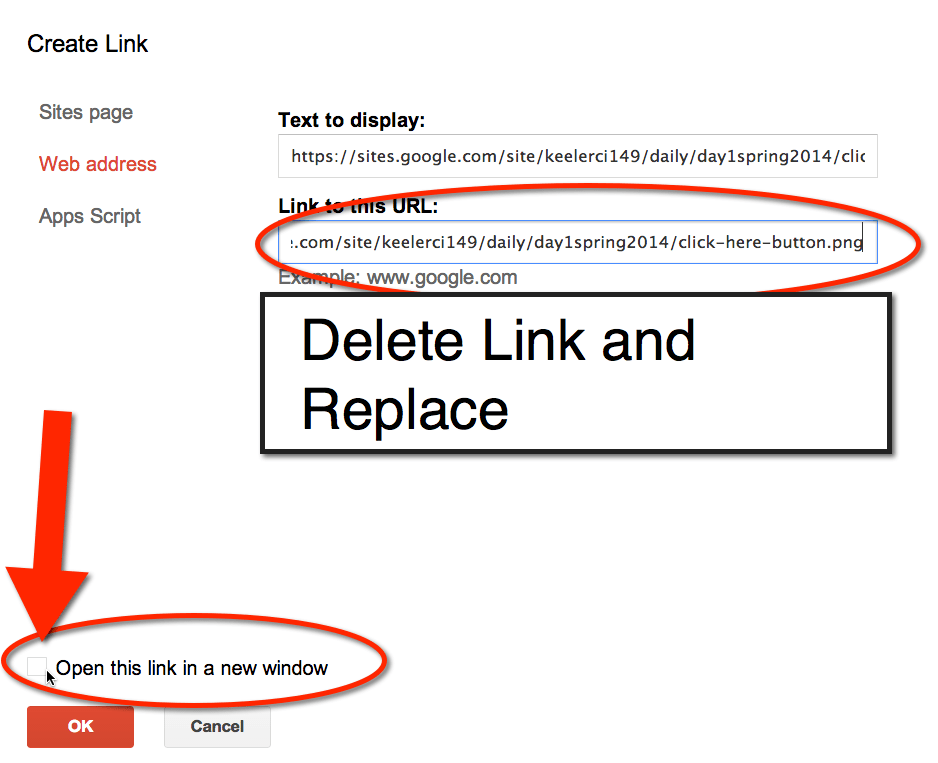
Delete out the URL under “Link to this URL:” Replace the link with what you want the button to link to. In my case I linked to a Google Form. You may want to check the “open this link in a new window” check box. 


1 thought on “Google Sites: Create a Click Here Button in 5 Easy Steps”
Awesome! I love the ability to create my own visual cues.