I was helping Catlin Tucker with some presentation tips and together we came up with a nifty way to use a Google Doc instead of a Presentation. Sometimes a text document will work better than a slideshow, in that case you may want to try this tip.
Step 1
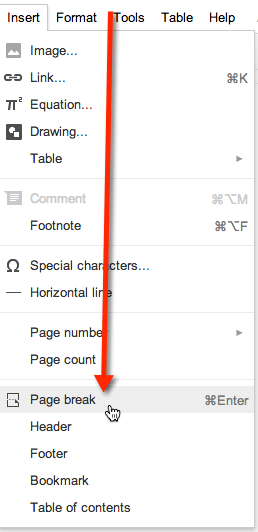
Use page breaks in your document, you do not want too much text on a page since you are using the pages as slides. Control Enter is the keyboard shortcut to inserting a page break. You can also use the insert menu.
Step 2
Create a title at the top of each page that you can navigate to from the custom navigation.
Step 3
Utilize headings as a style for your text at the top of the page. Highlight the title of the page and change it from normal text to a heading such as Heading 1. Repeat this for each page.
Step 4
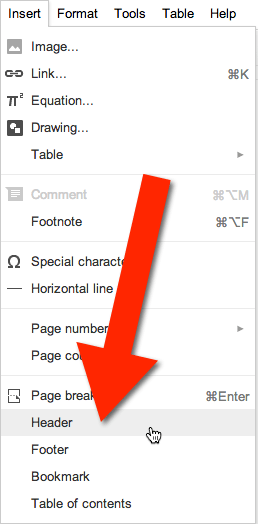
Insert a header into the document. Under the insert menu is the option to insert a header. This is something that will repeat on every page of your document.
Step 5
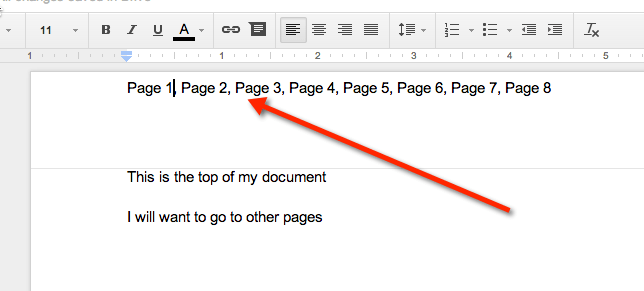
Type your navigation into the header. Such as Page 1, Page 2, Page 3, or possibly even more meaningful titles.
Step 6
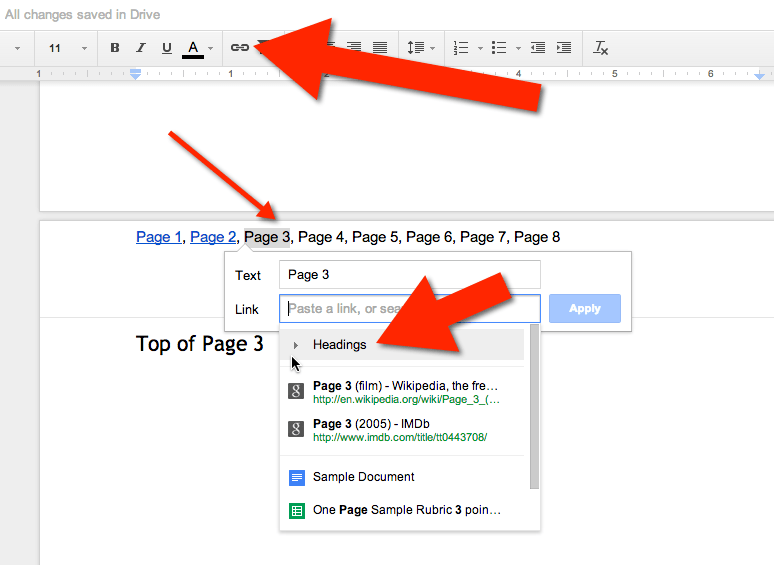
Highlight the text, one item at a time, and click on the link icon in the toolbar. This will allow you to create a hyperlink of the text. Instead of pasting a URL into the box notice the option to link to a Heading. Link to the headings you created. This will allow you to jump to pages in your document no matter what page you are on!
Click Here for a sample document to demonstrate the header navigation.
Click Here for a template you can make a copy of.






4 thoughts on “Creating Navigation in a Google Document in 6 Steps”
Thanks Alice, great tip!
Great idea! If you choose your heading style before typing your heading, as soon as you hit enter, it will move to the next line and reset to normal text (I use this all the time when creating docs).
Alice, tried this and it looked OK, but after I closed it, the formatting just went to headings with page breaks. I wanted to use it for a doctopus. Any ideas?
That should not happen