An app I like for my iPad is Haiku Deck. What is nice about Haiku deck is that it makes creating a presentation not only easy, but beautiful. The hangup is that Haiku deck is only available for the iPad.
Haiku Deck automatically searches for images using the keywords in your title slide. The images are high quality and dynamic. The first trick to replicating this is to find high quality images.
I stick to Creative Commons images. One place to find Creative Commons images is on Flickr. Rather than going directly to Flickr, I use http://compfight.com. I can not only find creative commons images from Flickr on Compfight, but it gives me the attribution information that I can copy and paste.
Step 1
Create a Google Presentation by going to Google Drive (http://drive.google.com).
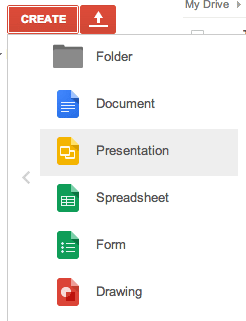
Step 2
Choose a simple white template.
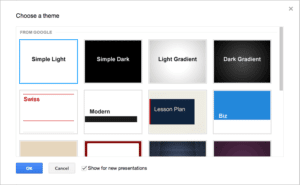
Step 3
Go to http://compfight.com and search for a keyword.
Step 4
Make sure you are searching Creative Commons images. On the left hand side is the option to filter for Creative Commons pictures.

Step 5
Click on the image you want to use in your slides.
Step 6
Download the large size if it is available. I look for 1024 if I can. Make sure you take note of where the image downloads to. On my Mac it downloads to the downloads folder.
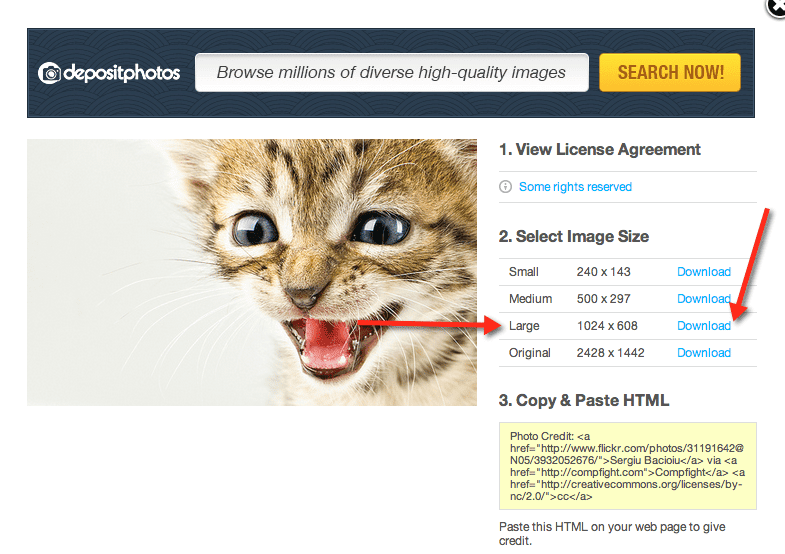
Step 7
Copy the photo credit. This is in the 3rd step of the pop up window.
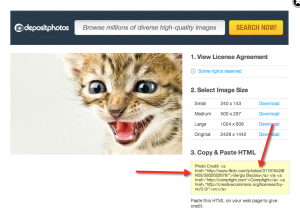
Step 8
Paste the photo credit into the slide notes or create a text box off canvas and paste the photo credit in there. It is suggested to create an attribution slide at the end of your presentation where you paste and organize the credits. You can remove the <html> tags from the credit.
Change
Photo Credit: <a href=”http://www.flickr.com/photos/31191642@N05/3932052676/“>Sergiu Bacioiu</a> via <a href=”http://compfight.com“>Compfight</a> <a href=”http://creativecommons.org/licenses/by-nc/2.0/“>cc</a>
Into
Photo Credit: http://www.flickr.com/photos/31191642@N05/3932052676/ by Sergiu Bacioiu via http://compfight.com, Compfight. Creative Commons licence http://creativecommons.org/licenses/by-nc/2.0/
Step 9
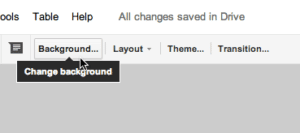
In the slide toolbar, choose the “background” button.
Step 10
Of the 3 options, choose the middle option “Image.” Click on choose and browse for the downloaded image.

Step 11
After choosing done, the image is now the background of the slide. Choosing a photo as your background can really make your presentation pop, however your text gets lost in the image.

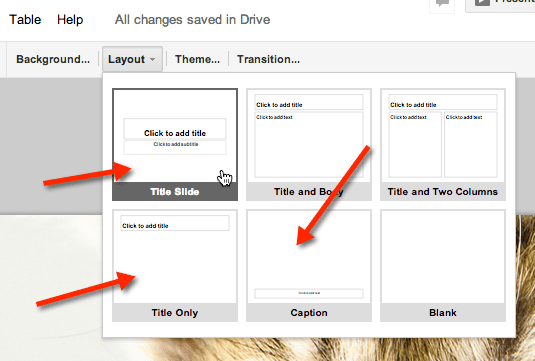
Type your text in the text box. Make sure you are using either “Title Slide,” “Title Only,” or “Caption” layouts. Alternatively, you can create your own text boxes.
Step 12
Select the text box. Go to the paint can in the toolbar and choose to fill the text box white.
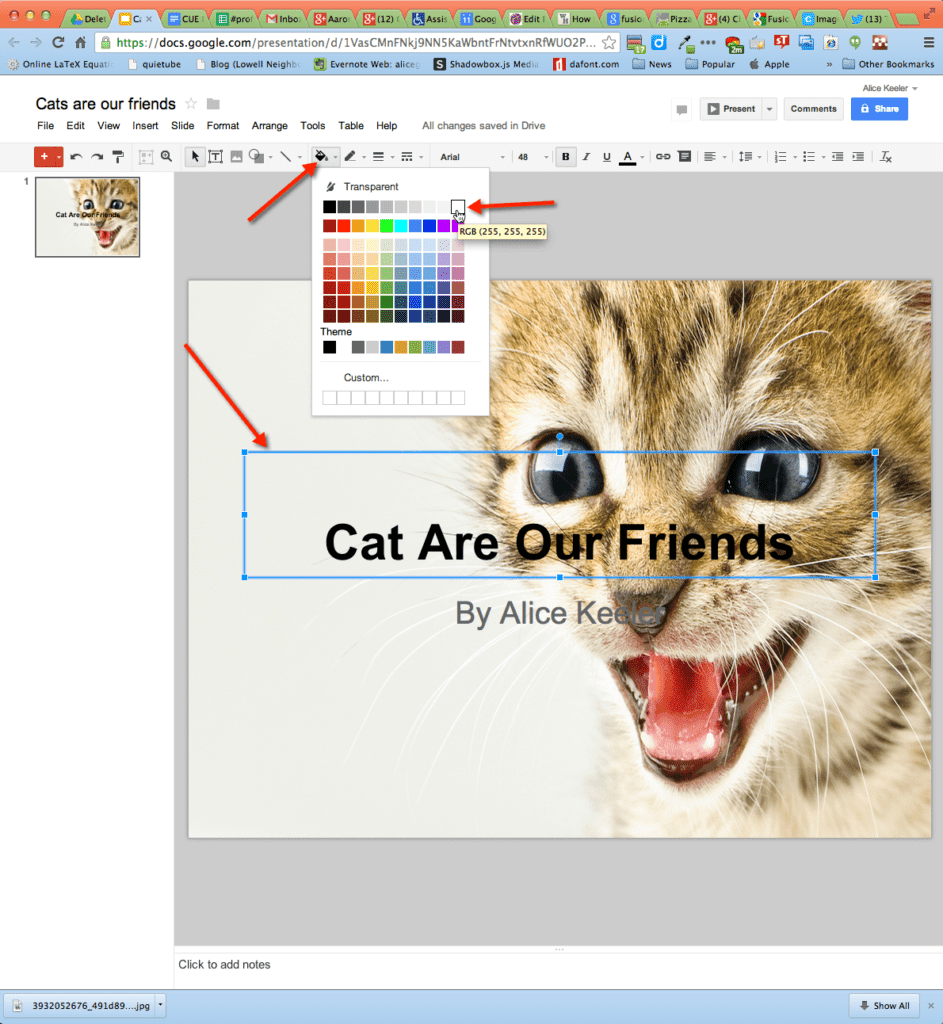
You may be thinking this looks terrible, but there is one more step!

Step 13
Select the text box again, go back to the paint can and choose “Custom…”

On the right hand side is the translucency slider. Decrease the opacity of the fill.
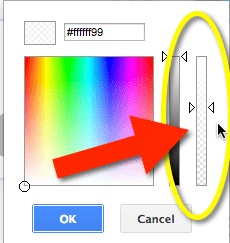
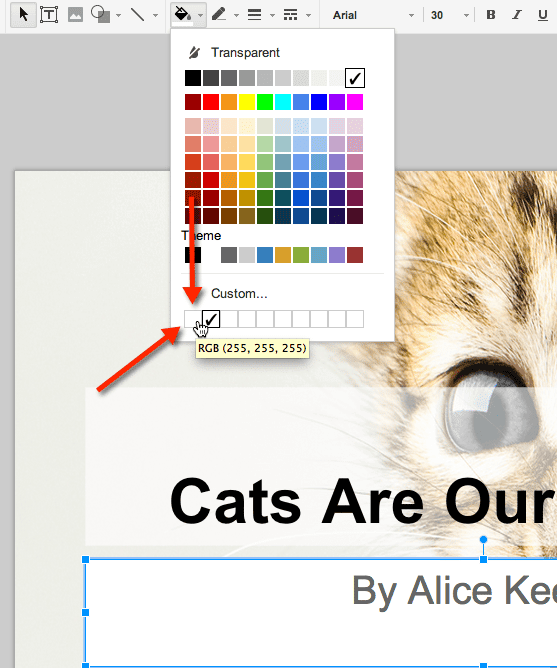
This gets a little easier with subsequent text boxes. The custom color is saved in the custom color tray. Instead of choosing a white background and then going back and customizing the translucency, simply choose the first custom color box. Notice that it does not look like anything is there since your custom color is white. But trust me, it works.
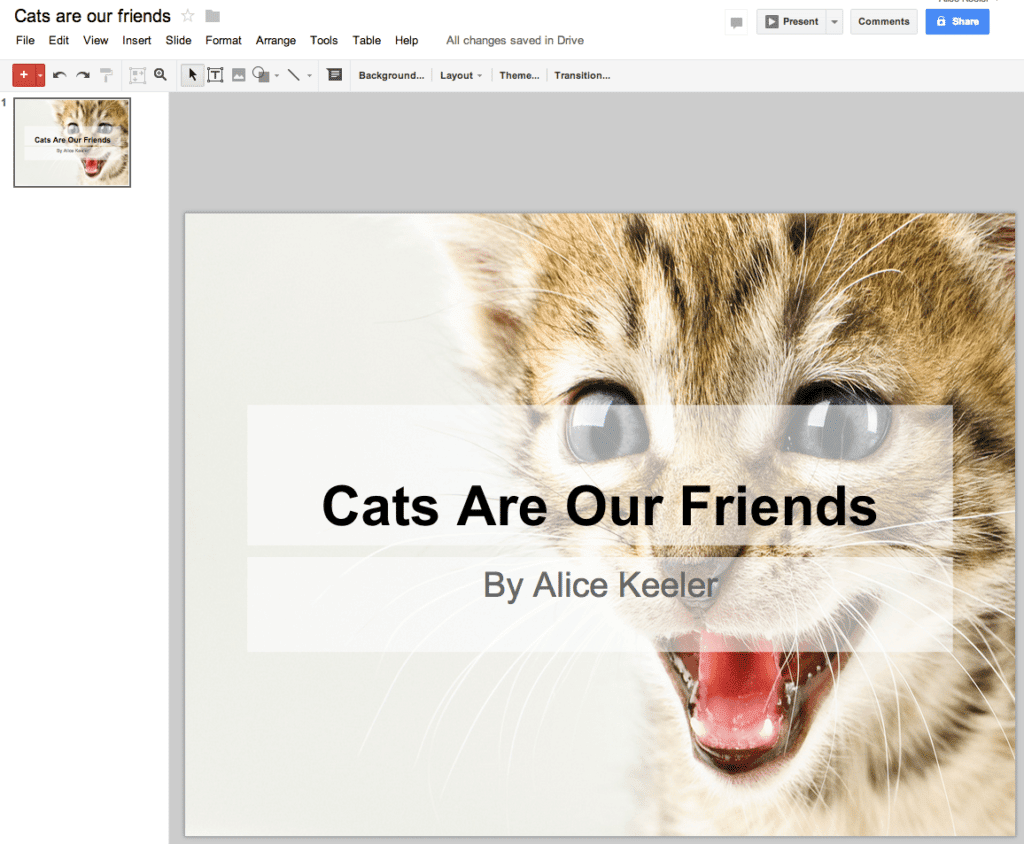
And your finished slide has a high quality image background, with a reduced opacity background on the text boxes that really helps your text to stand out!




3 thoughts on “Creating Slides for a Presentation”
This is great! Thanks for sharing!
compfight is new to me – and I am such a slideshow snob. this is great – thanks for putting it together 🙂
I also like how you use the Creative Commons for attributions. I’m going to use your tutorial
to teach that to my S’s.