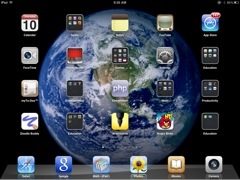
Last Monday I lead a training in Hollywood for how to use your iPad to teach math. The assumption was that the teacher had an iPad and the students did not. This has been my reality ever since the iPad came out, I got the iPad 1 the first day it came out. Just yesterday all the students at my new school were issued iPads so now I am in a 1-1 situation. I’m excited for the change in dynamics in my classroom. I’ve decided to do a blogging series on using the iPad to teach, drawing from my experiences.
Here are some of the suggestions I gave at the Hollywood training
- Use the free graphing calculator app to create graphs. Hold down the home button and the power button at the top to create a screen shot. This gets you images of graphs easily.
- Set up a wordpress blog on www.wordpress.com and use it as an FAQ for your class. Download the Wordpress app to your iPad. The app makes it easy to post to your blog from your iPad. Use the camera on your iPad to take pictures of your notes from the board, from paper, from the book, student work samples, etc… In the wordpress app tap on the picture icon and insert the pictures into a blog post. This gets your notes onto the web super quick. (note, I want to encourage you to use categories and tags with all your blog posts to keep it organized)
- Use the sundry notes app to create notes. These notes can be exported as a PDF and shared with students. What is nice about sundry notes is that it allows for you to insert clips from the web, insert math symbols, insert graphs, have a shared drawing space with another iPad user, to draw, to insert text. Trick for this app is to hold your finger down on the paper and to not lift your finger but to drag to what action you want to execute.
- Create google forms for your students to fill out. Pass around the iPad for students to fill out the form. I use this just to gather information from my students, but I can use this as a station also. Set up the form where the students will enter their first and last name, their period, SID, and their email (or whatever info you want to collect) and then have a field for them to fill out the answer to the questions at the station. Then you do not have papers to grade. All the answers go to a single spreadsheet for you to easily grade. Use the flubaroo script in google spreadsheet to grade it for you if you want.
- If you are using a Google site for your classroom website, create an announcement style page to list what you are doing everyday. For the daily post use a 2 column layout. On the left side insert instructions, questions, YouTube video, etc… And then on the right column insert the Google form for the student to answer questions based on what information you gave them on the left side. This does have to be done on your computer. However this is how you can set up your station with the students using the iPad as a station.
- Use a website such as www.quia.com to create practice activities. I like to create a question bank of questions to reinforce a key concept and then have a quia quiz choose a random 3-5 questions that the student has to get 100% on. If you have a student who is struggling with a concept, especially pre-requisites, they can use the iPad to practice that concept until they master it. Quia also lets you make games such as jeopardy style, who wants to be a millionaire, etc… So you can easily make fun practice activities that students can use as a station or reinforcement. (I have a group subscription for discount pricing, email me mrskeeler@gmail.com if you want in on it)
- Set up your email in the iPad, use this to keep you from needing to be at your desk.
- If you’re going to let students use your iPad (I recommend) think about creating a gmail account where you do not receive confidential emails. You still want to be able to email from iPad. I like to take pictures of student work and email it to parents to show how good they are doing (or possibly the converse). It is also a good way to capture work samples for IEP meetings. Create a photo folder on your computer for student work samples. Name the photo by the kids name so you can find work samples easily if you have a parent meeting. Walk around the class with your iPad taking pictures of student work samples frequently.
- Use iPad as a QR code reader. You can create a bulletin board of QR codes that link to websites, Quia activities, Khan Academy, etc… For support activities. When you realize a student needs help with…. Snap the QR code with your iPad and hand the kid the site with the info or practice they need. See my QR information site at alicekeeler.com/qr
- Use the PresenTimer app to time your activities in class. It creates a large timer that will ring a bell at 3 different time intervals to help keep you and your class on track. I’ve had it sit on my desk and as kids bring up their activity they see how long it took them to complete the task. It was a good motivator for students to keep moving.
- I like to do my lesson plans on Google Docs, but even if you do them on Pages on your iPad this keeps your lesson plans close at hand. I have them near me as an outline as I go through my lesson to make sure I am on track and cover everything I want to cover.
- Look up YouTube videos on the spot to share with students when off topics arise.
- If you email yourself a PowerPoint it opens up very nicely in the keynote app. This is great as it allows you to go through a presentation in a small group setting.
- iBooks: Download free books to your phone. You can highlight key passages from the text and a list of your highlights are created. This can create a great resource for you and also for your students.
- ePub: Many books are available in an ePub format, this downloads the book to your iBooks so you do not need an internet connection to access the book.
- CK-12 Flexbooks: www.ck12.org has free textbooks (mostly for Science, Engineering and Math) that can download to your iPad. You can also edit your own flexbook to customize the chapter order and even go in and edit all of the content to fully make it your own.
- Create QR codes that link to additional information outside of the textbook. A website, YouTube video… yourself (that you recorded with iPad camera), etc… that will give the student more information than what is listed in book. Use the iPad to help students access the now interactive book.
- Go to http://images.google.com on your iPad and search for almost anything you’re teaching. You’ll be able to come up with images that pertain to your topic. Hold your finger on the image and it will allow you to save that image to the photo library. You can then import that image as a background into apps such as Doodle Buddy, Show Me, Sundry Notes, and more. This allows you to annotate over the image and quickly make resources.
By the way, I created this blog post on my iPad using the wordpress app.


3 thoughts on “Teaching with iPad”
Consider using algebra touch. Beautifully designed app that allows students to manipulate equations.
I have a 2 students to 1 iPad ratio. My 2nd graders can make their own videos in iMovie , create ebooks in create a book app, do research, and learn with games.
When I got my first iPads my kids used them not me. I actually feel a little guilty using on for myself, but my iPhone is just to small to read in a glance.
I really like the idea of uploading my plans to google docs. I’m going to use the presenter app. I’ve been looking for a good app for timing centers.
Thanks for your blog! I really respect what you’re doing here.