Tie Dye Your Google Classroom Header
In Google Drawing and Google Slides you can now customize the gradient to create a “tie dye” effect. Use my Google Drawing template for Google Classroom headers to create a tie dye effect! Note: this does NOT work on mobile devices. Google Drawing only works on a Chromebook, Mac or PC.
Template
Steps
1. Make a copy of the template
Use the above link to create a copy of my Google Drawing template.
2. Right Click
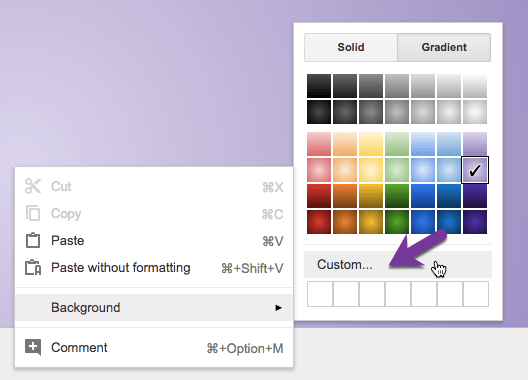
Right click on the drawing canvas to choose “Background” and click on “Gradient.” Choose the gradient color you want to start with.

3. Right Click Again
You want to customize the gradient. After choosing the gradient to start with you want to click on “Custom.”
4. Decide Type of Gradient
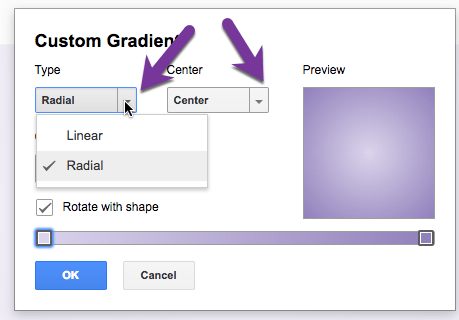
Once you choose “Custom” there are many options to choose from. Choose Radial or Linear and the direction you want the gradient to go.
5. Click on Gradient Stops
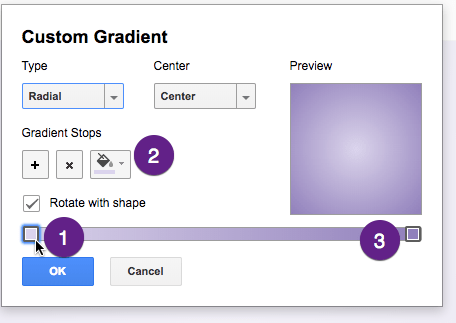
To change the start and end color of the gradient you want to click on the gradient stop on the left and then right side of the color line. Change the color with the paint can.
6. Add a Gradient Stop
Notice the plus icon that allows you to add a gradient stop. This will add a circle to the color line. DRAG THE CIRCLE to adjust the placement of the gradient stop.
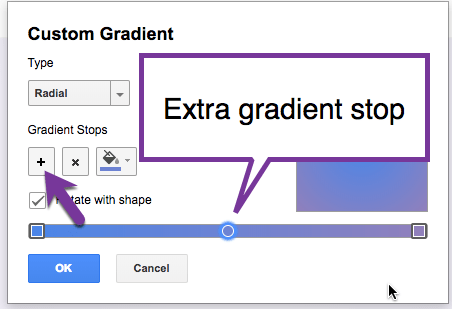
Click on the paint can to choose a different color.
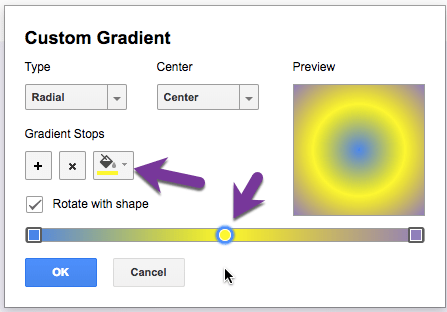
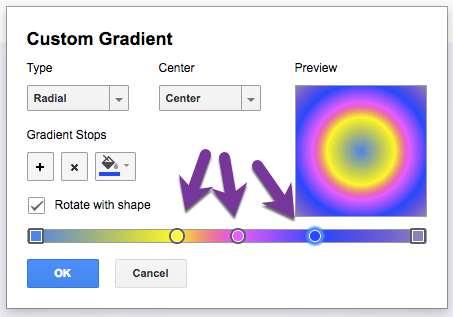
7. Add More Gradient Stops
Get crazy with it!!! Add more gradient stops!
8. Add Your Bitmoji
Okay, this is not required 🙂 If you have the Bitmoji Chrome extension you can DRAG it onto the drawing. Tip: Only put graphics on the LEFT hand side of the Google Classroom header. The right side of the header gets cropped off on small screens. The middle is covered by the class title.

9. Download
Use the File menu and choose “Download as” “PNG.”

10. Upload Photo
In Google Classroom, click on “Upload photo” up in the right hand side of the header.

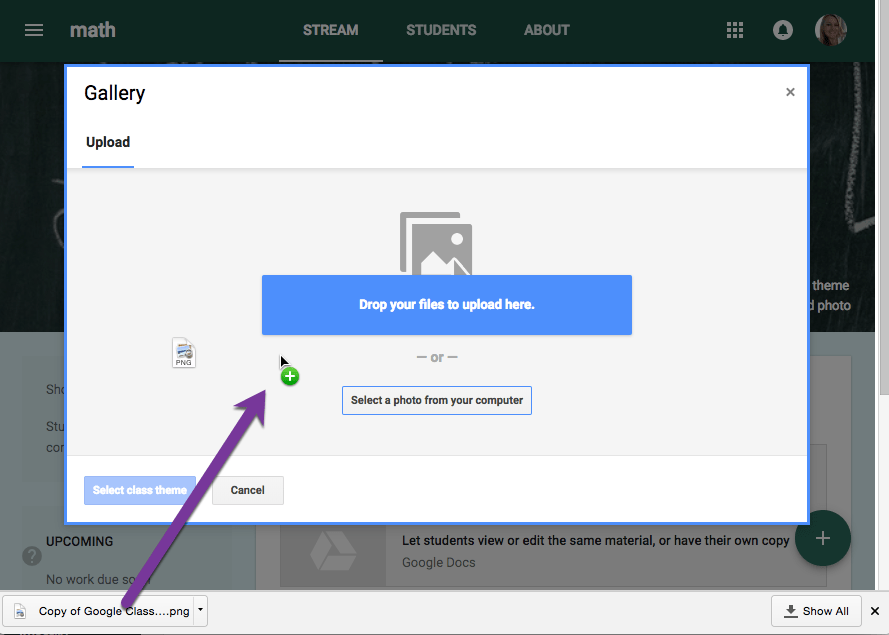
11. Drag from Download Bar
Tip: When you use Google Chrome to download the image, it downloads to the bottom of the window You can drag from the download bar to the upload window.
12. UnCrop
The default for Google Classroom is to want to crop your image. You want the WHOLE THING!







2 thoughts on “Tie Dye Your Google Classroom Header”
How fun!
I did it! Love it…Thanks!