If you are a user of Google Slides presentation tool you may want to take it to the next step and create your own templates instead of always using the default theme. One reason to do this is for student projects. If you have a particular way you want students to put their project together, creating a template for them to use can help them to focus on the content rather than the font choice.
Step 1
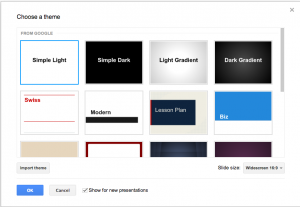
Create a Google Presentation. Choose the Simple Light template.
Step 2
Decide what design pattern you want for your template.
You may want to create a Google Drawing or use another editing program such as photoshop to create your designs. I will create my base design in a Google Drawing and then File->Download As->PNG. After downloading I create boxes or circles with reduced opacity to create different types of slide backgrounds that go along with the theme.
If you are using Google Draw go to the File Menu and choose “Page Setup.”
Choose the page size to be Widescreen 16:9 to match the default size of a Google Presentation.

Step 3
Under the View menu choose “Master.”

Step 4
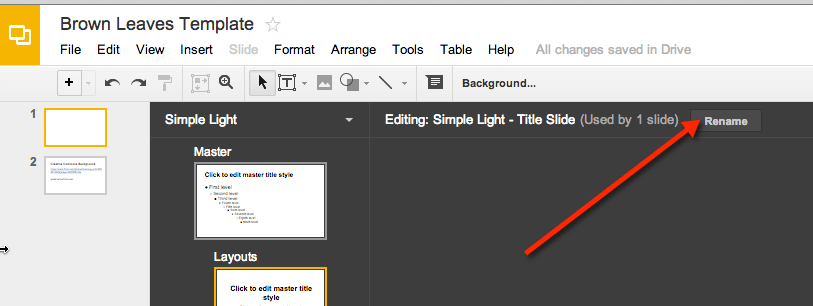
Rename the slide template from “Simple Light” to whatever you would like to call it. Notice the small lettering above the slide master slides.
Step 5
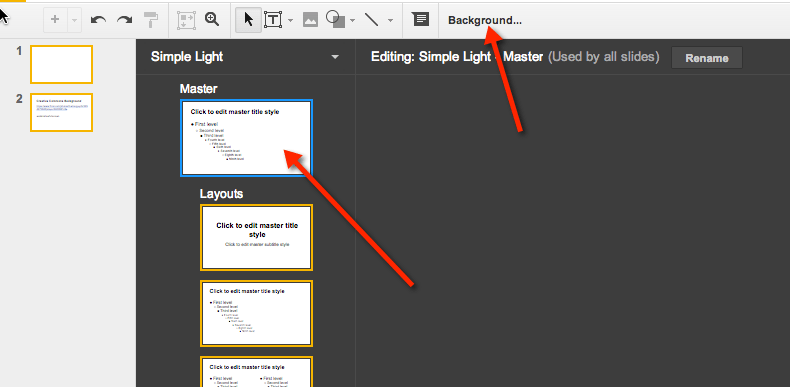
Click on the Master slide. By default you are taken to the first layout slide, you want to click on the slide master titled “Master” above that.
Step 6
Changing the background of the “Master” changes the background on all of the layout slides. Click on background in the toolbar to upload an image for the background.

Since this slide is the “Master” slide, anything you put on this slide will automatically appear on all slides. Change the font color and size on this “Master” slide and the font styles will be applied universally across the presentation.
When I am giving a presentation I want my handout URL to be present on each slide so that people who come in late can still get to the handout. I put this link on the master slide so I only have to type it once. Also, if I want to update the presentation for another presentation, I only have to edit the “Master” slide rather than editing the entire presentation one slide at a time.
Step 7
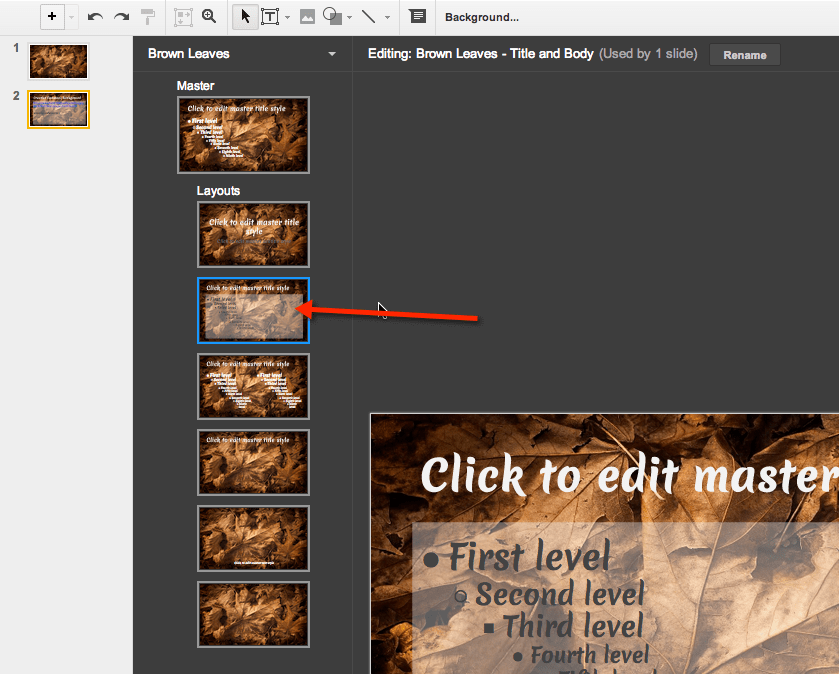
Click on the different layouts underneath the “Master.” You can change the default font, add lines and other design elements there. You can also click on the background link to change the default background from the slide “Master” background.
Step 8
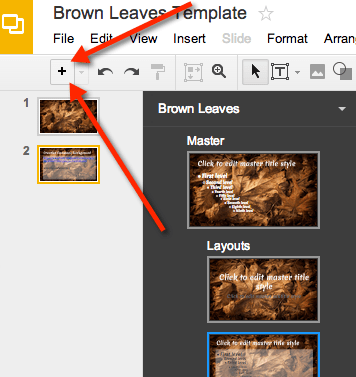
You can add NEW layouts by clicking on the plus button. While you are in editing the master mode, anything you click in the toolbar will affect the master layout’s.
Step 9
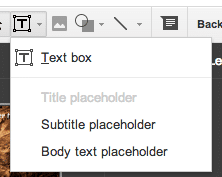
If you want to add a text box to layout choose one of the placeholder options from the drop down list of Text box options. Choosing the plain “Text box” will create a text box that can not be edited when you insert the layout. Only use “Text box” if you have font that you for sure want on the slide, such as the name of the conference you are presenting at or your website URL.
Step 10
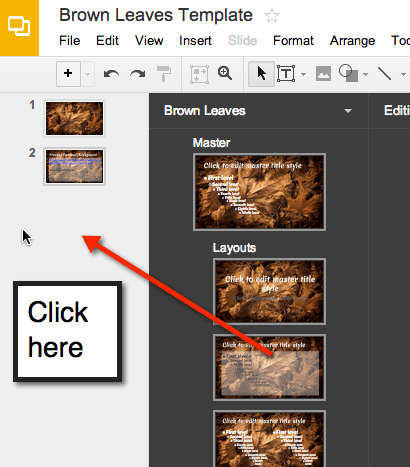
When you are done editing the master layouts and inserting new layouts, simply click on the left side below where the slides are. Essentially you are clicking out of the master editing. There is also an X in the upper right hand portion of the master editing portion that will exit you.
In the Presentation
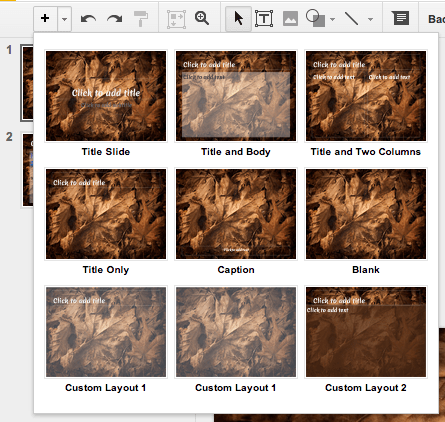
In the presentation when you go to add a new slide, the new layouts are now ready for you to use. No more changing the font style on each slide or having to copy and paste a previous slide!
Want to find templates? Go to http://drive.google.com/templates. On the left hand side is an option for Presentation Designs. There is quite a bit of “junk” in there though, people adding their random messing around to the template gallery. Make sure you rate templates you like to help the cream rise to the top.
If you find templates you like please add them to this list: http://goo.gl/v7xCv4
The spreadsheet is set to anyone can edit, add the presentations you think other educators would be interested in. Click on “Preview” in the template gallery and copy the URL to that template to paste into the spreadsheet.

Link to templates I have added to the template gallery: Click Here



9 thoughts on “10 Easy Steps: Creating Presentation Templates in Google Slides”
Can I translate your posting and share it in Indonesian. Can you permit me?
Please give me credit 🙂
This was all good, but when I go to a new slide doc and go to themes, my new theme I built is not there.
It does not add it to the gallery, you need to make a copy of the presentation. Create the template and then before you make your presentation make a copy.
How did you manage to get the textbox opaque/transparent (as shown in Step 7)? I’ve managed every step but that…
Reducing opacity is the same in Drawings and Slides:
https://alicekeeler.com/2013/04/28/opacity-in-google-drawing/ or
https://alicekeeler.com/2013/07/27/reducing-opacity-on-an-image-in-google-draw/
Great tutorial. It’s hard to find this info in Google help. As i understand it, there’s no way to add the template to your standard templates, which is a pity. I use the import function that appears when you start a new presentation in stead of copying the template, but thats much the same I guess
Thank you! Do you know if there is any way to easily apply a theme to a slide and have it reset the fonts/colors? I keep copying text into my presentations, and it keeps the original formatting. I have to painstakingly figure out all my fonts again to make the slide look right. I’m about ready to quit using GSlides and goes back to PPT.
YES! Make your edits in the slide master!