
Please feel free to use this poster with students or to train teachers. Please do not publish it to your blogs or public sites or in other publications.
6 Steps to Get Started with Google Classroom
Click Here to link to Google Drawing.
I was working with a group of teachers yesterday getting them set up with Google Classroom. I created this poster after the session to remind them of some tips I gave them of where to start and to build up to. I have a blog post on “10 Things to Start with in Google Classroom” and “Google Classroom: 8 Essential Tips Infographic” that might also be helpful.
Using Google Classroom to distribute worksheets does not change the learning environment, it simply makes it more efficient to pass out things. It takes time to learn a new tool and a level of frustration as well. Technology does not always work correctly; this can lead to frustration as well. My philosophy is that when introducing a new technology tool it better make for a better learning environment to make all the time and hassle worth it.
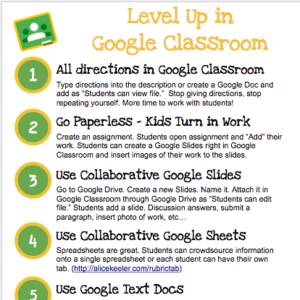
1) Stop giving directions
Post your directions in Google Classroom. All of them. Stop giving directions and stop repeating yourself. Information should not be ephemeral. Students who are absent or not paying attention miss the directions. This causes frustration on both ends. Even students who are paying attention can not memorize every word you say.
Posting directions in Google Classroom allow students to start immediately working. If they are not waiting for directions, students have more time in class to be actively involved in their learning. This allows you to spend more time working with students. Posting all directions in Google Classroom also makes a sub day a lot less stressful. Students are already used to getting their directions in Google Classroom rather than from the teacher. A sub day is no longer a lost day of learning.
Tip
Create a Google text document with the assignment directions and attach it as the first asset in Google Classroom. This allows you to format the text and insert images.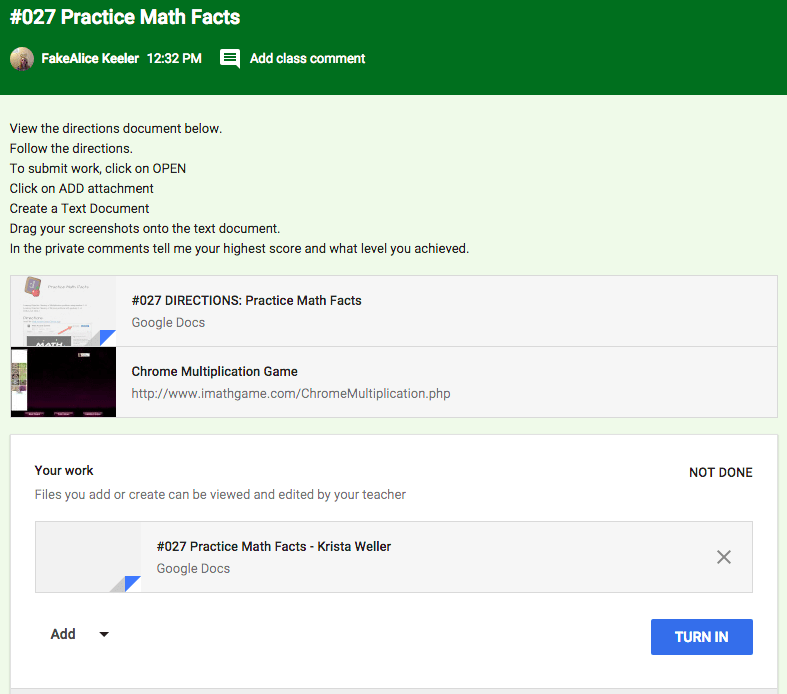
2) Have the students do the work
You do not need to create templates, worksheets or graphic organizers for students to use Google Classroom. Students will click on “OPEN” in Google Classroom and use the “ADD” attachments option to attach screenshots of their work or documents they have created. Students can also create a blank Google Doc right from Google Classroom. By creating blank documents from the “ADD” attachments option, the document is immediately available to you. You are able to view student work and provide feedback before the due date.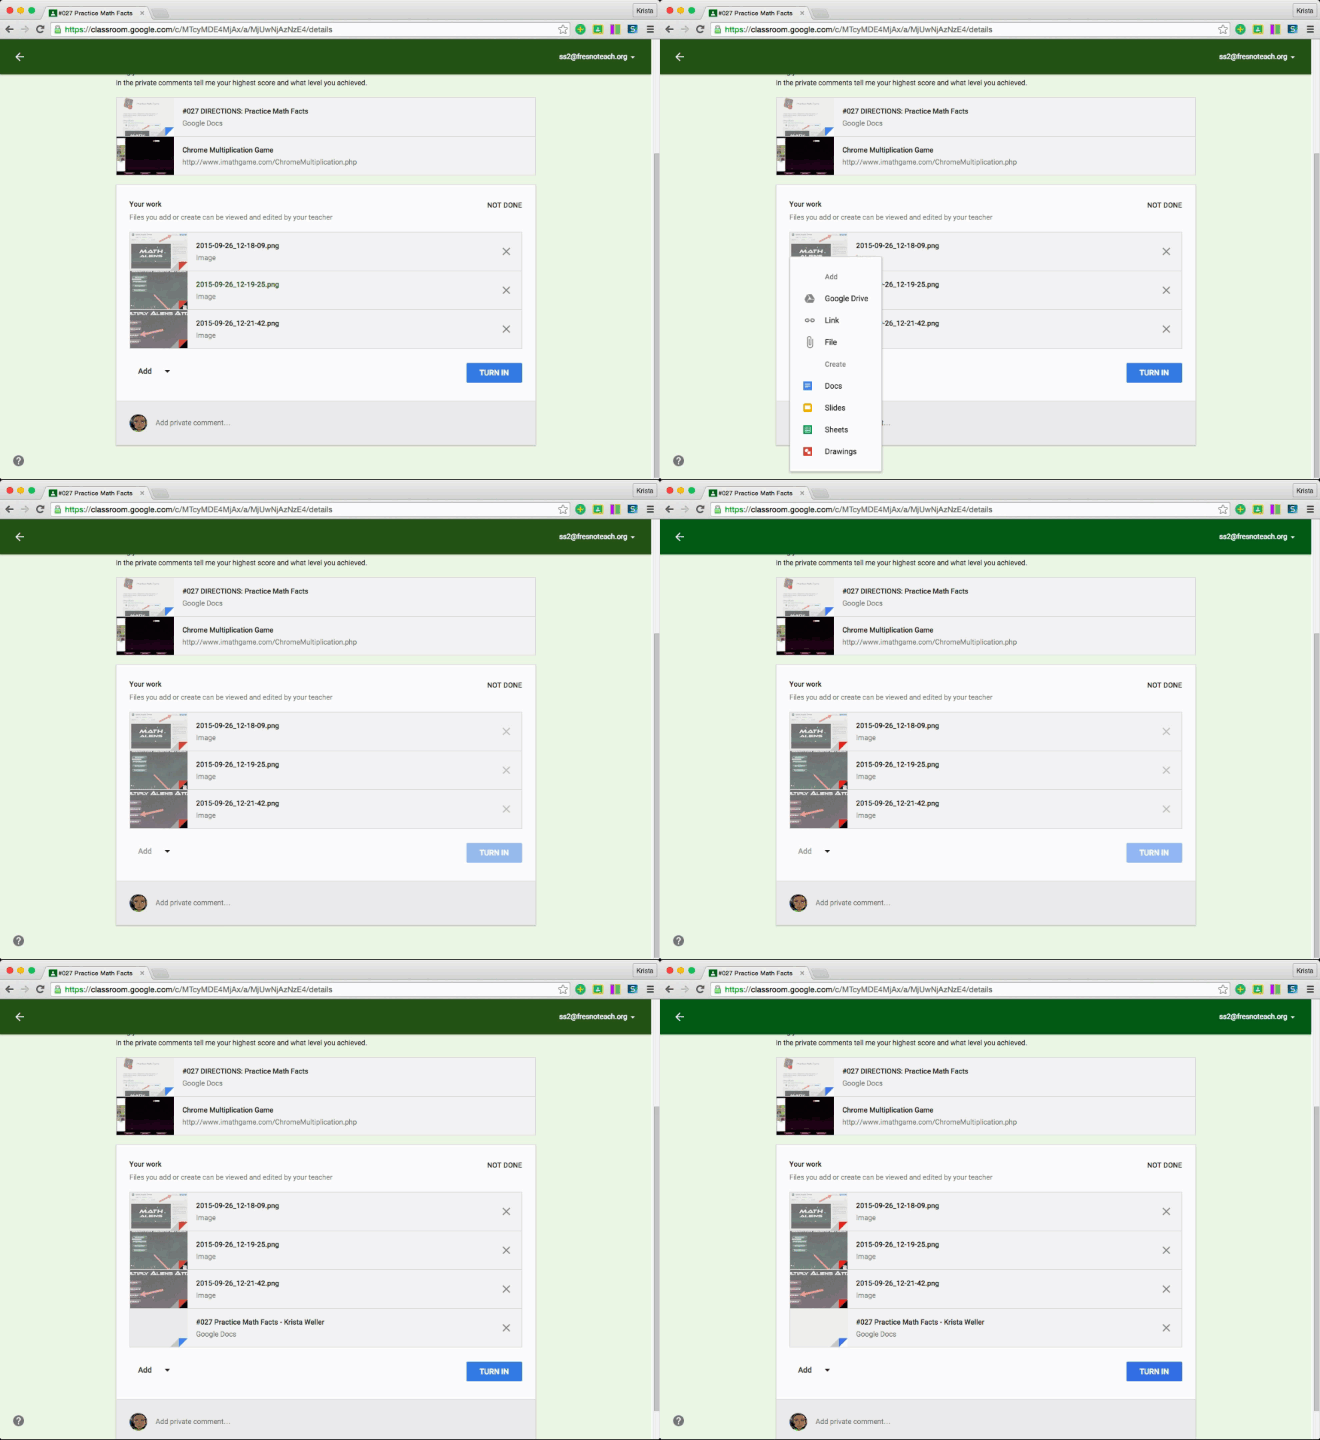
3) Use collaborative Google Slides
Learning new technology should feel like it is worth it. Having students type on a text document does not feel different than students write on paper or using other word processors. The big advantage to using Google Apps is “collaboration.” While students can collaborate on Google text documents, using Google Slides feels magical. Using Google Slides allows you to see all the students work at one time. It is less steps to create and share a collaborative Google Slides with students through Google Classroom than it is to learn how to annotate PDF’s and distribute to students.
Start with Google Drive. Click on the “NEW” button and choose “Slides.”
Name the Slides presentation. Leave the slides BLANK!
Close the presentation.
Go to Google Classroom.
Create a new assignment.
Select the Slides presentation you just created.
Change the viewing permissions to “Students can edit file.”
Press “ASSIGN.”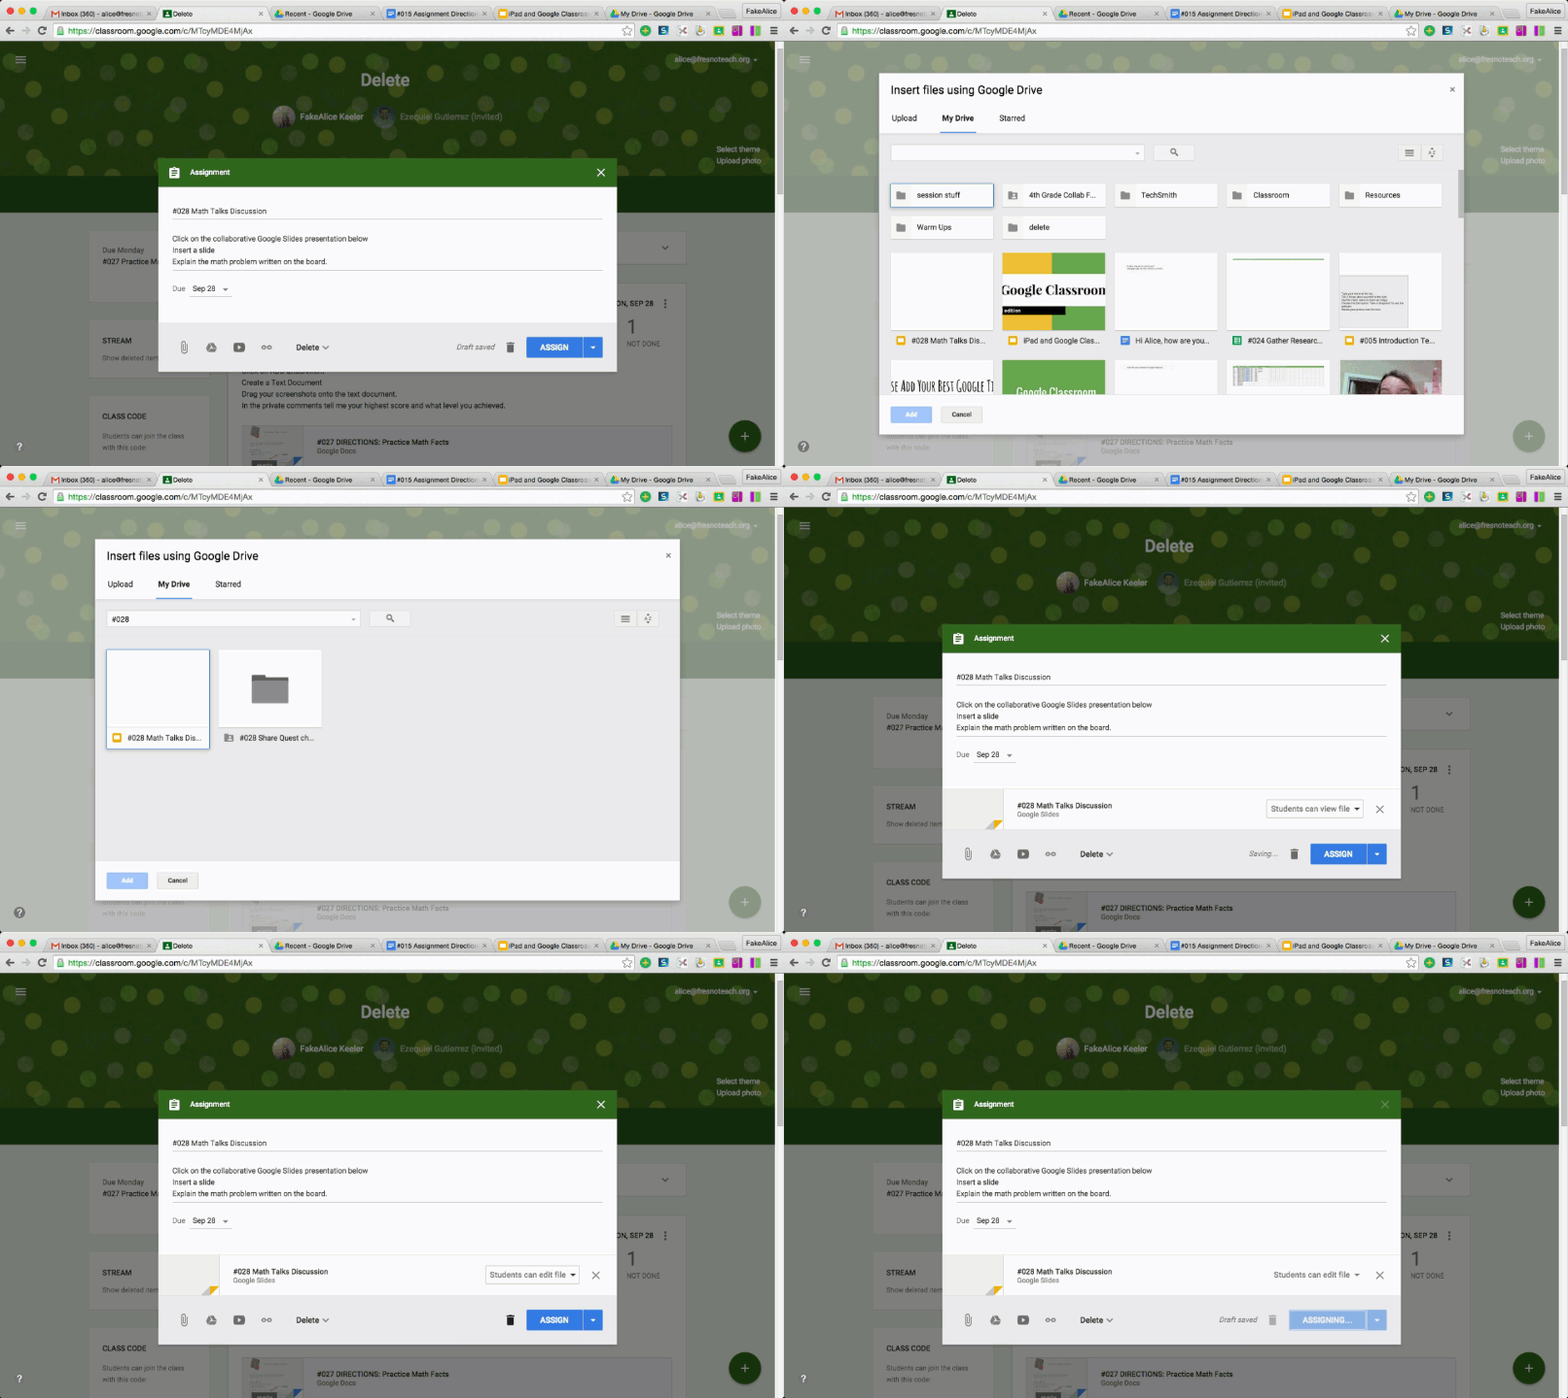
Collaborative Google Slides can be done for almost any assignment or activity. Think of the slide as a single page or a canvas. Students can write on the slide, draw on the slide or insert pictures onto the slide. Students can even do their work on paper and use the insert menu to insert an image and “Take a snapshot.” Students hold their work up to the webcam and insert a picture of their work.
The Google Slides app on mobile devices is amazing. Students are able to easily open the collaborative Google Slides presentation from the Google Classroom app on their mobile device. Using the camera feature, students can insert pictures of their work or screenshots of their work.
Do a lot of activities using collaborative Google Slides. This will allow you to regularly integrate collaboration into your lesson plans.
4) Use collaborative Google Sheets
Once the kids are screaming to have you do anything else besides collaborative Google Slides, move onto Google Sheets.
Spreadsheets are an important tool for anyone in a management position. Having students use spreadsheets is an important life skill. Google Sheets, like the other Google Apps, is collaborative. Students can work on the same document at the same time. Google sheets is great for collecting student ideas to start a discussion. Instead of having students raise their hand to share on a discussion topic, all students can contribute their idea to the same spreadsheet. This allows all students, including quiet students, to have a voice in the discussion. All students hear from all students.
Like in Google Slides where each student can create their own slide, students can each do work on their own sheet. Students click on the plus icon in the bottom left to create a new sheet. Double-clicking the tab allows the student to rename the tab to their name. This again gives the teacher one document to look at in order to assess and provide feedback. Try out alicekeeler.com/rubrictab. This creates a tab for each student on your roster automatically.
The process for creating a collaborative Google Sheets is the same for creating Google Slides. Create a blank spreadsheet in Google Drive, name it, close the document, attach in Google Classroom as “Students can edit file.”
5) Use Google Text Documents
Giving students feedback before the assignment is due changes your comments from being punitive to being formative. As soon as students start to work on their document you have access to the documents.
Create a graphic organizer in Google Drive or ask students to click on “Add” attachments and create a blank Google text document. If you create a graphic organizer or a template in Google Drive, attach it to Google Classroom as “Make a copy for each student.”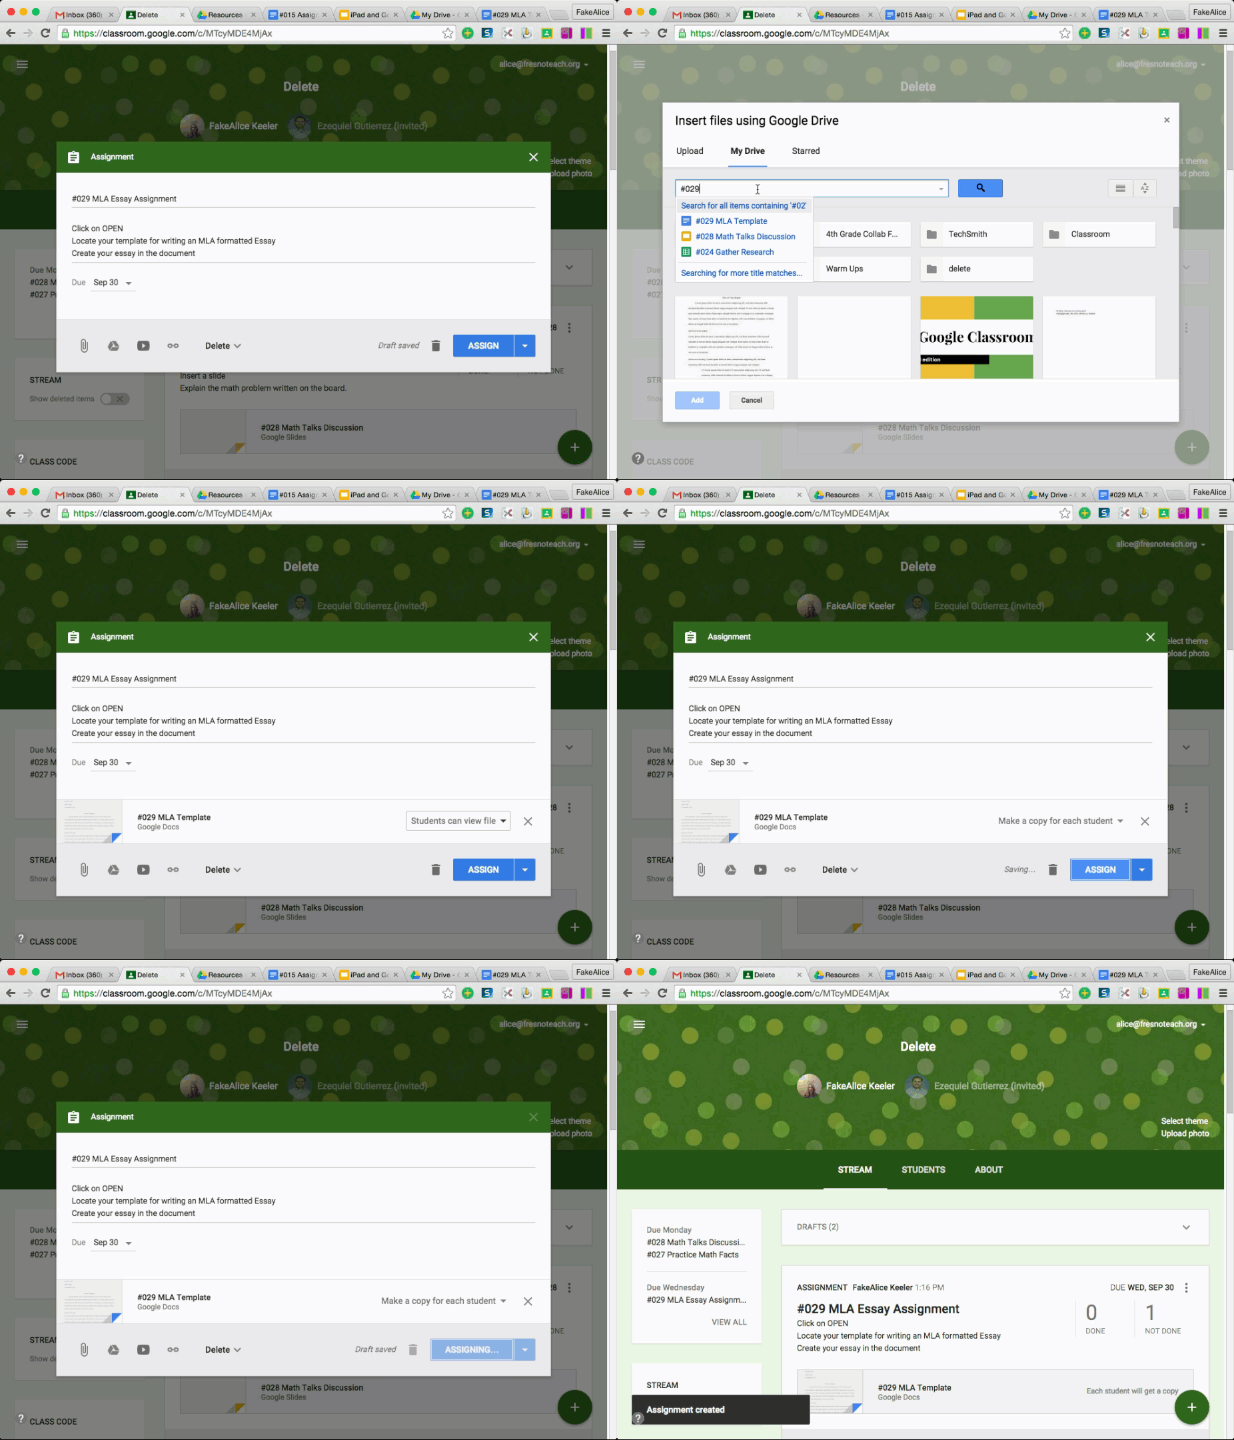
Once students access the assignment, click on the assignment title in the Google Classroom stream. On the right-hand side are tiles showing student documents. Click on the image of the attachment to launch the document.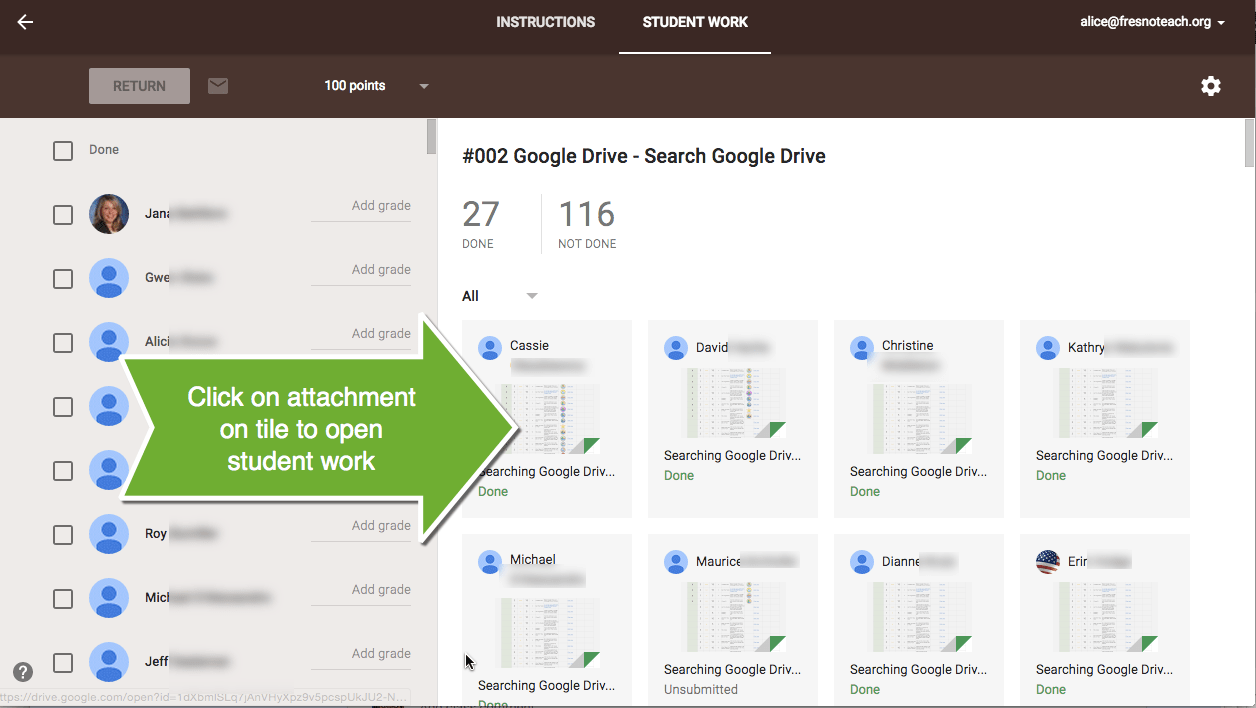
Insert comments by highlighting a selection of student work. Right click and choose “Comment” to insert a comment box.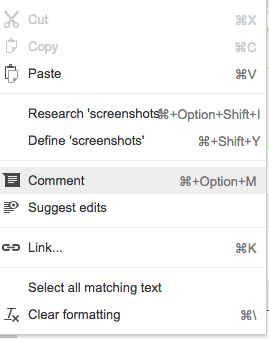
I highly encourage you to memorize the keyboard shortcut for inserting comments. This makes giving feedback much faster. Hold down the Control and the Alt key and then press the M key one time. (Command + Option + M on a Mac).
After typing the comment, use the keyboard shortcut Control + Enter to save the comment. (Command + Enter on a Mac).
You can quickly close the student document using the keyboard shortcut Control W. (Command W on a Mac).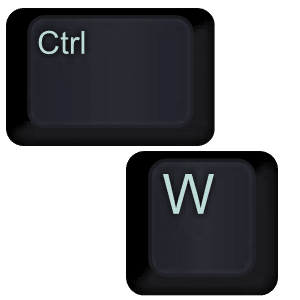
6) Use Google Classroom for everything
Google Classroom can help transform your class into a more collaborative environment, where students are more independent and receive feedback faster. Use Google Classroom as your central hub for all of your activities in your class.
Now that you have access to student work before the due date, consider creating feedback dates. Let students know you will be giving feedback on a certain day before the due date. They will want to have a rough draft completed by that time to allow you to give feedback to help students before they are done. Your comments and feedback mean more when you provide formative feedback.



2 thoughts on “Google Classroom: 6 Tips to Level Up”
We have middle school advisory groups. Mine is the only with a Google Classroom to contain our interactions. No more, “I can’t find that email. Did you share a document with me?”
Technology integration should be creatively designed, time-efficient, and meaningful, and I find your tips to meet those requirements. Google classroom is to be introduced at my school, and I appreciate all the information provided. Your thoughts and tutorials will make this change manageable. I like how you stressed how Google classroom is paperless, promotes student independence, ease, etc. I’m excited to read more.