


Thank you to Matt Miller (@jmattmiller) for creating this graphic.
Use DriveSlides to Review Student Images
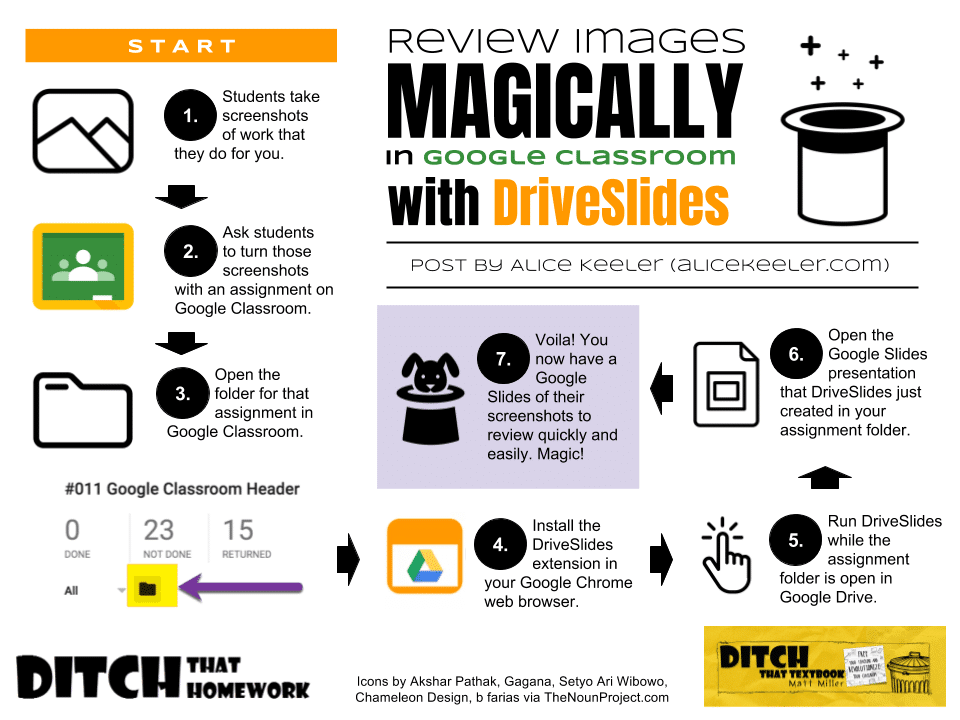
One thing I ask students to do is to submit screenshots of things as their evidence of completion. When students submit an image to Google Classroom it is automatically saved into an assignment folder in Google Drive. Using the DriveSlides Chrome extension you can with the single click of a button take those images and create a Google Slides presentation and easily view student screenshots.
Screenshots
There are many ways for students to take and submit screenshots to Google Classroom. Mobile users can take a screenshot by holding down the buttons on their device and the image is saved to the camera roll. In Google Classroom students tap on “Add attachments” to add a file from their device. The student can choose the screenshot as the attachment. This is automatically uploaded into the instructors Google Drive folder for that assignment. If the students would like to edit the screenshot before submitting, the mobile app Skitch is one option.
Chromebook users can use Control + Windows Switcher key to take a full screenshot. Control + Shift + Windows Switcher key allows them to take a partial screenshot. In Google Classroom students click on “Add” and choose the paperclip file icon to upload the screenshot from the downloads folder. (The Windows Switcher key is above the 6 key)

Chrome users can use a variety of Chrome extensions to take a screenshot, including QuickShare screenshot. QuickShare saves the screenshot to Google Drive, allowing the student to click on the “Add” button and choosing from Drive.
Google Classroom
In the Stream of Google Classroom, click on the assignment title where you asked students to submit their screenshots. Under the Done and Not Done count is a folder icon. This opens the folder of screenshots in Google Drive.

DriveSlides Chrome Extension

DriveSlides allows you to create a Google Slides presentation of images in a folder. The default is 30 images, you can right click on the extension and go to options to change it to 50. While in the Google Drive folder with the screenshots simply single click on the DriveSlides Chrome extension and wait for it to do it’s magic. A new tab will be brought up, Google Slides will be created, and each image will be added to it’s own slide.
View or Share
Having the students images in a Google Slides is handy just to quickly look at what was submitted. If you wanted to share a sample quickly with the class, simply press the Present button and project it. Alternatively, you can share the slides by adding it to Google Classroom with either view or editing access. I usually choose “Students can edit file” to allow students to insert comments on each other’s work.


