I have been loving using Google Sites to create tutorials. The autosizing of pictures, the easy insertion of items from Google Drive, mixing text with video and images, and other features that just make the process easier. Along the way I’ve discovered some hidden features of Google Sites that you might like to try!
7 Hidden Tips in the New Google Sites
1) Copy Header
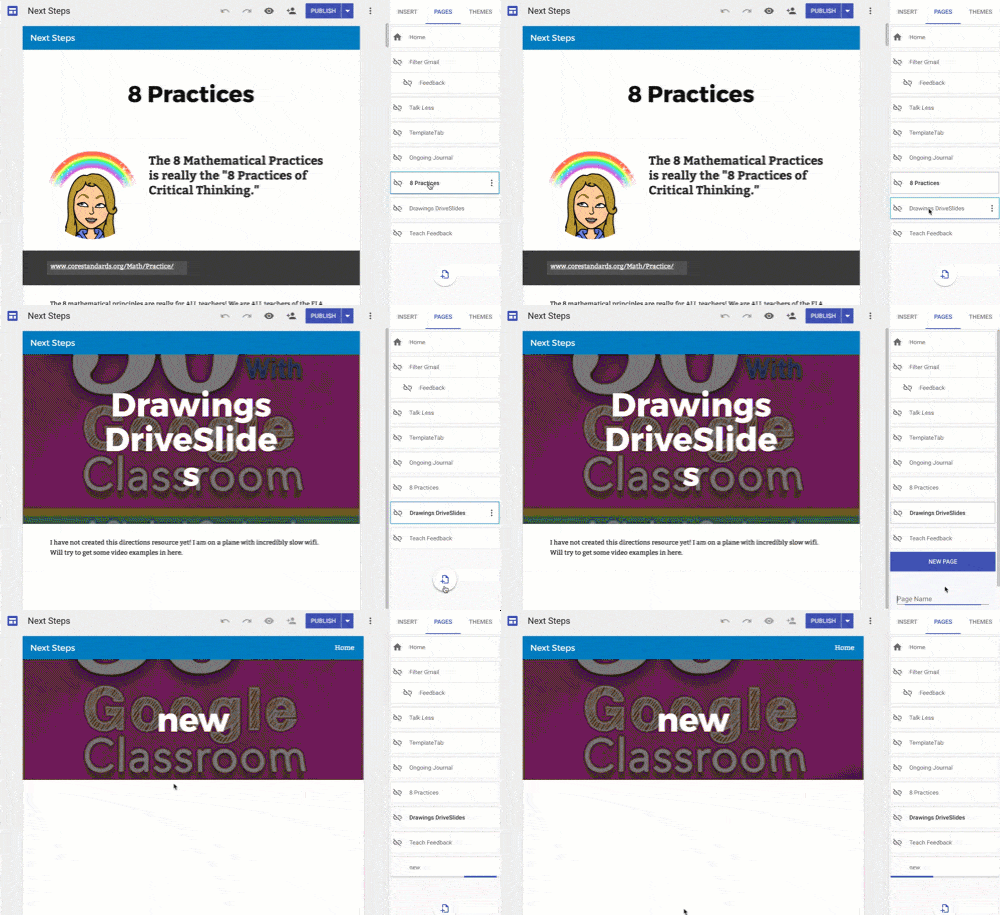
When you add a page to the new Google Sites, you get a blank header. If you want a common theme throughout the site the trick is to first click on the page that has the banner you want to reuse. Then when you click the plus icon to add a new page, the same banner is copied over.
2) Double Click
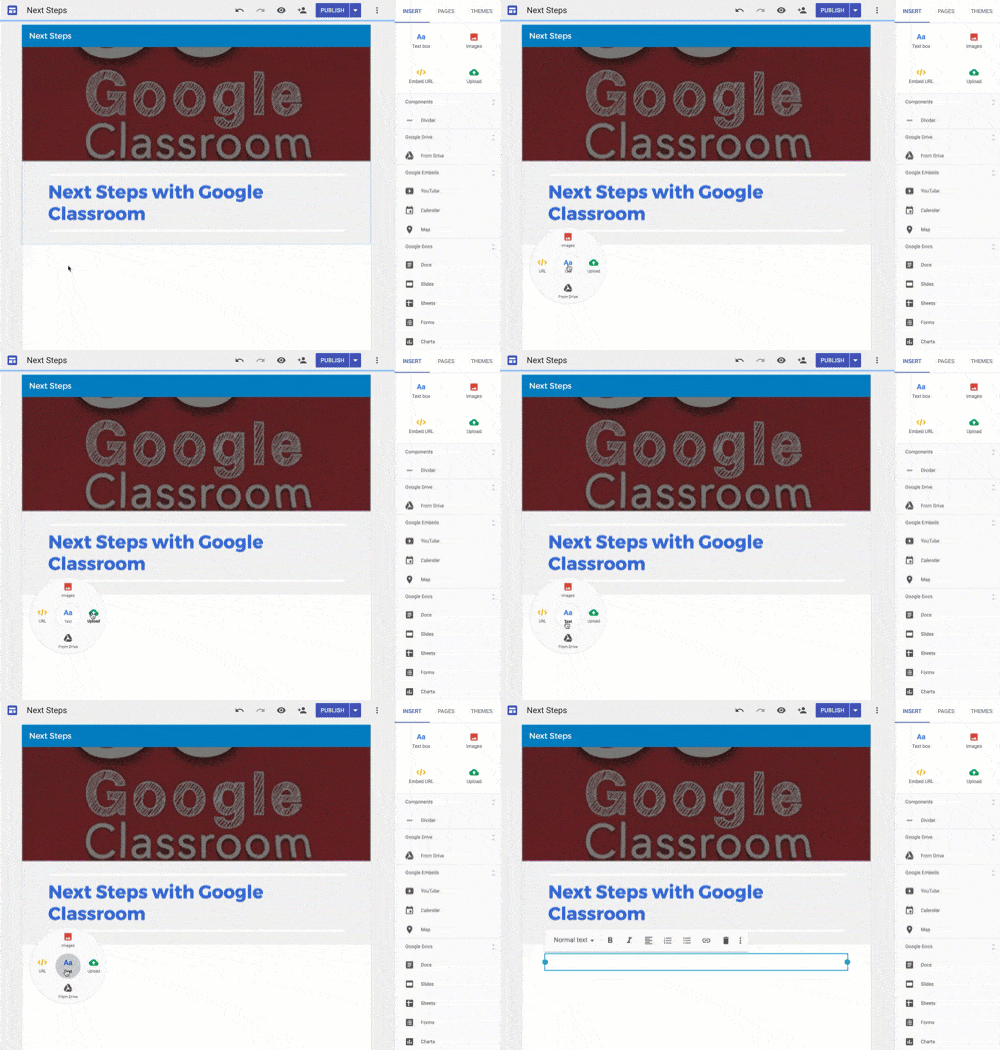
You can use the sidebar menu to insert things onto the page. But you can also just double click.
3) Insert Text Box
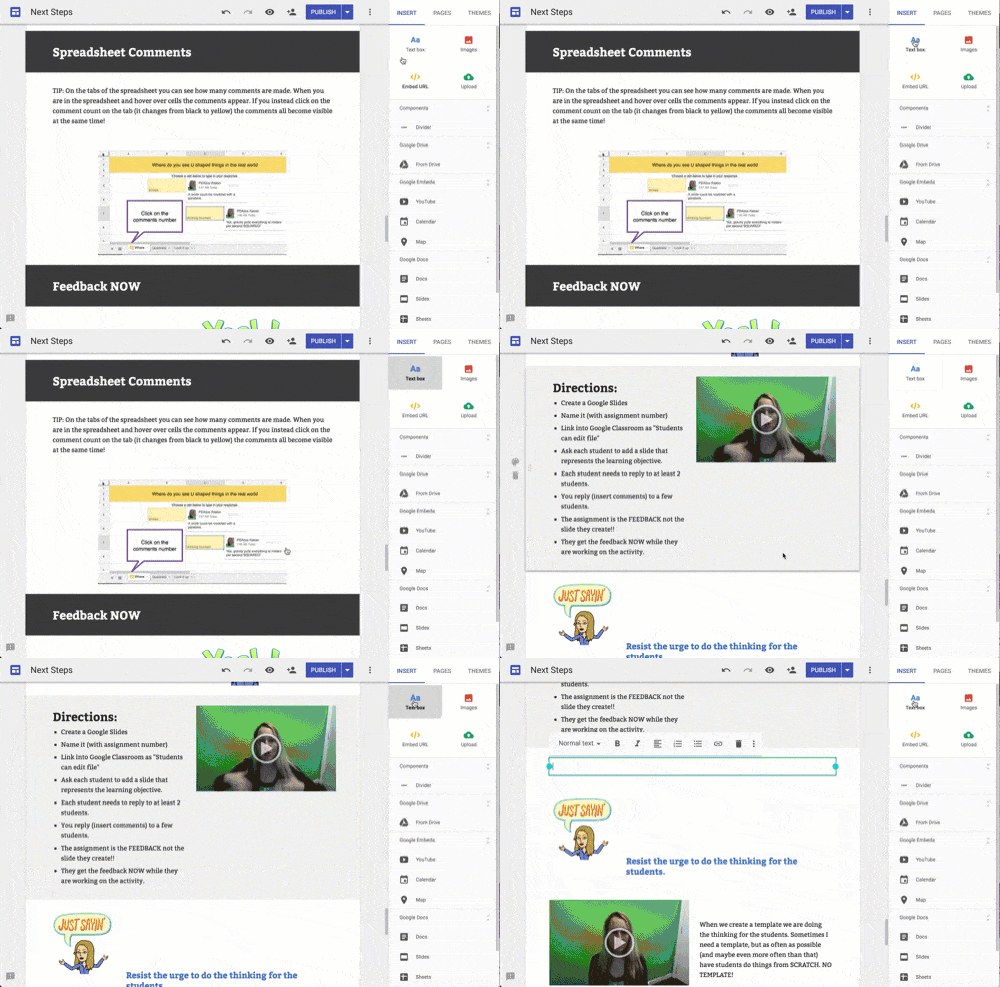
The trick to inserting a text box into a Google Site is to scroll to the spot where you want to insert the text box so it is just at the bottom of the screen. Text boxes are inserted at the bottom of the screen. This drove me crazy until I figured out the trick. Usually where I want to insert a text box is in the middle of the screen where I am looking. So if I just scroll a bit to put the spot where I want to insert the text box at the bottom of the visible window, using the sidebar panel and clicking “Text box” the text box goes where I want it. No dragging required.
4) Align Vertically
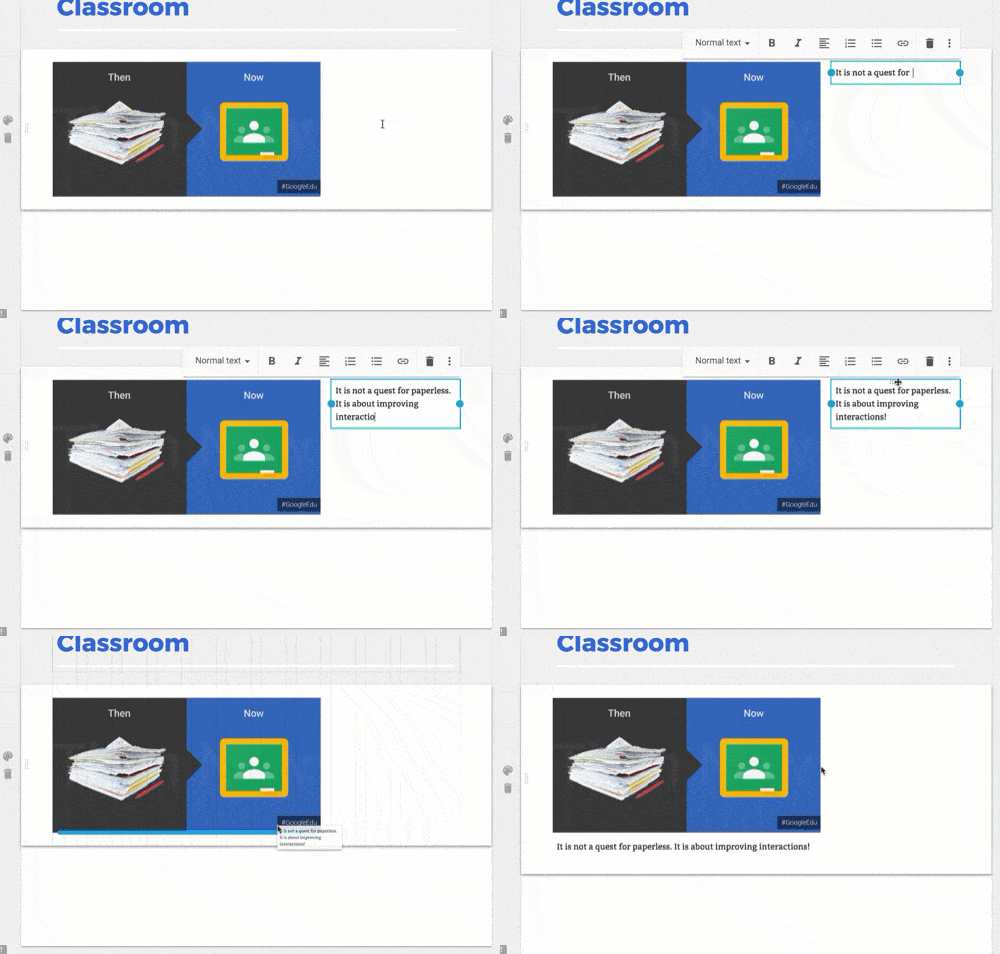
Up until recently you could only place items into a section on Google Sites horizontally. Now you can add vertically. Drag text boxes, pictures, whatever… UNDER something else. You can even put a text box under another text box within the same section.
5) Resize Embeds
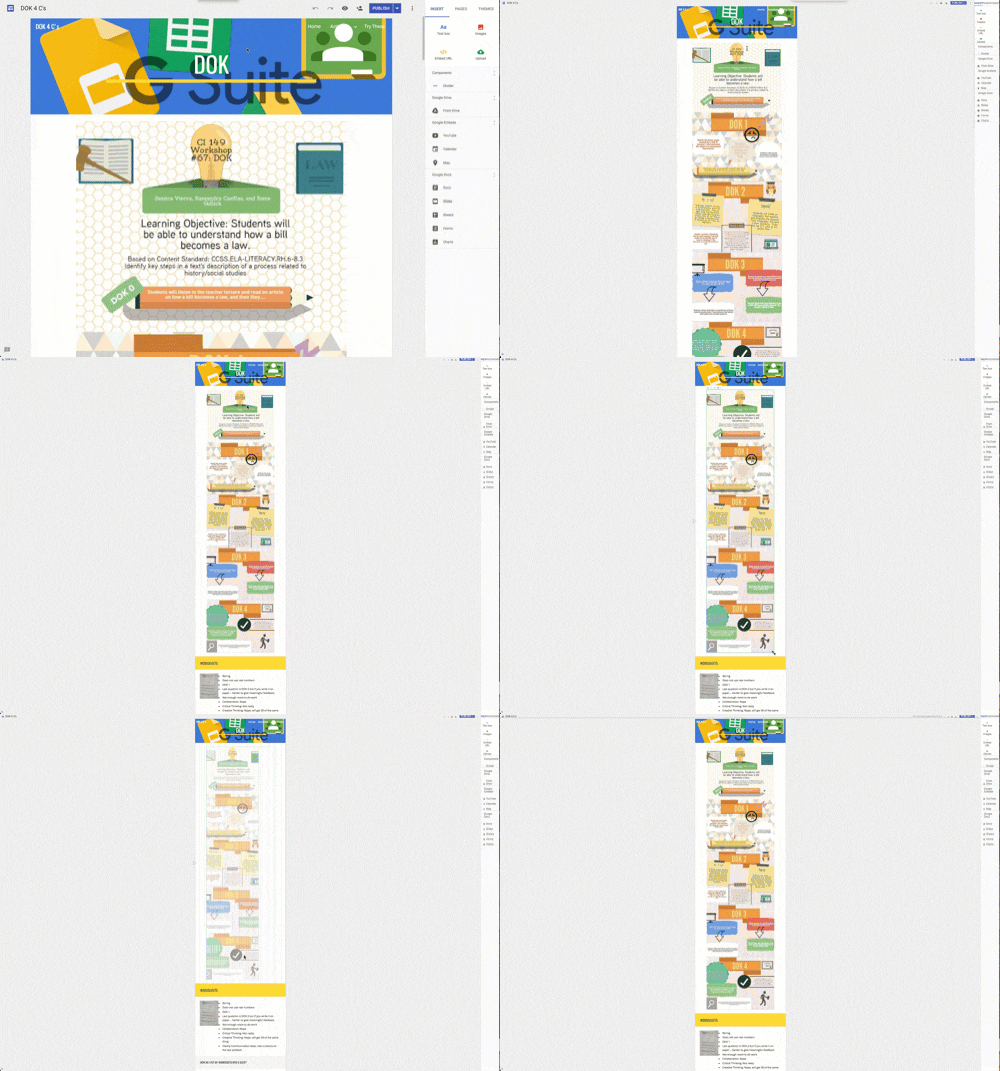
Sometimes when I am trying to add, for example, a Google Slides presentation I want it to be BIG. Google Sites seems to want to make me constrain it to the size of the window. Trick is to ZOOM OUT! I use the keyboard shortcut Control Minus a BUNCH OF TIMES until I am super zoomed out. Then I am able to use the resizing handles to make my embedded Google Slides as big as I want.
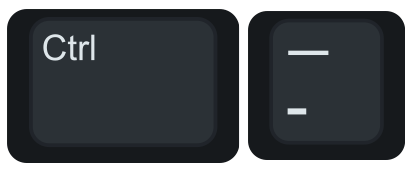
For example on this Google Site I made for DOK I had a very large infographic that I needed to size much larger than the visible window. To accomplish this I had to zoom all the way out and then stretch out the image so it fit the way I wanted it to. Use Control Zero to put the zoom back.
6) Google Drive Video
You are not restricted to inserting YouTube videos. You can use videos from your Google Drive! If you are using your school account you have unlimited Google Drive storage so fill it up with video!! I double click on the page and choose “From Drive” and then click on “Recent” in the sidebar (assuming I just recently uploaded the video) and insert the video right into the Google Site.
Set Sharing Permissions
Caution! Anything you insert onto a Google Site needs to be visible in your Google Drive. Remember that by default your files are PRIVATE! You need to change the sharing permissions. If you embed a Google Slides or a video from Drive it will look awesome to you because you have access to those items. Anyone else will not be able to view it on your Google Site.
Tip: In Google Drive create a folder for “Google Sites Videos” and change the sharing permissions to “Anyone with the link can view.” Now any videos you add to that folder (and subsequently to your Google Site) will be visible to the person viewing the site.
7) Hiding Pages
This tip is not so much a hidden tip but it’s about it’s about hiding so it gets to make the list 🙂 I use Google Sites to create tutorials. For example this site from my Go Slow online workshop. I do not want a new Google Site for each tutorial. I create one Google Site and add a page for the tutorial but the site is not intended to be browsed or navigated. In fact, many pages I would not want the tutorial viewer to see at all!
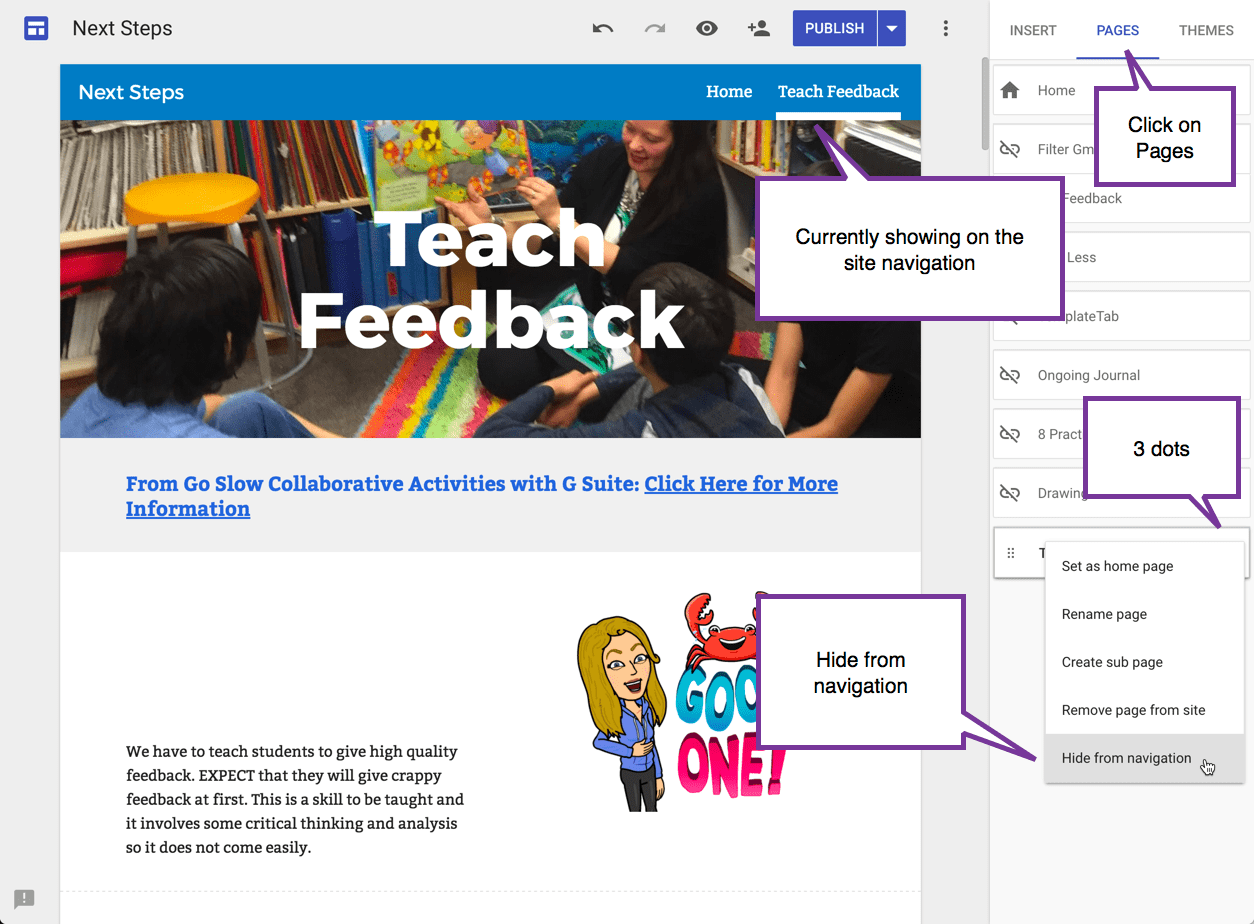
In the pages navigation side panel, click on the 3 dots on the page to reveal options for that page.
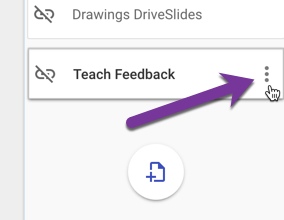
Choosing “Hide from navigation” allows my page to be a stand alone tutorial like I might make in a Google Doc. But unlike a Google Doc, I can embed video and more easily arrange the elements of my tutorial.
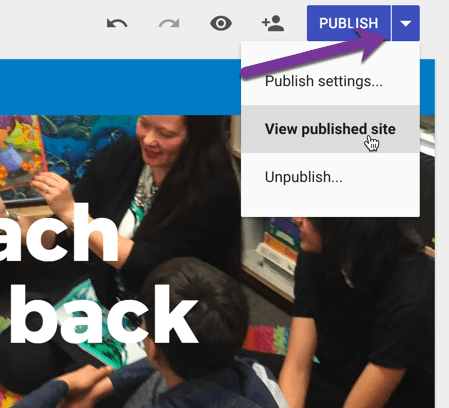
On the page I created the tutorial, I go to the Publish button at the top and click on the tiny triangle. Choosing “View published site” takes me to that specific page on the site. I copy the link to that page and share that with students.
Go Slow Online Workshops
My Go Slow online workshops are designed to give you time to practice in between learning new content. The workshops take place through Google Classroom. We practice together a skill. Then you go practice that skill with your students and report back. Instead of a 6 hours drink with a firehose PD, we go slow and spread it out over 6 weeks. View upcoming Go Slow online workshops at alicekeeler.com/events.





8 thoughts on “7 Hidden Tips for Google Sites”
Thanks for sharing awesome hidden tips for google sites…!!!!
Great tips! How did you manage to insert the Bitmoji images into your site? I have been trying and all I get it an error. Thanks!
You have to copy the image URL from the Bitmoji chrome extension.
Alice. . . this is a great list. if I can add one more hidden trick… Google Slides can embed AUDIO!!! I haven’t yet found it listed on any official document, but . . . (Drumroll) as long as the .mp3 is in Google Drive and the sharing permissions are open, you can go into Drive and copy the shareable URL and then paste that into the site using the Embed button and BAM! You have an audio file playing on your website.
#MicDrop
I’d have to see that Jeff because I don’t know where you’d put embed code.
I am using google sites this year, for the first time, as my classroom website. I have. It figured out how to put my twitter feed on my site. Could you please help my with this?
Thank you, always doing your workshops…..Lisa Meeks
Currently there is no native way to embed a Twitter feed.
As of today you now can.