


I oftentimes find it really handy to be able to insert a table into the Web 2.0 tool I am using. Not all web tools have the ability to insert a table so knowing how to write the table in HTML can really help you in many instances. You can use this in Google Sites, WordPress, Quia and many other tools that allow you to edit the source code.
Source Code
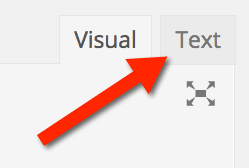
In WordPress the editor has 2 tabs. One for “Visual” and one for “Text.” Switching to text allows me to edit the HTML. This is where you can type your HTML table.
In Google Sites the editing toolbar has a button that says “HTML.”
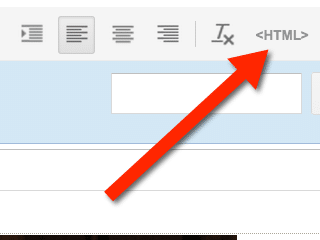
Other web toolbars may have a symbol with a less than greater than symbol (< >) to indicate the HTML editor. The toolbar or menu options may also say “source” to allow you to switch to the HTML editor.
Memorize
These are the HTML tags you want to memorize. Create a table <table>. Create a row <tr>. Create a column <td>.
<table></table>
<tr></tr>
<td></td>
Tips
The slash ends the tag. You start building your table with the tag <table> When you are done creating your table you end the table with </table>.
I usually will start my table with <table> and push enter several times and end the table </table> so I do not accidentally forget the end tag.
Build your table structure before entering in information. It can be tricky to keep track of the rows and columns. I prefer to build just the tags and then enter the information in later.
I would prefer to put my information into the table in the “visual” mode instead of the HTML editor. Entering in a few letters into where you will put your content allows you to make the table in the HTML editor but not have to try to figure out where the rows and columns are when creating your content.
Table Tag
<table>
</table>
Row
<tr></tr> will start your first row. You will build your columns in between the row tags.
Columns
How many columns do you want? You will type <td>text</td> for each column. The word text helps you to remember where the text of your table will go. This is a place holder. For your first row I recommend using your header column as your placeholder text. For example <td>First Name</td><td>Last Name</td><td>Address</td>
Build your First Row
<tr><td>text</td><td>text</td><td>text</td><td>text</td></tr>
Notice this HTML code defines FOUR columns in your table. I like to put them all in one line so I can see what one row will look like. Notice it starts with <tr> and ends with </tr>. I type the <tr> and </tr> before I insert the column tags of <td>. Suggestion to replace the words “text” with what each column is for.
Copy and Paste
Once you have your row defined, highlight it and copy and paste the code for the number of rows you want.
<table>
<tr><td>text</td><td>text</td><td>text</td><td>text</td></tr>
<tr><td>text</td><td>text</td><td>text</td><td>text</td></tr>
<tr><td>text</td><td>text</td><td>text</td><td>text</td></tr>
</table>
Switch Out of HTML Editor
Once you have set up the structure of your HTML table go back to the regular editor.
| text | text | text | text |
| text | text | text | text |
| text | text | text | text |
Notice above what the table will look like when I switch from the HTML editor to the visual editor. Having placeholder text allows me to more clearly see that I set up my table correctly.
Edit Placeholder Text
Now that the table looks the way you want it to be, insert the information into the table you want.
Get Fancy
This was intended to help you get started with writing HTML tables. You can get a lot fancier by merging cells, coloring the background, having different widths for each column, etc…. Doing a Google search for “HTML tables” can help you find the adjustments to your code to help you get fancy.


