Chromebook: Post Screenshots to Google Slides
One thing I advocate is for students to take screenshots of their work while they are working on a Chromebook. This provides a level of accountability for what the students are working on during class and also provides the student with images to discuss their work. Screenshots are easily added to a Google Slides to help students present their process for their activity.
Taking a Screenshot
To take a screenshot on a Chromebook hold down the Control key and press the windows switcher key. This is the key above the 6: a rectangle with 2 lines next to it. This takes a full screen screenshot. The screenshot is saved to the downloads folder.

A partial screenshot can be obtained by holding down the Shift key in addition to the Control and windows switcher key. The screen greys out and the mouse arrow changes to cross hairs to allow for a partial selection of the screen.
Notification
For both the full-screen screenshot and partial screen screenshot, the Chromebook provides a notification that the screenshot was taken. This appears in the bottom right of the screen. On the notification is an option to “Copy to clipboard.” Clicking the “Copy to clipboard” allows the screenshot to be pasted into Google Slides or a Google Doc.

Google Slides
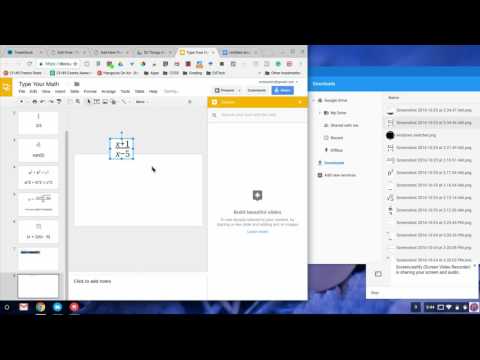
Control V in Google Slides pastes the screenshot easily. The student can then add text boxes to explain the screenshot or add an additional slide to explain the screenshot. When using non-Google tools this can be a way for students to submit their work. Whatever website the student is using, the student would capture screenshots while they are working. Copying the screenshot to the clipboard allows the student to quickly copy and paste the screenshot on a Google Slides slide and get back to the activity. Alternatively, the student can capture screenshots and build the Google Slides later. Opening the downloads folder, the screenshots can be dragged onto the slide.